
Attic Ventilation and Moisture Control Basics That Work
Master attic ventilation and moisture control basics to prevent ice dams and mold. Call (833)-365-8755 for expert help.

By Irene Walsh
Learn more about Weatherization for guides, costs, and what to expect.
Compare Weatherization Pros Near You

Enter your ZIP code to compare top-rated local professionals and request free quotes.
A quiet attic can hide expensive problems. Condensation on the rafters, frost on the roof deck, and that musty smell drifting into upstairs bedrooms are all signs that your attic is not breathing properly. Attic ventilation and moisture control basics are not glamorous, but they protect the roof, the insulation, and the comfort of everyone living below. When warm, moist air gets trapped in an attic, it condenses on cold surfaces, feeds mold, and slowly rots the wood structure. The good news is that the principles are straightforward: keep air moving, keep moisture out, and keep insulation from blocking the path. This guide explains how the system works, what to look for, and when to bring in a professional.
How Attic Ventilation Actually Works
An attic is not a sealed box. It is designed to be a flowing channel where outside air enters low, sweeps through the space, and exits high. This stack effect uses natural physics: warm air rises, and as it escapes through upper vents, it pulls fresh air in through lower vents. Without that continuous loop, heat and moisture accumulate. In summer, trapped heat can push attic temperatures well above 130 degrees Fahrenheit, baking shingles from underneath and shortening roof life. In winter, trapped moisture condenses on cold roof sheathing and can freeze into ice dams at the eaves.
The key insight is that ventilation is a system, not a single product. Adding a ridge vent without adequate intake is like installing a chimney with no air holes in the fireplace: it cannot draw. The most effective setups balance intake and exhaust so that air volume entering equals air volume leaving. Building science guidelines generally recommend about 1 square foot of net free vent area for every 150 square feet of attic floor space when intake and exhaust are balanced, or 1 per 300 square feet in some configurations with vapor barriers. A roofing or insulation professional can calculate the right ratio for your specific home.
Three common vent types dominate residential attics: ridge vents, soffit vents, and gable vents. Ridge vents run along the peak of the roof and act as the primary exhaust. Soffit vents sit under the eaves and serve as the primary intake. Gable vents are placed on the triangular end walls and can function as either intake or exhaust depending on pressure. When these are combined correctly, air enters low at the soffits, travels up the underside of the roof deck, and exits at the ridge. That continuous sweep carries moisture and heat out before they can cause damage.
Ridge, Soffit, and Gable Vent Combinations That Work Together
The most reliable ventilation strategy pairs continuous soffit intake with continuous ridge exhaust. This combination creates a steady, low-to-high airflow path across the entire roof deck, which is far more effective than isolated vents. A ridge vent alone cannot perform if the soffits are blocked by insulation, paint, or debris. Similarly, gable vents alone tend to create localized airflow that leaves dead zones near the center of the attic. When gable vents are used alongside ridge and soffit vents, they can sometimes short-circuit the system by allowing air to enter and exit at the same height, bypassing the upper roof deck.
Here is how the main combinations compare in practice:
- Soffit plus ridge: The gold standard for most sloped roofs. Continuous intake at the eaves and continuous exhaust at the peak move air evenly across the entire deck.
- Soffit plus gable: Workable on some homes, but gable exhaust is less efficient than ridge exhaust and can leave hot spots near the ridge.
- Gable plus ridge: Generally discouraged because both sit high, reducing the low-to-high draw that makes the stack effect work.
- Static vents plus soffit: Roof-mounted box vents can supplement exhaust on complex roof lines where a ridge vent is not feasible, but they cover less area.
Roof complexity matters. Hip roofs, dormers, and intersecting gables can interrupt the ridge line and create pockets where air stalls. In those cases, a contractor may recommend a mix of ridge vent sections, static vents, and carefully placed intake. The goal is always the same: uninterrupted airflow from the lowest point to the highest point. If you are unsure which combination suits your roof, a professional assessment is worth the cost. Our guide on attic ventilation and moisture problems walks through specific fixes for common failure points.
Signs of Poor Attic Ventilation and Moisture Buildup
Attics rarely announce their problems loudly. Instead, they leave clues that homeowners can learn to read. The most common signs fall into three categories: moisture evidence, temperature symptoms, and structural changes. Catching these early can prevent thousands of dollars in roof deck replacement, mold remediation, and insulation repair.
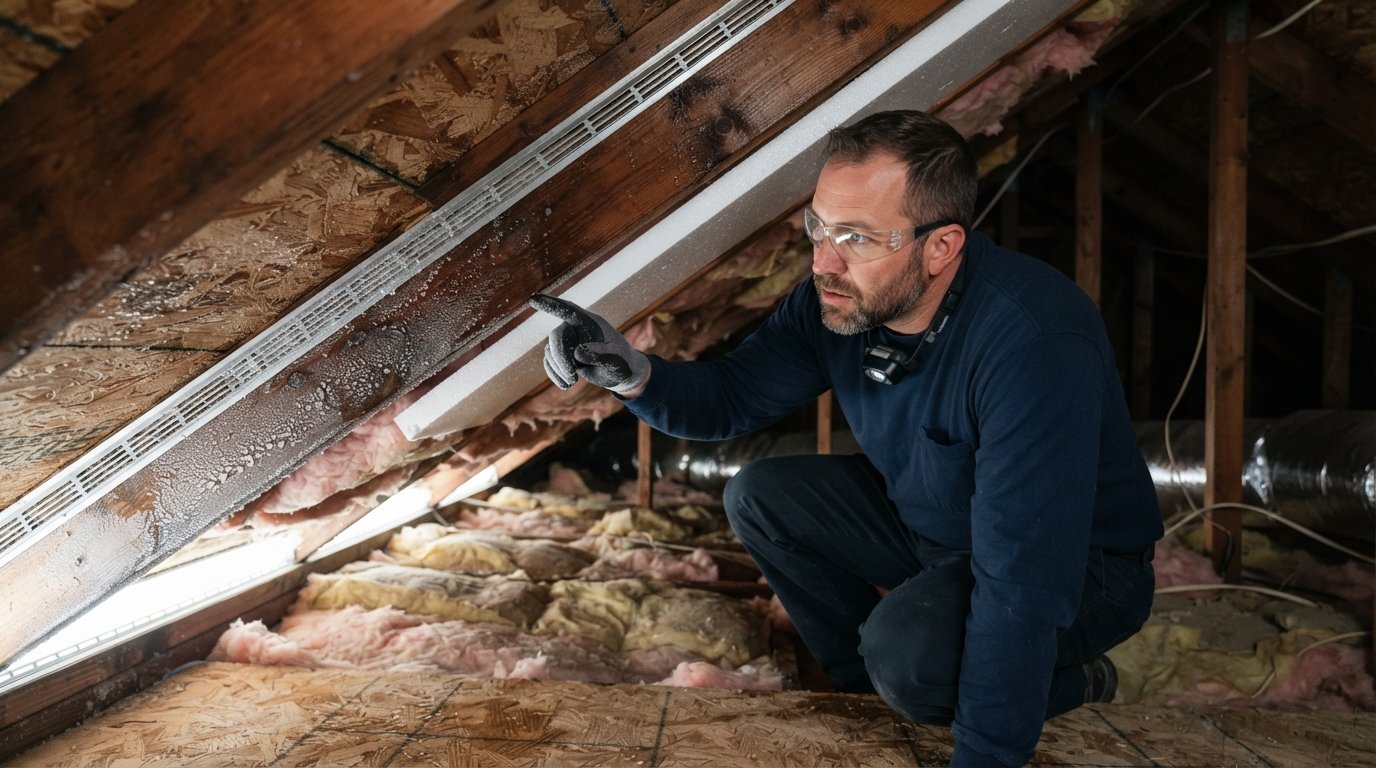
Condensation is the clearest warning. In cold weather, look for frost on the underside of the roof sheathing or water droplets on rafters and nails. During warmer months, dark staining on the deck, rusted nail heads, and a persistent musty odor point to chronic moisture. Ice dams are another red flag: when warm attic air melts snow on the upper roof and it refreezes at the cold eaves, water backs up under shingles and leaks into the house. Ice dams are often a ventilation problem as much as an insulation problem.
Temperature symptoms are easier to notice from inside the living space. Upstairs rooms that stay uncomfortably hot in summer, even with air conditioning running, may be sitting under an overheated attic. In winter, uneven heating and cold drafts near the ceiling can indicate that insulation is compromised or that air sealing is incomplete. Structural clues include sagging roof sheathing, warped shingles, and visible mold growth on rafters or insulation batts. Any of these signs warrants a professional inspection before the damage spreads.
Homeowners sometimes try to solve moisture by adding more vents without addressing the source. That approach rarely works. Moisture comes from three main sources: household activities like cooking, bathing, and laundry; ground moisture rising through the foundation; and air leaks that let warm interior air escape into the attic. Ventilation helps remove moisture that reaches the attic, but air sealing and proper exhaust fans stop it at the source. A balanced approach addresses both.
Baffles and Insulation Clearances Around Vents
Even a perfectly designed ventilation system fails if insulation blocks the intake. Soffit vents are especially vulnerable. When attic insulation is blown or laid too close to the eaves, it can cover the vents and choke off airflow. This is one of the most common and most overlooked ventilation defects in homes. The fix is simple in concept: install baffles, also called rafter vents or insulation stops, at each bay between rafters where soffit vents are present.
Baffles are rigid channels, usually made of plastic or foam, that hold insulation back while allowing air to pass from the soffit up along the underside of the roof deck. They create a clear pathway that keeps intake air moving even when the attic floor is deeply insulated. Proper installation matters: baffles should extend from the top plate of the wall past the point where insulation will sit, and they should be sealed or fitted snugly so air does not leak around them. If baffles are missing, adding insulation can actually make ventilation worse by blocking the only intake path.
Clearances around other components also matter. Recessed lights, chimneys, and exhaust fans need proper separation from insulation to prevent fire hazards and moisture problems. Bathroom and kitchen exhaust fans should vent directly outside, never into the attic. A fan that dumps moist air into the attic is worse than no fan at all. Similarly, dryer vents must terminate outdoors and be kept clear of insulation. During any insulation upgrade, a professional should inspect every penetration and confirm that baffles, clearances, and vent connections are correct.
Air Sealing and Vapor Control: The Other Half of Moisture Management
Ventilation gets most of the attention, but air sealing is equally important for moisture control. Warm, moist air from the living space rises and finds its way into the attic through gaps around light fixtures, plumbing penetrations, attic hatches, and top plates. Once that air reaches a cold roof deck, it condenses. Sealing those leaks prevents moisture from entering the attic in the first place and reduces energy waste at the same time.
Common air sealing targets include the attic hatch or pull-down stairs, which often lack weatherstripping and insulation; gaps around chimneys and flues; electrical boxes and recessed lights; and the tops of interior walls where they meet the attic floor. Spray foam and caulk are typical materials for these jobs. In many homes, air sealing and insulation upgrades together deliver a bigger comfort improvement than ventilation changes alone, and they often qualify for energy efficiency incentives. A comprehensive energy efficiency plan should treat the attic as a system: seal first, insulate to the recommended level, and ensure ventilation remains unobstructed.
Vapor barriers and vapor retarders are a related but separate topic. In most climates, the goal is to stop moisture from entering the attic from below while allowing the assembly to dry if moisture does get in. The right approach depends on climate zone, insulation type, and existing construction. This is not a do-it-yourself decision. A qualified contractor can assess whether your home needs a vapor retarder, where it should go, and how it interacts with ventilation. Getting this wrong can trap moisture inside the assembly and create worse problems than the ones you started with.
When to Call a Roofing or Insulation Professional
Some attic tasks are reasonable DIY projects: replacing a damaged vent cover, removing obvious debris from soffit vents, or checking that the attic hatch closes tightly. But most ventilation and moisture problems require a professional eye. Roof leaks, hidden moisture damage, and improperly balanced vent systems are hard to diagnose from a quick ladder inspection. A roofing contractor can evaluate the roof deck, shingles, flashing, and vent layout. An insulation contractor can assess baffle placement, air sealing opportunities, and R-value gaps.
Call a professional when you notice any of the following: persistent condensation or frost in the attic, ice dams forming repeatedly, mold growth on rafters or insulation, a roof that sags or feels soft underfoot, or a musty smell that does not go away after cleaning. Also call if you are planning a roof replacement or an insulation upgrade, because those projects are the ideal time to correct ventilation problems. Retrofitting vents during a roof replacement is far cheaper than opening the roof again later. For homeowners comparing contractors, platforms like ContractorHomeQuotes can help gather estimates and clarify pricing before work begins.
Costs vary widely by region and scope. A simple baffle installation may be a few hundred dollars, while a full roof ventilation retrofit or moisture remediation project can run into the thousands. The best way to avoid surprises is to get multiple quotes, ask each contractor to explain the ventilation calculation, and confirm that the proposal addresses both intake and exhaust. A contractor who only recommends adding vents without checking baffles and air sealing is not solving the whole problem.
Attic ventilation and moisture control basics come down to a simple idea: air must move, moisture must be stopped at the source, and insulation must not block the path. Homeowners who understand ridge and soffit balance, recognize condensation and ice dams, and know the role of baffles are better equipped to protect their homes. When in doubt, bring in a professional early. A small inspection today can prevent a roof replacement tomorrow, and a well-ventilated attic pays back in comfort, durability, and lower energy bills for years to come.
Learn more about Weatherization for guides, costs, and what to expect.
Compare Weatherization Pros Near You
Enter your ZIP code to compare top-rated local professionals and request free quotes.