
Attic Ventilation and Moisture Problems: Fixes That Work
Stop attic mold and rot with proven attic ventilation and moisture problems fixes. Call 8333658755 to compare local contractor quotes.

By Rachel Green
Learn more about Roof Repair or Maintenance for guides, costs, and what to expect.
Compare Roof Repair or Maintenance Pros Near You

Enter your ZIP code to compare top-rated local professionals and request free quotes.
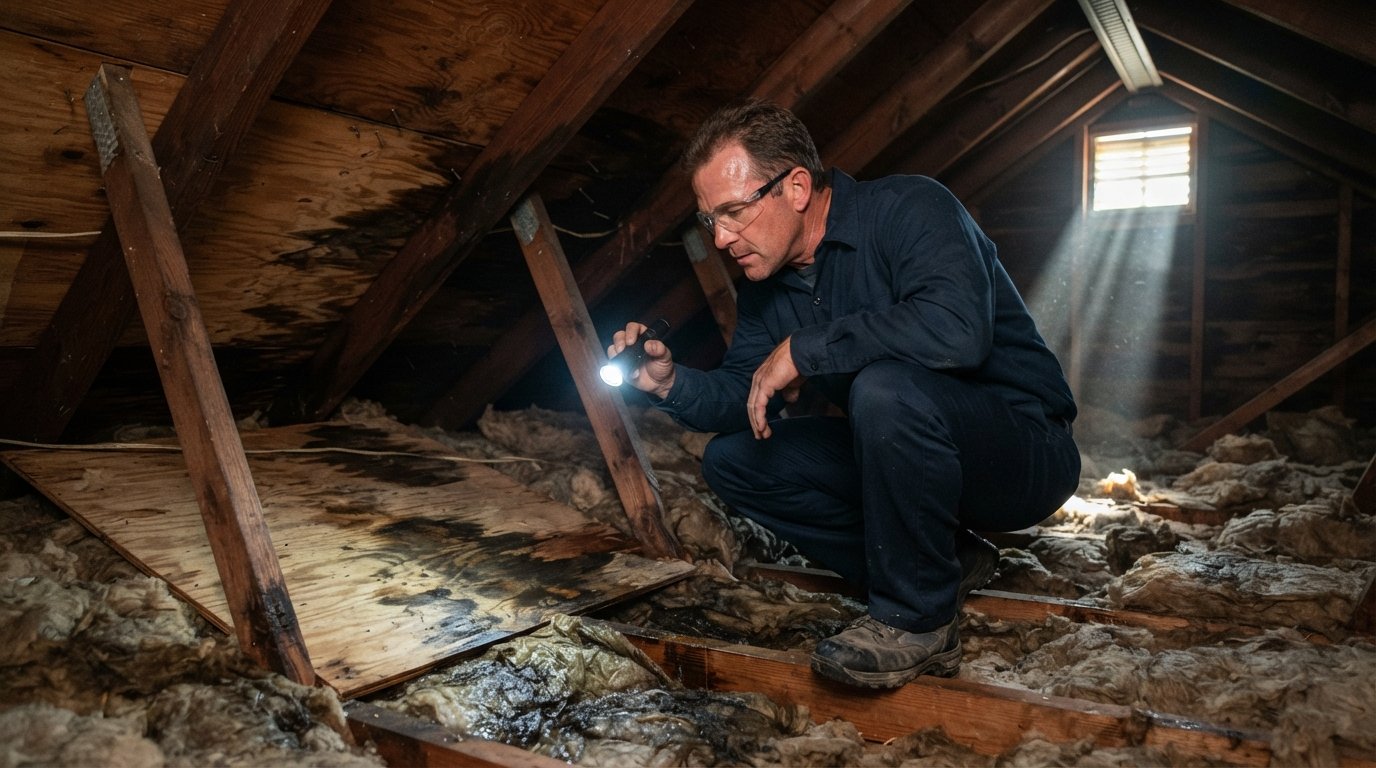
A musty smell in the upstairs hallway. Dark stains spreading across the attic decking. Insulation that feels damp to the touch even in summer. These are not random annoyances: they are warning signs that your attic is trapping moisture, and the damage rarely stays confined to the attic. Water vapor migrates downward through ceilings, into wall cavities, and eventually into living spaces, where it feeds mold, rots framing, and shortens the life of your roof. The good news is that most attic moisture problems trace back to a handful of correctable causes, and the fixes are well within reach for a typical homeowner working with the right contractor. This guide walks through why attics sweat, how to diagnose the real source, and which attic ventilation and moisture problems fixes deliver lasting results instead of temporary relief.
Why Attics Trap Moisture in the First Place
An attic is essentially a buffer zone between your living space and the outdoors, and it works best when it stays dry and roughly the same temperature as the outside air. Moisture gets into that buffer zone in three main ways. The first is air leakage: warm, humid air from kitchens, bathrooms, and laundry rooms rises through gaps around light fixtures, attic hatches, and plumbing penetrations. The second is diffusion: water vapor passes slowly through drywall and insulation, even without an obvious opening. The third is bulk water intrusion from roof leaks, flashing failures, or driving rain.
Once that moisture reaches a cold surface, it condenses. In winter, the underside of roof sheathing is often the coldest surface in the house, so it becomes the first place frost and droplets form. In summer, the same thing happens in reverse when air conditioning keeps the attic cool while humid outside air seeps in. Over time, this cycle stains wood, rusts fasteners, compresses insulation, and creates the damp, dark conditions mold needs to colonize. The key insight is that ventilation alone does not create moisture, and ventilation alone cannot always remove it. The fix usually requires addressing both the source of the water vapor and the attic's ability to dry out.
Signs Your Attic Has a Moisture Problem
Attic moisture rarely announces itself with a puddle. It shows up in subtle clues that accumulate over months. Homeowners who learn to read these signs can catch a small problem before it becomes a five-figure repair. A quick inspection twice a year, ideally in late fall and early spring, is enough to stay ahead of trouble.
Watch for these indicators during your next trip into the attic:
- Dark or discolored streaks on roof sheathing and rafters, especially near the ridge and gable ends.
- Frost or water droplets on the underside of the roof deck on cold mornings.
- Damp, matted, or compressed insulation, which loses much of its R-value when wet.
- A persistent musty or earthy odor that gets stronger on humid days.
- Rust on nails, staples, and metal connectors, or peeling paint on attic-facing walls.
- Visible mold growth, often appearing as black, gray, or white speckling on wood surfaces.
If you find any of these, resist the urge to simply add a vent and call it done. The most common mistake in attic moisture repair is treating the symptom (poor airflow) while ignoring the cause (air leakage from the living space). A roof with plenty of vents can still sweat if warm, moist air is pouring into it from below. Diagnose first, then fix.
The Core Fixes for Attic Ventilation and Moisture Problems
Effective moisture control in an attic rests on three pillars: air sealing, insulation, and balanced ventilation. Each one supports the others, and skipping one usually undermines the rest. Think of it as a system rather than a checklist of independent upgrades.
1. Air Sealing the Attic Floor
Air sealing is the highest-value fix in most homes, and it is also the least glamorous. The goal is to block the pathways that let conditioned air escape upward. In a typical house, those pathways include recessed light fixtures, attic access hatches, top plates where walls meet the ceiling, bathroom exhaust fan housings, and gaps around chimneys and plumbing stacks. Sealing them with caulk, spray foam, or rigid covers can cut moisture migration dramatically.
This step matters because air leakage moves far more water vapor than diffusion does. A single unsealed attic hatch can release as much moisture as a small humidifier running all day. When that vapor hits a cold roof deck, it condenses. Sealing the floor of the attic is therefore the first line of defense, and it makes every other fix more effective.
2. Upgrading and Protecting Insulation
Insulation slows heat transfer, which keeps attic surfaces warmer in winter and reduces the temperature gap that causes condensation. But insulation only works when it stays dry. Wet insulation is worse than no insulation in some cases because it can hold moisture against wood framing. After air sealing, check the depth and condition of your insulation. If it is compressed, matted, or stained, it should be replaced. If it is simply thin, adding a layer can raise the R-value and reduce condensation risk.
Pay attention to baffles at the eaves as well. These small channels keep insulation from blocking airflow at the soffits, which is where most intake ventilation happens. When installers push insulation too far into the rafter bays, they choke off the intake side of the system and the entire ventilation strategy collapses.
3. Balancing Intake and Exhaust Ventilation
Ventilation works only when air can enter and exit in roughly equal measure. Most attics rely on a combination of soffit vents (intake), ridge vents or roof vents (exhaust), and sometimes gable vents. If the intake is blocked or undersized, exhaust vents pull air from wherever they can, including through the living space, which drags moisture upward. The rule of thumb is to aim for a balanced ratio, often cited as roughly one square foot of net free vent area per 150 square feet of attic floor, split evenly between intake and exhaust.
For attics that cannot achieve enough natural airflow, a powered attic ventilator or a solar-powered vent can help, but these devices must be controlled carefully. A fan that runs constantly can depressurize the attic and pull conditioned air out of the house, which wastes energy and can worsen moisture problems in winter. The best approach is to fix air sealing and insulation first, then size ventilation to match.
If you would rather not climb into a hot attic to diagnose these issues yourself, a professional assessment can save time and prevent missteps. Platforms like USremodel connect homeowners with independent contractors who handle attic ventilation, insulation, and roof repairs, so you can get a qualified opinion without guessing.
Step-by-Step: A Practical Repair Sequence
When multiple problems overlap, order of operations matters. Doing the work in the wrong sequence can waste money or even make moisture worse. The following sequence reflects how experienced contractors typically approach an attic moisture retrofit.
- Inspect and document. Photograph stains, frost, mold, and insulation condition. Note where the worst moisture appears, since that points to the source.
- Locate and fix bulk water entry. Repair roof leaks, flashing, and vent boots before addressing humidity, since liquid water must be stopped first.
- Air seal the attic floor. Seal penetrations, top plates, and the attic hatch. This is the single most important moisture control step.
- Correct insulation and baffles. Replace wet insulation, add depth where needed, and ensure soffit baffles are clear.
- Balance ventilation. Confirm intake and exhaust are both open and appropriately sized. Add or upgrade vents as needed.
- Verify with a follow-up inspection. Check again after a heating season and a cooling season to confirm the attic stays dry.
This sequence works because it removes the water source before trying to dry the space. If you ventilate a leaky, unsealed attic without sealing it, you may simply pull more humid air into the attic and accelerate condensation. If you seal and insulate without adequate ventilation, trapped moisture has nowhere to go. The steps reinforce one another.
Common Mistakes That Make Attic Moisture Worse
Some well-intentioned fixes backfire. Adding a powered vent without air sealing, for example, can pull moist air from the house into the attic and increase condensation on the roof deck. Installing a dehumidifier in the attic without addressing air leakage treats the symptom while the root cause continues. Blocking soffit vents with insulation is another frequent error, and it is easy to miss because the blockage is hidden under the insulation itself.
Another mistake is assuming that a new roof will solve moisture problems. A roof replacement addresses water entry from outside, but it does nothing about vapor rising from inside the home. If the underlying attic ventilation and air sealing issues remain, the new roof deck can still stain and rot. Homeowners who plan a roofing project should treat it as an opportunity to inspect and correct attic ventilation at the same time, since the deck is exposed and access is easier.
Finally, avoid the temptation to seal an attic completely in an effort to keep moisture out. Attics need to breathe, and a fully sealed attic without mechanical conditioning can trap moisture and create a greenhouse effect. The goal is controlled airflow, not zero airflow.
When to Call a Professional
Some attic moisture fixes are DIY-friendly, such as sealing an attic hatch or replacing a bathroom fan duct that vents into the attic instead of outdoors. Others, including roof repairs, ventilation redesign, and mold remediation, are best handled by qualified tradespeople. Mold in particular requires careful containment and removal, and disturbing it without protection can spread spores through the house.
Warning signs that it is time to bring in help include widespread mold growth, soft or spongy roof sheathing, recurring leaks after a repair attempt, and any situation where you cannot safely access the attic. A professional can also perform a blower door test or use a moisture meter to pinpoint hidden problems that are invisible to the naked eye.
Preventing Future Moisture Problems
Once the repairs are complete, a small amount of routine maintenance keeps the attic dry. Check exhaust fans annually to confirm they vent outdoors and not into the attic. Replace attic hatch weatherstripping when it hardens. Keep gutters clear so water does not back up under the roof edge. After major storms, inspect the attic for new stains or drips.
It also helps to think about moisture at the source. Running a bathroom fan for 20 minutes after a shower, using a kitchen exhaust hood while cooking, and fixing plumbing leaks promptly all reduce the amount of vapor that reaches the attic in the first place. These habits cost nothing and extend the life of every repair you make.
Attic moisture is one of those problems that feels mysterious until you understand the mechanics. Water vapor rises, meets a cold surface, and condenses. The fix is to stop the vapor at its source, keep the attic surfaces warm with proper insulation, and give moisture a clear path out through balanced ventilation. Homeowners who tackle all three together typically see stains stop spreading, odors fade, and insulation perform the way it was designed to. Whether you handle the work yourself or bring in a vetted contractor, addressing attic ventilation and moisture problems early protects your roof, your insulation, and the air quality of the home beneath it.