
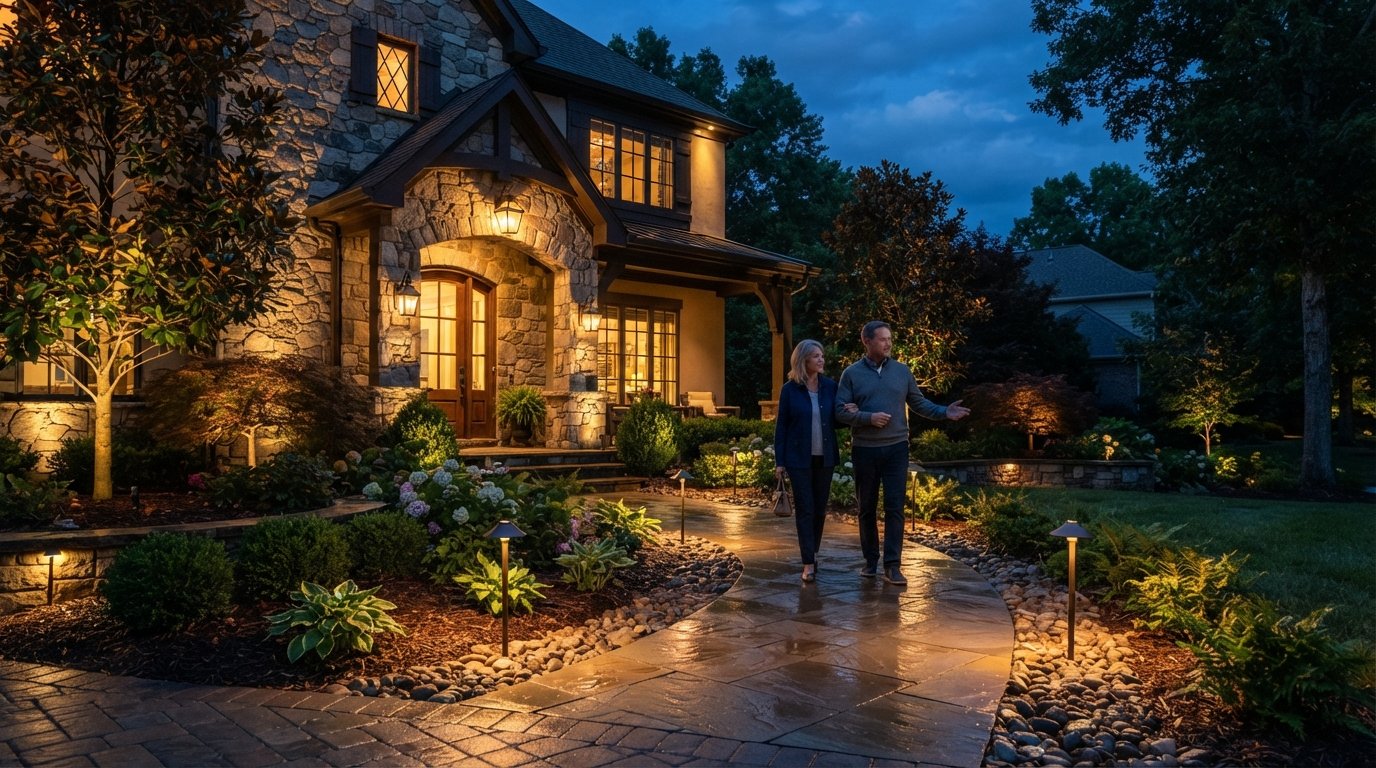
Outdoor Lighting Design for Ambiance and Security
Transform your yard with outdoor lighting design for ambiance and security. Call (833)-365-8755 to connect with trusted local pros for installation.

By Maya Adler
Learn more about Lighting Installation for guides, costs, and what to expect.
Compare Lighting Installation Pros Near You

Enter your ZIP code to compare top-rated local professionals and request free quotes.
A beautifully lit home exterior does more than look inviting after sunset. It guides guests safely along walkways, deters intruders, and extends your living space into the yard. Yet many homeowners either flood their property with harsh glare or leave critical areas in shadow. The difference between a welcoming glow and a security risk often comes down to planning. This guide breaks down outdoor lighting design for ambiance and security, covering everything from layered lighting zones to wiring and timer installation, so you can create an exterior that feels both safe and stunning.
The Three Layers of Exterior Lighting
Effective outdoor lighting design rests on three distinct layers: path lighting, accent lighting, and security lighting. Each serves a different purpose, and together they create a balanced environment that is both functional and beautiful. Skipping any layer leaves your exterior either unsafe, uninviting, or both.
Path Lighting: Guiding Steps and Walkways
Path lighting is the foundation of any safe exterior. It illuminates walkways, driveways, and steps so people can move confidently after dark. The goal is not to flood the ground with light but to place fixtures at regular intervals, usually every 6 to 8 feet, with low output (around 50 to 100 lumens) that washes the path without blinding anyone. Bollards, stake lights, and step lights are common choices. Pay attention to beam spread: a narrow beam creates pools of light that can be disorienting, while a wider spread offers smooth, continuous guidance.
Accent Lighting: Adding Depth and Drama
Accent lighting highlights architectural features, trees, and textures, giving your home depth and character at night. Uplights aimed at a facade or a favorite oak tree can transform a flat wall into a dramatic backdrop. Downlights from eaves or pergolas can graze a patio wall or illuminate a seating area. The key is restraint: a few well-placed accents are more powerful than a dozen scattered fixtures. Use warmer color temperatures (2700K to 3000K) to create a cozy, welcoming feel, and consider dimmers or smart controls to adjust intensity for different occasions.
Security Lighting: Deterrence and Detection
Security lighting focuses on deterring intruders and illuminating vulnerable areas such as doors, garages, and dark corners. Motion-activated floodlights and smart security cameras with built-in lights are popular, but they should be used strategically. A light that snaps on suddenly can startle neighbors and wildlife, so aim for fixtures with adjustable sensitivity and dual brightness levels (low-level constant light that jumps to full brightness on motion). Place security lights at heights that are difficult to tamper with, typically 8 to 10 feet, and ensure they cover entry points without creating blind spots.
Balancing these three layers requires thinking about how they interact. A path light that shines directly into a security camera can cause glare and reduce image quality. Accent lights that are too bright can wash out security coverage. The best designs use shielding and precise aiming to keep each layer distinct. If you are planning a larger renovation that includes lighting, our guide on modern lighting design offers additional principles that apply both indoors and out.
Low-Voltage vs. Line-Voltage Systems
Outdoor lighting systems generally fall into two categories: low-voltage and line-voltage. Each has distinct advantages, and the right choice depends on your project scale, budget, and DIY comfort level.
Low-voltage systems (typically 12V or 24V) are the most common for residential landscapes. They use a transformer to step down standard household current, making them safe to install and operate. Because the voltage is low, you can run cables through shallow trenches (as little as 6 inches deep) and even bury them under mulch. Low-voltage fixtures are available in a wide range of styles, from modern cylinders to traditional lanterns, and they consume less energy. However, voltage drop over long runs is a consideration: the further a fixture is from the transformer, the dimmer it may become. Proper planning of cable runs and transformer capacity is essential.
Line-voltage systems (120V) are more powerful and can handle larger loads, making them suitable for long driveways, large properties, or high-output security lights. They require deeper trenches (18 inches or more) and must be installed according to electrical codes, often by a licensed electrician. Line-voltage fixtures are generally more durable and can be brighter, but they are less forgiving of DIY mistakes. For most homeowners, a hybrid approach works well: low-voltage for path and accent lighting, and line-voltage for security floodlights or long runs.
When choosing, consider the total wattage and the length of cable runs. A 300-watt transformer can typically power 20 to 30 low-voltage fixtures, but you must account for voltage drop by using thicker gauge cable or splitting the run into multiple home runs. Many modern transformers include timers, photocells, and smart controls, simplifying operation. If you are unsure, consult a qualified electrician or landscape lighting professional to size the system correctly.
Dark-Sky Friendly Fixtures: Reducing Light Pollution
Light pollution is a growing concern, affecting wildlife, human health, and our ability to see the stars. Dark-sky friendly lighting is designed to direct light downward where it is needed, rather than up into the sky or sideways into neighbors' yards. The International Dark-Sky Association (IDA) certifies fixtures that meet strict criteria for shielding and color temperature.
To choose dark-sky friendly fixtures, look for:
- Full cut-off design: The fixture completely shields the bulb so no light escapes above the horizontal plane.
- Warm color temperature: 2700K or lower reduces blue light, which is more harmful to ecosystems and human circadian rhythms.
- Low glare: Fixtures with honeycomb louvers or recessed bulbs prevent direct view of the light source.
- Motion sensors and timers: These reduce light use when not needed, saving energy and limiting pollution.
Using dark-sky friendly fixtures does not mean sacrificing ambiance or security. In fact, by directing light precisely, you can achieve better visibility with fewer fixtures. For example, a well-shielded path light illuminates the walkway without spilling into the garden, and a downward-aimed security light covers the door without blinding passersby. Many utilities and local governments offer rebates for dark-sky compliant lighting, so check with your provider.
Wiring, Transformer, and Timer Installation Steps
Installing an outdoor lighting system involves several key steps, from planning to final connections. While some tasks are DIY-friendly, others require a licensed electrician. The following steps outline a typical low-voltage installation, which is the most common for residential landscapes.
- Plan the layout: Sketch your property and mark fixture locations, cable runs, and the transformer spot. Consider the layers discussed earlier and ensure each fixture has a clear purpose. Check for underground utilities by calling 811 before digging.
- Mount the transformer: Choose a location near an outdoor GFCI outlet and within reach of your cable runs. Mount the transformer at least 12 inches above ground and ensure it is rated for outdoor use. Leave room for ventilation.
- Run the cable: Use direct-burial landscape cable (typically 12 or 14 gauge) and run it in shallow trenches (6 to 8 inches deep) or bury it under mulch. Leave slack at each fixture location and at the transformer. Avoid running cable through areas that will be dug up later.
- Connect fixtures: Strip the cable ends and attach fixtures using waterproof connectors. Most low-voltage fixtures use gel-filled wire nuts or quick-connect clips. Ensure connections are tight and protected from moisture.
- Install the timer and photocell: Many transformers include built-in timers and photocells. Set the timer to turn lights on at dusk and off at a specific time (e.g., 11 PM) or use a photocell to activate at dusk and a timer to turn off later. Smart controllers allow app-based scheduling and dimming.
- Test and adjust: Turn on the system and check for voltage drop by observing brightness at the end of each run. Adjust fixture aiming and replace any dim bulbs. If voltage drop is significant, consider a higher-wattage transformer or thicker cable.
For line-voltage systems, the steps are similar but require deeper trenches, conduit, and compliance with local electrical codes. Hiring a licensed electrician is strongly recommended for line-voltage work, as mistakes can be dangerous. If you are remodeling your home and want to integrate lighting with other upgrades, consider how outdoor lighting can complement energy-efficient improvements. For example, pairing LED outdoor lighting with solar panel installation can reduce your carbon footprint and energy bills. To explore how solar can power your home, including exterior lighting, visit SolarEnergy.ai for guides and calculators.
Smart Controls and Automation
Modern outdoor lighting systems offer a range of smart controls that enhance convenience, security, and energy savings. Smart timers, motion sensors, and app-controlled dimmers let you customize your lighting schedule and respond to events in real time.
For ambiance, you can create scenes: a "party" mode that brightens accent lights and dims path lights, or a "movie night" mode that turns off security floods and softens the patio glow. For security, geofencing can turn on lights when you are away, and integration with security cameras can trigger lights when motion is detected. Many smart systems also provide energy monitoring, showing you how much power your outdoor lighting uses.
When selecting smart controls, ensure compatibility with your transformer and fixtures. Some systems use proprietary protocols, while others rely on Wi-Fi, Zigbee, or Z-Wave. A licensed electrician or lighting designer can help you choose a system that fits your needs and budget. Keep in mind that outdoor-rated components are essential; indoor smart plugs and timers will fail in wet conditions.
Maintenance and Troubleshooting
Outdoor lighting requires occasional maintenance to keep it performing at its best. Common issues include flickering lights, dim output, and corrosion. Here is a quick troubleshooting guide:
- Flickering or dim lights: Check for loose connections, corroded sockets, or voltage drop. Clean contacts and tighten wire nuts.
- Lights not turning on: Verify the transformer is receiving power, the timer is set correctly, and the photocell is not blocked by debris.
- Moisture inside fixtures: Replace gaskets and ensure fixtures are sealed properly. Use dielectric grease on connections.
- Fallen or damaged fixtures: Inspect after storms and replace damaged components promptly to maintain safety.
Regular maintenance also includes trimming vegetation around fixtures to prevent obstructions and cleaning lenses to maximize light output. Schedule a yearly inspection before the holiday season, when lighting is most used.
By following these guidelines, you can design an outdoor lighting system that enhances both ambiance and security, turning your yard into a safe, beautiful extension of your home. Whether you DIY the low-voltage components or hire a pro for the electrical work, the investment pays off in comfort, safety, and curb appeal.
Learn more about Lighting Installation for guides, costs, and what to expect.
Compare Lighting Installation Pros Near You
Enter your ZIP code to compare top-rated local professionals and request free quotes.