
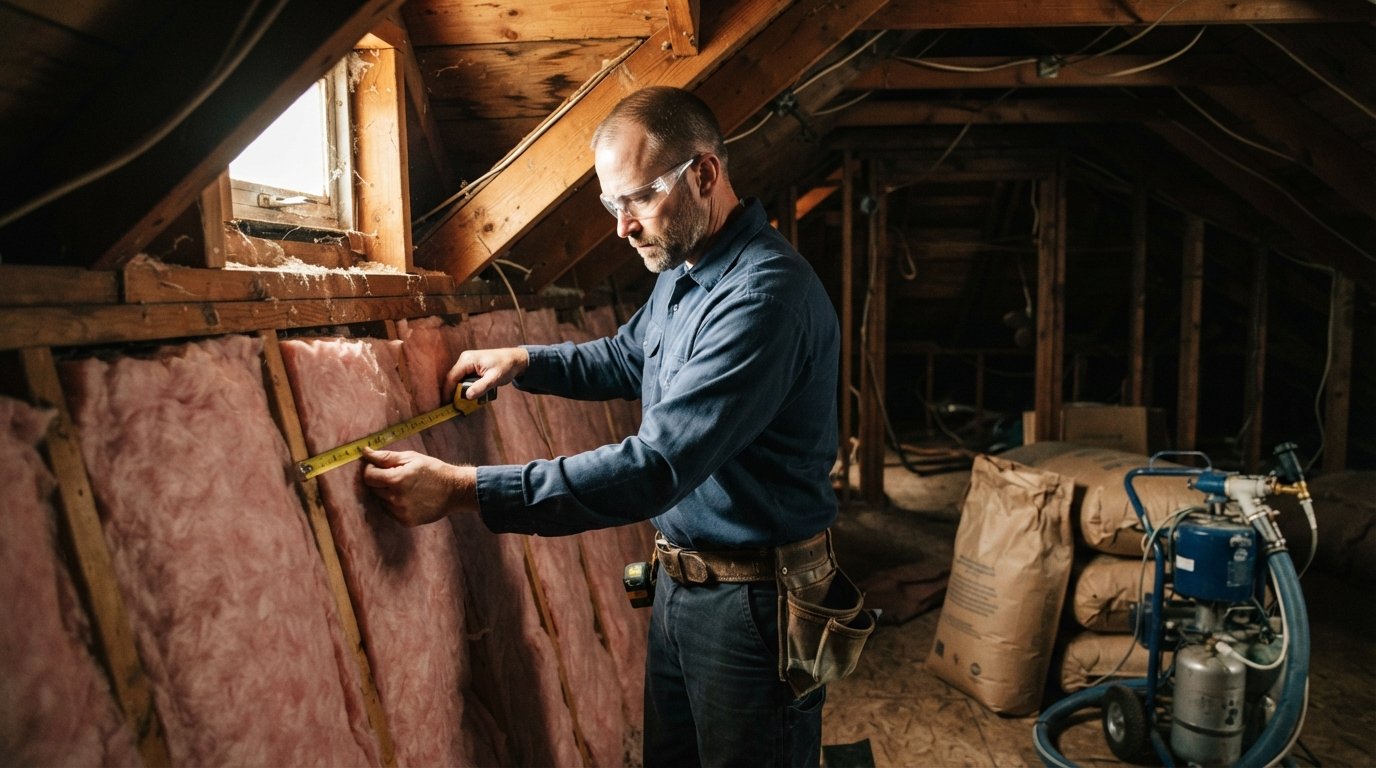
Insulation Types Comparison for Home Energy Efficiency
Compare fiberglass, cellulose, and spray foam performance, R-value targets, and payback. Call (833)-365-8755 for expert insulation guidance.

By Elena Shaw
Learn more about Insulation Installation or Upgrade for guides, costs, and what to expect.
Compare Insulation Installation or Upgrade Pros Near You

Enter your ZIP code to compare top-rated local professionals and request free quotes.
Your attic is either a silent ally or a hidden liability. In most American homes, heating and cooling account for over half of annual energy costs, and the Department of Energy estimates that proper insulation can slash that bill by up to 20 percent. Yet walking into a big-box store and staring at pink batts, bags of cellulose, and cans of spray foam can feel like deciphering a foreign language. This insulation types comparison for home energy efficiency cuts through the noise. You will learn how fiberglass, cellulose, and spray foam actually perform, what R-values make sense for your climate zone, and which upgrades deliver the fastest payback. We will also cover the steps that must happen before any insulation goes in, because skipping them is the most common and expensive mistake homeowners make.
The Big Three: Fiberglass Batts, Blown-In Cellulose, and Spray Foam
Fiberglass batts remain the most recognizable insulation product in North America. They are pre-cut blankets of spun glass fibers, available in widths that fit standard stud bays and joist spacing. Their popularity comes from low upfront cost and straightforward installation in new construction or open wall cavities. However, batts only perform well when they fit perfectly. Gaps around wires, pipes, and outlet boxes create convection loops that quietly erode performance. Compressing a batt into a tighter space also reduces its R-value, a detail that do-it-yourselfers often miss.
Blown-in cellulose takes a different approach. Made from recycled newsprint treated with fire retardants, it is blown into attics, walls, and enclosed cavities as a loose, fluffy material. Because it settles into irregular spaces, cellulose fills the nooks and crannies that batts leave behind. It also has a higher density than fiberglass, which helps block air movement and gives it slightly better sound dampening. The trade-off is that cellulose can absorb moisture if a leak goes undetected, and it settles over time, so installers must account for a small loss in thickness when calculating the initial depth needed to hit a target R-value.
Spray foam is the high-performance option. It starts as a liquid and expands into a solid foam that adheres directly to framing, sealing gaps and cracks as it cures. Closed-cell spray foam delivers the highest R-value per inch (typically R-6 to R-7) and acts as a vapor barrier, making it ideal for rim joists, crawl spaces, and exterior walls in harsh climates. Open-cell spray foam offers roughly R-3.5 to R-4 per inch and is more vapor-permeable, which suits interior applications where trapping moisture would be risky. The main drawbacks are cost and the need for professional installation with specialized equipment. Spray foam also requires careful planning because it is difficult to remove once cured.
Here is a quick side-by-side look at how the three compare on the factors homeowners care about most:
- R-value per inch: Closed-cell spray foam (R-6 to R-7) beats cellulose (R-3.2 to R-3.8) and fiberglass batts (R-2.9 to R-3.8).
- Air sealing: Spray foam seals as it insulates; cellulose reduces airflow; fiberglass batts do neither well without separate air sealing.
- Moisture behavior: Closed-cell foam blocks vapor; open-cell foam and cellulose allow drying; fiberglass tolerates wetting but loses performance when saturated.
- DIY friendliness: Fiberglass batts are the easiest for homeowners; cellulose requires rental equipment; spray foam demands a licensed professional.
- Typical installed cost: Fiberglass is the least expensive, cellulose sits in the middle, and spray foam is the premium option.
For a typical attic retrofit, many homeowners land on blown-in cellulose as the sweet spot between cost and performance. Spray foam wins when air sealing is the primary goal, such as in a bonus room over a garage or a vented crawl space. Fiberglass batts make sense in new construction where the framing is open and the budget is tight. The right answer depends on your assembly, your climate, and how much prep work the space needs before insulation goes in.
R-Value Targets by Climate Zone and Assembly
R-value measures resistance to heat flow, and the target you need depends on where you live. The International Energy Conservation Code groups the country into climate zones, and the Department of Energy publishes recommended insulation levels for each. In broad strokes, attics in cold climates (zones 5 through 8) call for R-49 to R-60, while attics in hot climates (zones 1 through 3) need R-30 to R-49. Walls generally fall between R-13 and R-21 depending on the zone and construction type. Floors over unconditioned spaces typically need R-19 to R-30.
Those numbers only work if the assembly can hold them. A 2x4 wall cavity can physically hold about R-13 of fiberglass or R-15 of cellulose, even though spray foam can push higher. Adding rigid foam board to the exterior is one way to boost wall R-value without rebuilding the framing. In attics, the depth of the joist bay limits how much loose-fill insulation you can add before you need a raised heel or a second layer running perpendicular to the joists. A qualified contractor will measure existing insulation, check for compression or settling, and calculate the depth needed to reach your zone's target.
Assembly matters as much as the number itself. Insulation slows conductive heat flow, but it does not stop air leakage. A wall rated at R-21 can perform like R-11 if outdoor air is streaming through gaps around outlets and top plates. That is why energy codes increasingly treat air sealing as a separate requirement. Vapor management is the other half of the equation. In cold climates, the vapor retarder generally goes on the warm side of the insulation to prevent moisture from condensing inside the assembly. In hot-humid climates, the rules flip, and a vapor barrier on the wrong side can trap moisture and cause mold. Before committing to any insulation types comparison for home energy efficiency, confirm which side of the assembly faces the conditioned space and which faces the outdoors.
Windows and doors are part of the same envelope. Even well-insulated walls lose heat through single-pane glass and leaky frames. If your renovation plans include window replacement, a smart renovation Dallas Texas homeowner guide can help you sequence envelope upgrades so insulation and glazing work together instead of duplicating effort. The general principle applies everywhere: tighten the shell first, then insulate, then upgrade mechanical systems.
Moisture and Air Sealing: The Steps Before Insulation
Insulating a leaky, damp assembly is like putting a sweater on a leaky boat. The insulation will underperform, and trapped moisture can rot framing and feed mold. The correct sequence starts with air sealing. Walk through the attic and seal penetrations where wires, plumbing stacks, and ductwork pass through the ceiling plane. Foam gasket covers on recessed lights rated for insulation contact, caulk around top plates, and weatherstripping on attic hatches all make a measurable difference. In basements and crawl spaces, seal the rim joist, which is one of the leakiest parts of most homes.
Next, address water. Fix roof leaks, grade soil away from the foundation, and make sure bathroom and kitchen exhaust fans vent outdoors rather than into the attic. If you find existing mold or saturated insulation, remove and remediate before adding new material. In humid climates, a closed crawl space with a vapor barrier on the ground and sealed vents often outperforms a vented crawl space, but only if the details are done correctly. A contractor who specializes in building science can assess dew points and recommend whether open-cell or closed-cell foam suits your assembly.
Only after the envelope is dry and sealed should insulation go in. This order of operations is where professional guidance pays for itself. When you are ready to compare quotes for air sealing and insulation as a combined scope, USremodel connects homeowners with independent contractors across the country who can assess the whole envelope rather than sell a single product. Getting three quotes on a clearly defined scope keeps the comparison honest and helps you avoid paying for insulation that cannot perform because the prep work was skipped.
Which Upgrades Deliver the Fastest Payback
Not every insulation dollar returns at the same rate. The attic almost always comes first. It is the easiest area to access, the cheapest per square foot to upgrade, and it has the largest temperature differential between conditioned and unconditioned space. If your attic has six inches of settled fiberglass, topping it up to R-49 with blown-in cellulose is often a one-day project with an immediate effect on winter heating bills. Air sealing the attic floor before adding insulation boosts the return further, because it stops the stack effect that pulls conditioned air out through the ceiling.
Rim joists and band boards come second. These are the spots where the wood framing meets the foundation, and they are notoriously leaky. Sealing and insulating them with cut foam board or two-part spray foam is a small job with outsized comfort benefits, especially in rooms above garages or over crawl spaces. Third on the list are basement walls in finished or semi-finished spaces. Rigid foam board glued to masonry walls, covered with framing and drywall, turns a cold, damp basement into usable square footage while reducing heat loss through the slab edge.
Whole-wall upgrades from the exterior, such as adding rigid foam under new siding, deliver excellent performance but cost far more and usually make sense only during a larger renovation. The same is true for spray foam in every stud bay of an existing home. These are long-term investments in comfort and durability rather than quick payback plays. A sensible sequence for most homeowners looks like this:
- Air seal the attic floor, rim joists, and any accessible penetrations.
- Add or upgrade attic insulation to your climate zone's target R-value.
- Insulate and seal the rim joist and crawl space or basement walls.
- Upgrade windows and doors during a planned renovation, not as a standalone emergency.
- Reassess HVAC sizing after the envelope is tightened, since a better shell may allow a smaller system.
That last point surprises many homeowners. After a serious insulation upgrade, an oversized furnace or air conditioner can short-cycle and leave rooms uncomfortable despite the improved shell. A load calculation after the work is finished tells you whether the existing equipment is still appropriately sized. In many cases, the money saved on energy bills funds the next upgrade on the list, and the cycle continues until the envelope and mechanical systems are working as a team.
Making the Choice for Your Home
There is no universal winner in an insulation types comparison for home energy efficiency, only the best fit for your climate, your assembly, and your budget. Fiberglass batts reward careful installation in open cavities. Blown-in cellulose fills irregular spaces affordably and shines in attic retrofits. Spray foam delivers the highest performance per inch and doubles as an air seal, at a premium price. Whichever you choose, the prep work (air sealing, moisture control, and ventilation) determines how close the installed system gets to its rated performance.
Start with an energy audit or a contractor walkthrough that measures existing insulation and identifies air leaks. Set a target R-value for your climate zone, prioritize the attic and rim joist, and insist on a written scope that separates air sealing from insulation so you can compare bids fairly. Homeowners who treat insulation as a system rather than a product consistently see the fastest payback and the most comfortable rooms. If you are planning a larger renovation alongside the insulation work, line up your contractor comparisons early so the envelope upgrades happen in the right order and at the best price.
Learn more about Insulation Installation or Upgrade for guides, costs, and what to expect.
Compare Insulation Installation or Upgrade Pros Near You
Enter your ZIP code to compare top-rated local professionals and request free quotes.