
How to Build a Mudroom Addition for a Small Home
Build a mudroom addition for your small home to gain storage and protect floors. Call 8333658755 for contractor quotes.

By Julian Hayes
Learn more about Home Remodeling for guides, costs, and what to expect.
Compare Home Remodeling Pros Near You

Enter your ZIP code to compare top-rated local professionals and request free quotes.
A mudroom addition can transform a small home by containing clutter, protecting floors, and creating a dedicated transition zone between the outdoors and your living space. If your entryway currently doubles as a shoe storage area and a dumping ground for bags and coats, a mudroom addition offers a permanent solution that adds function and value. The challenge is doing it without overwhelming a compact floor plan or blowing your budget. This guide walks you through planning, designing, and building a mudroom addition that fits your small home perfectly.
Why a Mudroom Addition Makes Sense for Small Homes
Small homes often lack a natural buffer zone at the main entry. Without one, dirt, moisture, and clutter travel directly into living areas. A mudroom addition creates a physical and psychological barrier that keeps the rest of your home cleaner and more organized. Even a modest 6 by 8 foot addition can provide enough space for benches, hooks, cubbies, and a small closet. For families with children or pets, this dedicated space reduces daily cleanup time and protects flooring and furniture from premature wear.
Beyond practicality, a mudroom addition can increase your home's resale value. Buyers in many markets view a functional entryway as a highly desirable feature, especially in regions with distinct seasons. The addition also gives you a place to store seasonal gear, reducing the need for storage elsewhere in the house. When planned well, a mudroom can even improve energy efficiency by creating an airlock effect that minimizes drafts when doors open and close.
However, building any addition on a small home requires careful consideration of space, budget, and local building codes. You will need to decide whether to extend outward, convert an existing space like a porch, or bump into an adjacent room. Each option has trade-offs in cost, complexity, and impact on your daily life. The following sections break down the process step by step so you can make informed decisions.
Planning Your Mudroom Addition: Key Decisions
Before you contact contractors or buy materials, define your goals and constraints. Start by assessing how you currently use your entryway and what frustrates you most. Do you need more storage for shoes and coats? A place to sit while putting on boots? A spot for pet supplies or sports equipment? Write down a list of must-have features and nice-to-have extras. This list will guide your design and help you communicate with builders.
Next, evaluate your home's layout and lot. Where can you realistically add square footage? Common options include extending from the back door, converting a side porch, or building over an existing stoop. In some cases, you might sacrifice a small closet or pantry to create an interior mudroom without expanding the footprint. Each approach affects cost, permitting, and construction time. For example, converting a porch may require less foundation work but could need insulation and weatherproofing upgrades.
Budget is another critical factor. Mudroom additions typically cost between $15,000 and $40,000 depending on size, materials, and labor. On the lower end, a simple bump-out with basic finishes might run $10,000 to $20,000. Higher-end additions with custom cabinetry, heated floors, or architectural details can exceed $50,000. Get at least three quotes from licensed contractors to understand local pricing. Remember to factor in permits, design fees, and contingency funds for unexpected issues.
Finally, check local building codes and homeowner association rules. Many jurisdictions require permits for additions, and some have restrictions on setbacks, height, and lot coverage. Your contractor should handle permit applications, but you need to know what is allowed before you finalize your design. If you are unsure where to start, a guide on home addition contractors can help you understand how to vet professionals and avoid common pitfalls.
Designing a Functional Mudroom Layout
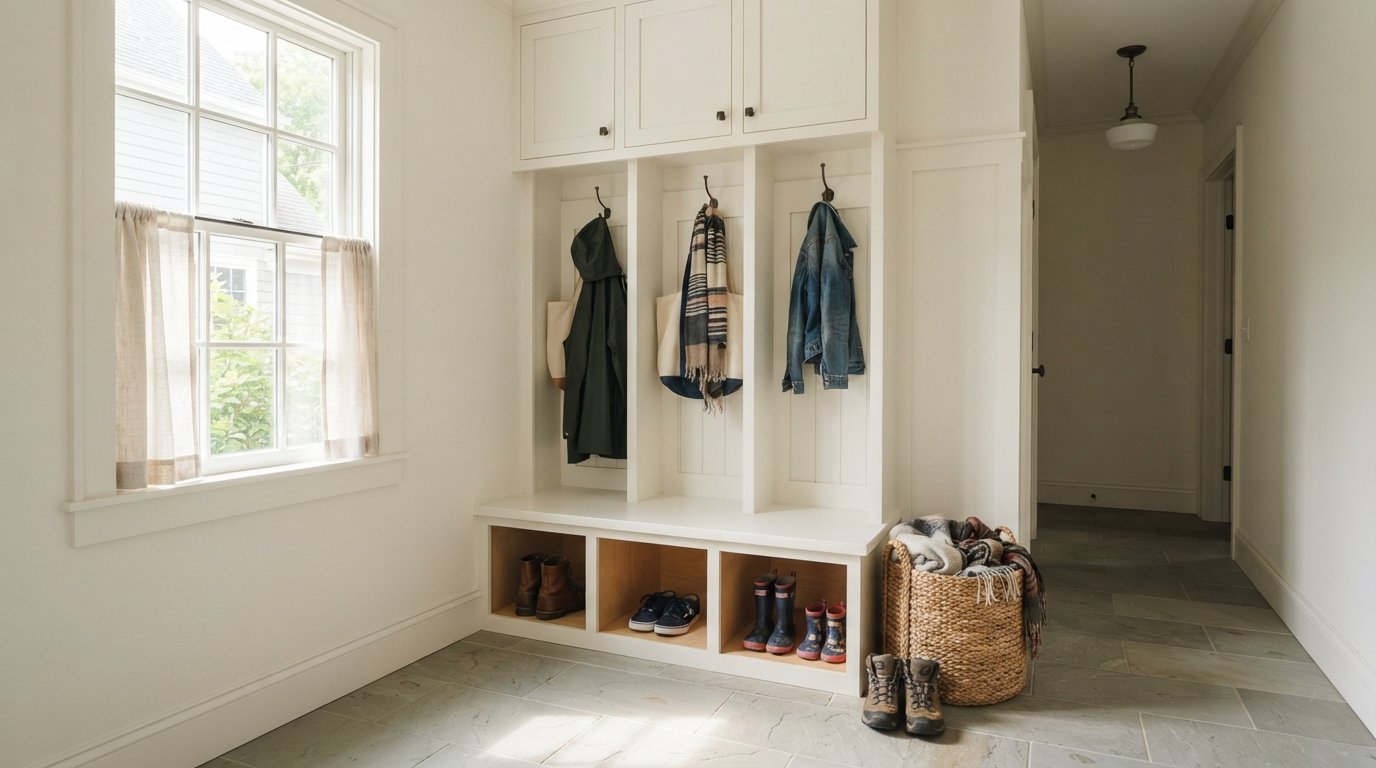
The most successful mudroom additions prioritize function over form, especially in small homes. Every inch counts, so choose a layout that maximizes storage and traffic flow. A typical mudroom includes a bench with shoe storage underneath, a row of hooks or cubbies above, and a small closet or cabinet for coats and bags. If space allows, add a sink for washing hands or rinsing muddy boots. A durable floor material like tile or luxury vinyl plank is essential for easy cleaning.
Consider the path people will take when entering. The door should swing outward if possible to save interior space. Leave at least 36 inches of clear walkway so people can move through without bumping into furniture. If you have pets, designate a corner for leashes, food bowls, or a dog-washing station. For families with young children, lower hooks and cubbies encourage kids to hang up their own belongings. Adjustable shelving and modular storage systems allow the space to adapt as your needs change.
Lighting is often overlooked in mudroom design. Good overhead lighting plus task lighting near benches and closets makes the space safer and more inviting. If your addition has windows, use them to bring in natural light and reduce electricity costs. For interior mudrooms without windows, consider a skylight or light tube. Ventilation is also important to prevent moisture and odors from building up, especially if you store wet gear. An exhaust fan or a small window that opens can help.
When choosing finishes, balance durability with aesthetics. Bench tops can be wood, quartz, or laminate. Hooks and hardware should be heavy-duty to handle coats and bags. Flooring should be slip-resistant and water-resistant. Beadboard or shiplap walls add a classic mudroom look and are easy to wipe down. If your budget is tight, prioritize structural elements and storage over decorative touches. You can always upgrade finishes later.
Step-by-Step Construction Process
Building a mudroom addition involves several phases, from site preparation to final inspection. While every project is unique, the following sequence gives you a realistic overview of what to expect. Keep in mind that timelines vary based on weather, permits, and contractor availability. A small addition might take four to eight weeks, while larger or more complex projects can take three to six months.
- Site evaluation and design: A contractor or architect assesses your property, checks for utilities, and drafts plans that meet building codes. You will review and approve the design before any work begins.
- Permitting: Your contractor submits plans to the local building department. Approval can take days or weeks, depending on your area. Do not start construction without permits.
- Foundation and framing: The crew excavates and pours a foundation, then frames the walls, roof, and floor. This is the most disruptive phase, with heavy equipment and noise.
- Roofing, siding, and windows: Once the shell is up, workers install roofing, siding, windows, and exterior doors. This phase makes the addition weather-tight.
- Insulation, drywall, and finishes: Insulation improves energy efficiency, then drywall is hung and finished. Next come flooring, paint, trim, and built-in storage.
- Final inspection and punch list: The building inspector verifies that the work meets code. You and your contractor walk through the space to address any remaining issues.
Throughout construction, communicate regularly with your contractor. Ask for a schedule and weekly updates so you know what to expect. If you plan to live in your home during the project, prepare for dust, noise, and limited access to the construction area. Set up a temporary entry system if your main door is blocked. A clear contract that specifies payment schedules, change-order procedures, and warranties will protect both parties.
One often overlooked step is coordinating with your homeowner's insurance company. Adding square footage may increase your premium, but it also increases your home's replacement value. Notify your insurer before construction begins to avoid coverage gaps. Also, consider how the addition affects your property taxes. In many areas, improvements trigger a reassessment, so budget for a potential increase.
Budgeting and Cost-Saving Strategies
Mudroom additions are not cheap, but you can control costs with smart choices. The biggest expenses are foundation, framing, roofing, and labor. If you can keep the addition small and simple, you will save significantly. For example, a 6 by 8 foot bump-out costs far less than a 10 by 12 foot room. You can also save by choosing standard-sized windows and doors instead of custom sizes. Stock cabinetry and ready-to-assemble storage systems are more affordable than custom built-ins.
Another way to reduce costs is to do some of the work yourself. If you are handy, you might handle painting, trim work, or installing hooks and shelves. However, leave structural work, electrical, plumbing, and HVAC to licensed professionals. Attempting complex tasks without experience can lead to costly mistakes and failed inspections. Always pull the required permits, even for DIY portions, to ensure safety and code compliance.
Financing options include home equity loans, personal loans, and credit cards. Some homeowners use cash savings or tax refunds. Compare interest rates and terms before committing. If you are working with a contractor, ask about payment schedules that tie payments to project milestones. Never pay the full amount upfront. A reputable contractor will provide a detailed estimate and a written contract. For homeowners seeking multiple quotes quickly, platforms like USremodel connect you with independent contractors for remodeling and repair projects across the United States.
Do not forget to budget for the unexpected. A contingency fund of 10 to 20 percent of the project cost is standard. Hidden issues like rot, pests, or poor soil can increase expenses. If you skip the contingency, you may be forced to cut corners or delay completion. It is better to plan for surprises than to run out of money mid-project.
Permits, Codes, and Contractor Selection
Building codes exist to protect your safety and investment. Your mudroom addition must comply with local requirements for foundations, framing, electrical, insulation, and egress. For example, if the addition includes a sleeping area, it may need a window large enough for emergency escape. Electrical outlets must be GFCI-protected in wet areas. Insulation must meet minimum R-values for your climate zone. Your contractor should be familiar with these rules and handle inspections.
When hiring a contractor, verify their license, insurance, and references. Ask for proof of general liability and workers' compensation coverage. Check with your state or local licensing board to confirm their status. Request a written contract that includes the scope of work, materials, timeline, payment schedule, and warranty. Avoid contractors who demand large upfront payments or refuse to provide a written estimate. Get at least three bids and compare not just price but also included services and communication style.
A good contractor will help you navigate permits and inspections. They will also coordinate subcontractors for electrical, plumbing, and HVAC work. If you are acting as your own general contractor, you take on that responsibility, which can be time-consuming and risky. For most homeowners, hiring a professional is worth the cost. The right contractor can save you money by avoiding rework and delays.
Before construction starts, establish a communication plan. Who is your main contact? How often will you receive updates? What is the process for change orders? Clear expectations prevent misunderstandings. Also, confirm that the contractor will clean up daily and protect your home from dust and debris. A respectful crew makes living through renovation much easier.
Maximizing Storage and Organization in a Small Mudroom
In a small mudroom, storage must be efficient and vertical. Use the walls from floor to ceiling. Install hooks at different heights for adults and children. Add a high shelf for seasonal items or baskets. Bench seats can lift up to reveal hidden storage for shoes or sports gear. Cubbies with bins keep small items organized and out of sight. Over-the-door organizers can hold cleaning supplies or pet accessories.
Consider multipurpose furniture. A bench with built-in shoe racks serves two functions. A hall tree with a mirror and hooks combines storage and grooming. A narrow console table with drawers can hold keys, mail, and leashes. If you have a closet, use a closet system with adjustable shelves and rods. For open storage, choose matching baskets or bins to maintain a tidy look. Label bins if you have children so they know where things belong.
Do not underestimate the power of a well-placed mirror. It reflects light and makes the space feel larger. Light-colored walls and flooring also enhance the sense of openness. If your mudroom connects to a laundry room, consider stacking appliances or adding a counter for folding. Even a small sink can be useful for handwashing or filling pet bowls. Every feature should earn its place by solving a problem or improving daily function.
Finally, keep the mudroom clutter-free by establishing routines. Encourage family members to put away their belongings immediately. A place for everything and everything in its place reduces stress and keeps the space usable. Regular purging of unused items prevents overflow. With thoughtful design and consistent habits, a small mudroom addition can feel spacious and highly functional.
Building a mudroom addition on a small home is a rewarding project that improves organization, protects your interior, and adds value. By planning carefully, choosing the right layout, and working with qualified professionals, you can create a space that serves your family for years. Start with a clear vision, set a realistic budget, and stay involved throughout construction. The result will be a hardworking entryway that makes your small home feel larger and more livable.