
Radon Mitigation System Installation and Testing Guide
Radon mitigation system installation and testing protects your family from a leading cause of lung cancer. Call 8333658755 to connect with certified pros.

By Elena Shaw
Learn more about Radon Mitigation for guides, costs, and what to expect.
Compare Radon Mitigation Pros Near You

Enter your ZIP code to compare top-rated local professionals and request free quotes.
Radon is an invisible, odorless gas that seeps into homes from the soil beneath them. It is the second leading cause of lung cancer in the United States, according to the Environmental Protection Agency, and it affects roughly one in every fifteen American homes. If you have tested your home and found elevated radon levels, or if you are buying a house in a known radon-prone area, understanding the ins and outs of radon mitigation system installation and testing is the single most important step you can take to protect your family. This guide walks you through how these systems work, what installation involves, how to verify that your system is doing its job, and how to connect with qualified professionals who can handle the project from start to finish.
What a Radon Mitigation System Does and Why It Matters
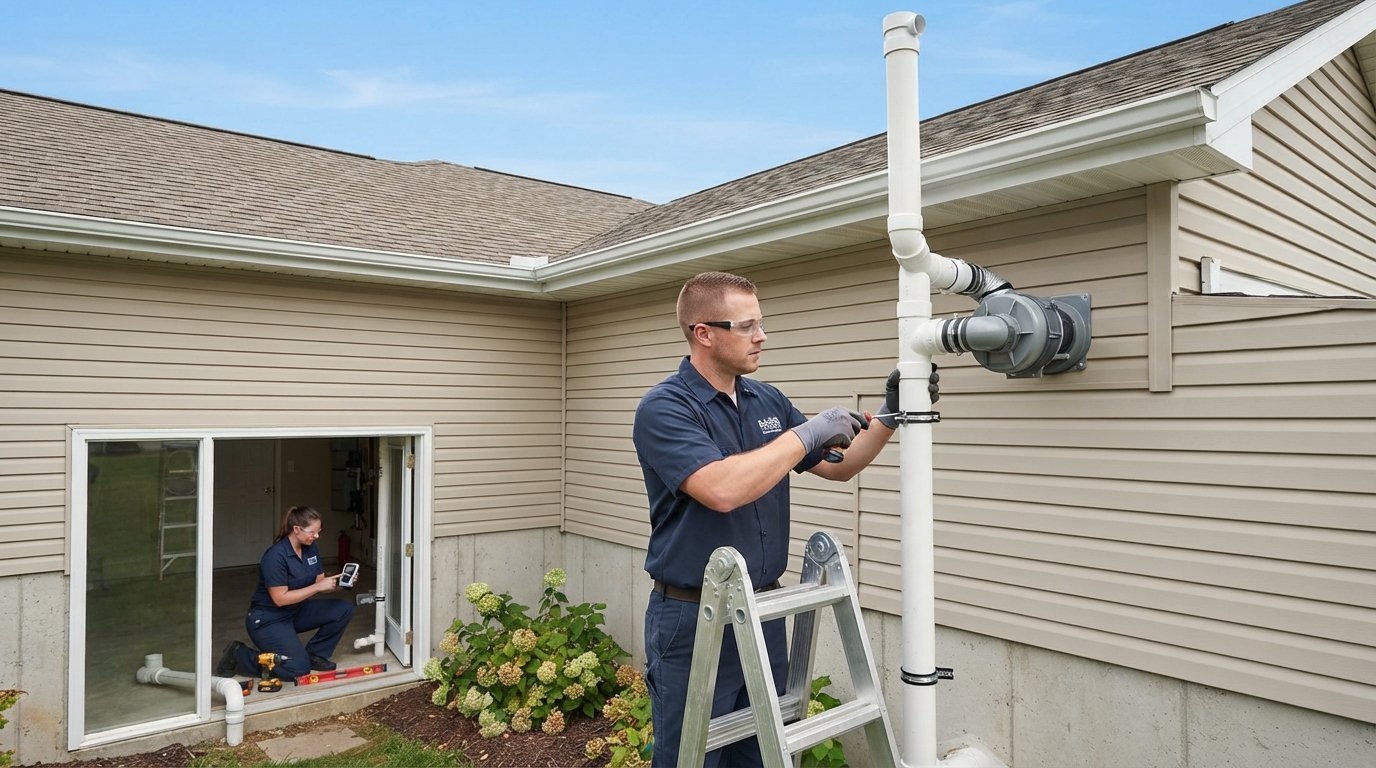
A radon mitigation system is a collection of pipes, fans, and seals designed to redirect radon gas away from your home's living space before it can accumulate to dangerous concentrations. The most common type is called a sub-slab depressurization system. It works by inserting one or more suction points through the basement floor or slab, running PVC piping from those points to a vent pipe that exits the roof, and installing an inline fan that continuously pulls soil gas from beneath the foundation and exhausts it safely above the roofline.
There are other system designs as well. A sub-membrane depressurization system is used in crawl spaces, where a heavy plastic sheet covers the soil and a fan draws gas from beneath the membrane. Drain tile suction and block wall suction are variations that use existing foundation drainage or hollow block walls as collection channels. The right approach depends on your home's foundation type, soil conditions, and the radon concentration measured during testing.
What makes radon mitigation so important is the health risk. Long-term exposure to elevated radon levels is linked to thousands of lung cancer deaths each year, and the risk is especially high for smokers. The EPA recommends mitigation when indoor radon levels reach 4 picocuries per liter (pCi/L) or higher, and it suggests considering mitigation even at levels between 2 and 4 pCi/L. Because you cannot see, smell, or taste radon, testing is the only way to know whether your home has a problem.
Pre-Installation Testing: The Essential First Step
Before any pipe is cut or fan is mounted, you need reliable test data. Professional radon testing typically involves either a short-term test (lasting two to ninety days) or a long-term test (more than ninety days). Short-term tests are useful for real estate transactions and quick screenings, while long-term tests provide a more accurate picture of your home's year-round average radon level because they account for seasonal fluctuations.
During a properly conducted test, closed-house conditions are required. This means keeping windows and exterior doors closed as much as possible, except for normal entry and exit, and running your heating or cooling system as usual. Test devices are placed in the lowest livable level of the home, typically a basement or first-floor living area, at least twenty inches above the floor and away from drafts, exterior walls, and high-humidity areas like bathrooms.
If your test results come back at or above the EPA action level, the next step is to schedule a professional radon mitigation system installation. If you are also dealing with other home safety concerns, such as hidden water damage that could compromise your foundation, you might find our Smart Water Leak Detection System Installation Guide helpful for protecting your home's structural integrity while you address radon.
How Professional Radon Mitigation System Installation Works
Installing a radon mitigation system is not a do-it-yourself weekend project. It requires knowledge of soil gas dynamics, building codes, electrical wiring, and roofing practices. A certified mitigator will begin by evaluating your home's layout, foundation type, and the results of your radon test. From there, the installer designs a system tailored to your property.
The installation process generally follows a clear sequence. First, the contractor identifies the best location for the suction point, usually in a basement, crawl space, or utility room where the slab or membrane can be accessed. Next, they drill a hole through the foundation and excavate a small pit beneath the slab to create a collection area. PVC piping is then routed from the suction point through the home, ideally through interior walls or closets to protect it from freezing, and exits through the roof. An inline radon fan is mounted in the attic or on the exterior, and a monitoring gauge called a u-tube manometer is installed so you can visually confirm the system is operating. Finally, all penetrations and cracks in the foundation are sealed to prevent soil gas from entering through other pathways.
Depending on your home's construction, the installer may also need to run electrical service to power the fan. This is where a licensed electrician often gets involved, and it is one more reason to work with a contractor network that can handle multiple trades. Platforms like USremodel connect homeowners with independent contractors who can manage radon mitigation alongside related electrical, roofing, and plumbing work, so you are not coordinating five different companies for one project.
A typical radon mitigation system installation takes one to two days to complete. The cost varies based on foundation type, home size, and the complexity of the routing, but most homeowners can expect to pay between $800 and $2,500 for a standard sub-slab system. More complex installations involving crawl spaces, multiple suction points, or finished basements may cost more.
Post-Installation Testing and Verification
Once the system is installed and running, you cannot simply assume the problem is solved. Post-mitigation testing is required to confirm that radon levels have dropped below the EPA action level. This test should be conducted by an independent, certified radon measurement professional who was not involved in the installation, ensuring unbiased results. The test typically takes place no sooner than twenty-four hours after the system is activated, and it follows the same closed-house protocols as the original test.
If the post-mitigation test shows that radon levels remain at or above 4 pCi/L, the contractor may need to adjust the system. This could involve adding a second suction point, increasing fan size, or sealing additional entry routes. Reputable installers will stand behind their work and make these adjustments at no additional cost within a reasonable warranty period.
Even after a successful post-installation test, ongoing verification matters. Homeowners should check the u-tube manometer monthly to make sure the fan is pulling suction. If the liquid levels in the manometer are equal, the fan may have failed or the piping may be blocked. A qualified radon professional can inspect and repair the system, and many contractors offer annual maintenance plans that include fan inspection, pipe inspection, and follow-up testing.
Choosing the Right Radon Mitigation Contractor
Not all radon contractors are created equal. Certification matters. Look for professionals certified by organizations such as the National Radon Proficiency Program (NRPP) or the National Radon Safety Board (NRSB). These credentials indicate that the contractor has passed rigorous exams and adheres to established standards for installation and testing.
When evaluating contractors, ask about their experience with your specific foundation type, whether they pull required permits, and what kind of warranty they offer on both labor and materials. A good contractor will also provide a written contract that details the scope of work, the expected radon reduction, and the timeline. Be wary of anyone who promises a specific result without first testing your home or who pressures you into a quick decision.
If you are already planning other home improvements, such as a basement remodel or an HVAC upgrade, coordinating radon mitigation with those projects can save time and money. A contractor network that handles multiple home systems can sequence the work efficiently. For homeowners who want to compare quotes from vetted professionals quickly, using a service that matches you with local contractors in under five minutes is a practical way to get started.
Maintaining Your Radon Mitigation System Long-Term
A radon mitigation system is designed to run continuously for years, but it is not maintenance-free. The fan is the most common point of failure. Most radon fans have a lifespan of five to ten years, and when they fail, radon levels can rise again within hours. That is why the u-tube manometer is so important: it gives you an immediate visual cue that something is wrong.
Beyond checking the manometer, homeowners should periodically inspect visible piping for cracks, disconnected joints, or blockages. The exterior vent should be kept clear of debris, snow, and vegetation. If you notice any unusual noises from the fan or a sudden change in the manometer reading, contact a radon professional promptly.
Retesting every two years is also a good practice, even if your system appears to be working. Soil conditions, foundation settling, and home renovations can all affect radon entry routes. A periodic test confirms that your system is still performing as intended and gives you documented proof of safe indoor air quality, which can be valuable if you decide to sell your home.
Radon Mitigation and Real Estate Transactions
Radon often becomes a focal point during real estate transactions. Many states require sellers to disclose known radon hazards, and buyers frequently request a radon test as part of their due diligence. If elevated levels are found, the buyer may ask the seller to install a mitigation system or to provide a credit so the buyer can arrange installation after closing.
Having a professionally installed and properly documented radon mitigation system can be a selling point. It demonstrates that the home has been responsibly maintained and that indoor air quality has been addressed. Keep copies of your installation invoice, post-mitigation test results, and any maintenance records. These documents provide assurance to future buyers and can help smooth the transaction.
If you are a buyer, insist on an independent post-mitigation test before closing if a system was recently installed. Do not rely solely on the seller's paperwork. A fresh test conducted by a certified professional gives you confidence that the system is functioning and that radon levels are within safe limits.
Radon mitigation system installation and testing is a process that protects your health, your home's value, and your peace of mind. From the initial test that identifies the problem to the post-installation verification that confirms the solution, every step matters. By working with certified professionals and staying attentive to your system's performance, you can breathe easier knowing that one of the most serious indoor air quality risks has been addressed. Whether you are planning a renovation, buying a home, or simply being proactive about your family's safety, taking radon seriously is one of the smartest investments you can make.