Kitchen Flooring Replacement: A Complete Guide for Homeowners
"*" indicates required fields
Your kitchen floor takes a beating every single day. From spilled drinks and heavy appliances to constant foot traffic, it’s no wonder that even the most durable flooring eventually shows its age. When your once-beautiful floor becomes cracked, stained, or simply outdated, it’s more than just an eyesore,it can be a safety hazard and drag down the entire feel of your home. Replacing it is a significant project, but with the right knowledge and professional help, it can transform your kitchen into a safer, more beautiful, and more valuable space.
Understanding Kitchen Flooring Replacement
Kitchen flooring replacement is the process of completely removing your old floor covering and installing a new one. It’s more involved than a simple repair or refinishing job. This project involves careful preparation of the subfloor, precise installation of the new material, and finishing touches that ensure a seamless, durable result.
It’s a project that impacts your daily life, but when done correctly, the results last for decades. A successful replacement starts with choosing the right material for your lifestyle and ends with a flawless installation by skilled hands.
Why It Matters for Homeowners
A new kitchen floor is one of the smartest investments you can make in your home. It immediately boosts your kitchen’s aesthetics, making it a more enjoyable place to cook and gather. But the benefits go far deeper than looks.
A properly installed, modern floor is easier to clean and more hygienic, with fewer places for dirt and germs to hide. It also enhances safety by eliminating tripping hazards from loose tiles, warped boards, or worn-out surfaces. Furthermore, a high-quality floor replacement can significantly increase your home’s resale value, offering an excellent return on investment by modernizing one of the most important rooms in the house.
Choosing the best kitchen flooring options is the first critical step in this valuable upgrade.
Common Issues and Their Causes
Most kitchen floors fail due to a combination of moisture, wear, and subfloor problems. Kitchens are high-moisture areas, and water is the enemy of many flooring materials. Persistent leaks from appliances, spills that aren’t cleaned up, or even high humidity can lead to serious damage over time.
Daily wear and tear is another major factor. The constant movement of chairs, dropped utensils, and foot traffic gradually breaks down the floor’s surface. Sometimes, the issue isn’t with the flooring you see, but with what’s underneath. An uneven or damaged subfloor will cause problems for any new material installed over it.
- Water Damage: Swelling, warping, or mold growth under laminate, wood, or vinyl.
- Cracks and Chips: Impact damage or shifting foundations affecting tile or stone.
- Fading and Staining: Sun exposure and spills permanently discoloring the surface.
- Loosening or Buckling: Poor installation or adhesive failure causing planks or tiles to lift.
How Professionals Fix the Problem
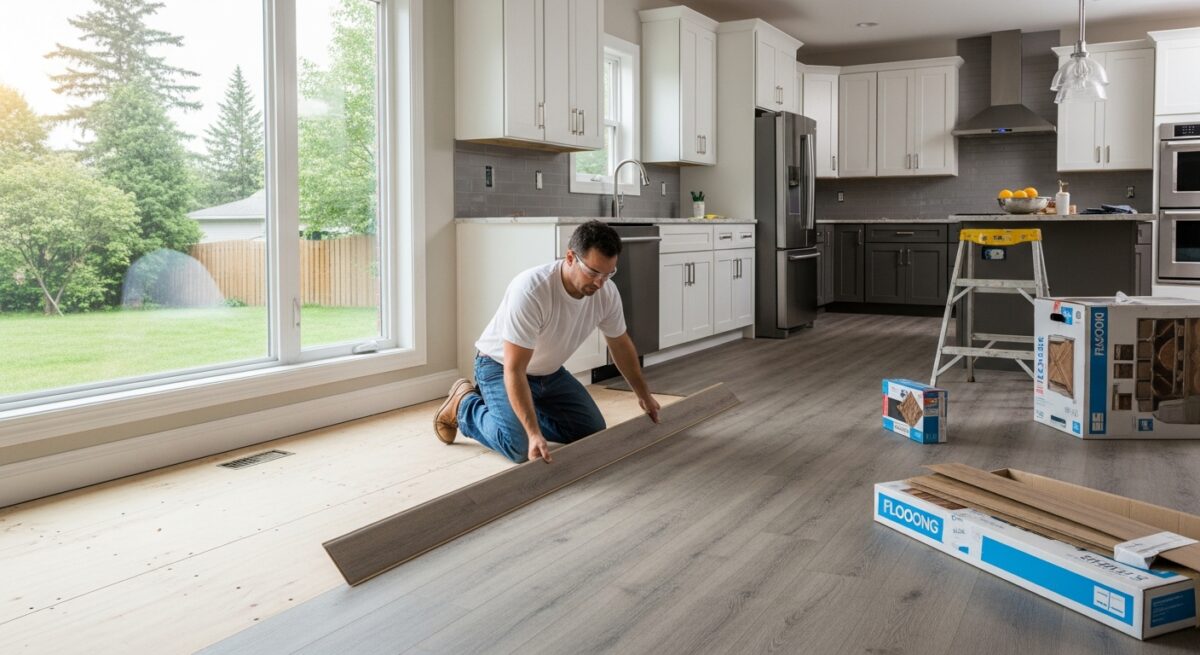
A professional flooring replacement is a multi-step process designed for longevity. It begins with a thorough assessment of your existing floor and subfloor. The old flooring material is carefully removed and disposed of, revealing the foundation beneath.
The subfloor is then inspected, repaired, and leveled. This crucial step is often overlooked in DIY projects, but it’s essential for preventing future issues like squeaks, dips, or premature wear in the new floor. Once the subfloor is perfect, professionals meticulously install the new flooring according to the manufacturer’s specifications, ensuring proper expansion gaps, seam sealing, and adhesion.
- Assessment & Removal: Evaluating the job and safely removing the old floor.
- Subfloor Preparation: The most critical phase for a stable, long-lasting result.
- Precise Installation: Expert cutting, fitting, and securing of the new material.
- Finishing & Cleanup: Installing trim, sealing edges, and leaving your kitchen spotless.
Signs You Should Not Ignore
Some floor problems start small but can quickly escalate into bigger, more expensive issues. It’s important to recognize the warning signs that indicate a replacement, not just a patch-up, is needed.
If you notice soft spots or spongy areas when you walk, this often signals water damage and rot in the subfloor,a serious structural concern. Persistent stains that won’t come clean or widespread, deep scratches mean the wear layer of your floor is compromised. When more than a few tiles are cracked or planks are buckling, it’s usually a sign of a larger underlying problem.
- Persistent, unpleasant odors coming from the floor.
- Visible gaps, buckling, or tiles that are loose and shift underfoot.
- Extensive water damage, warping, or mold.
- Your floor is severely outdated, affecting your home’s function and value.
Cost Factors and What Affects Pricing
The cost of a kitchen flooring replacement varies widely, and understanding the factors helps in planning your budget. The single biggest cost driver is the material you choose. Luxury vinyl plank, laminate, tile, and hardwood all have different price points per square foot.
Labor costs depend on the complexity of the installation. Intricate patterns, lots of cuts for appliances, or difficult subfloor repairs will increase the time and skill required. The size of your kitchen is, of course, a direct factor. Finally, don’t forget to account for additional costs like moving appliances, removing and disposing of the old floor, and installing new moldings or transitions.
For a detailed look at material pros, cons, and costs, our resource on the best kitchen flooring options is an essential read.
How To Choose the Right Professional or Service
Selecting the right installer is as important as choosing the right flooring. Look for a licensed, insured company with specific, verifiable experience in kitchen flooring. They should offer a clear, detailed written estimate that breaks down material, labor, and any potential additional costs.
Always ask for and check references or online reviews from past customers. A trustworthy professional will be happy to provide them. They should also guide you through material selection, explaining the durability, maintenance, and suitability of different options for a kitchen environment. Good communication and a solid warranty on both materials and labor are non-negotiable for your peace of mind.
Long-Term Benefits for Your Home
Investing in a professional kitchen floor replacement pays dividends for years to come. You gain a durable surface that stands up to daily life, reducing the need for frequent repairs or early replacement. The improved safety for your family is invaluable, eliminating trip hazards and creating a more secure environment.
You’ll also enjoy easier cleaning and maintenance, saving you time and effort. Perhaps most significantly, a modern, well-installed floor dramatically increases your home’s appeal and market value, making this upgrade a financially savvy decision as much as a practical one. A deep dive into kitchen flooring options and benefits can help you maximize these long-term advantages.
Frequently Asked Questions
How long does a kitchen flooring replacement take?
For an average-sized kitchen, a professional team can typically complete the job in 2-3 days. This includes removal, subfloor prep, installation, and cleanup. Complex patterns or extensive subfloor repairs may add extra time.
Can I install new flooring over my old floor?
Sometimes, but it’s not always recommended. It depends on the condition and type of both the old and new flooring. A professional can assess if this is a viable option, but often, removing the old floor is best for ensuring a proper, long-lasting installation.
What is the most durable kitchen flooring?
Luxury vinyl plank (LVP) and tile (porcelain or ceramic) are top contenders for durability. They resist water, scratches, and stains exceptionally well. The “best” choice ultimately depends on your specific needs, budget, and style preferences.
How do I prepare my kitchen for installation?
Your installer will give you specific instructions. Generally, you’ll need to remove all items from the floor, including small appliances, rugs, and furniture. You may also need to disconnect and move your refrigerator, stove, and dishwasher.
Will I be without a kitchen during the project?
You will have limited access. You can usually use other parts of your home, but the kitchen itself will be a work zone. Planning for simple meals or using a temporary setup in another room is a good idea for the duration of the work.
How do I maintain my new kitchen floor?
Maintenance varies by material. Generally, sweep or vacuum regularly to prevent grit buildup. Clean spills promptly with a manufacturer-recommended cleaner. Avoid using harsh chemicals, abrasive pads, or excessive water on most flooring types.
Replacing your kitchen floor is a substantial project, but it’s one that renews the heart of your home. With careful planning, the right material choice, and expert installation, you can enjoy a beautiful, functional, and safe kitchen for many years to come. Don’t let a worn-out floor hold your kitchen back,explore your options and take the first step toward a stunning transformation today.
About Alex Carter
"*" indicates required fields