
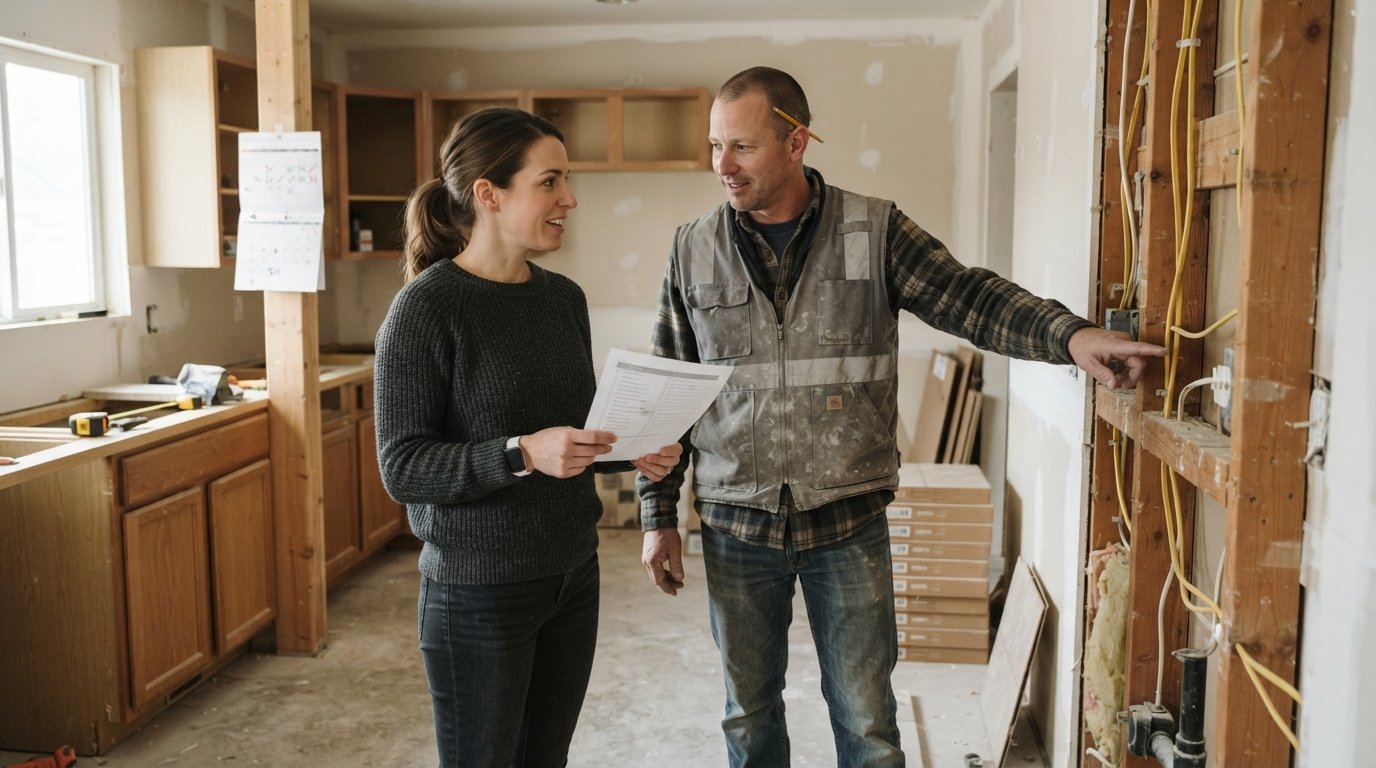
How to Set Realistic Renovation Timelines That Work
Learn how to set realistic renovation timelines that keep your project on track, reduce stress, and help you avoid costly delays.

By Justin Parker
Learn more about Home Remodeling for guides, costs, and what to expect.
Compare Home Remodeling Pros Near You

Enter your ZIP code to compare top-rated local professionals and request free quotes.
You have finally decided to remodel your kitchen, update your bathroom, or add a new deck. You have the inspiration boards, the budget spreadsheet, and the contractor list. Then reality hits: the project takes twice as long as you expected, the crew is on site only three days a week, and the tile you ordered is back-ordered for six weeks. This scenario is so common that it has become a punchline. But it does not have to be your story. The difference between a stressful renovation and a smooth one often comes down to managing renovation timelines realistic expectations from the very first day. When you know what to expect, you can plan smarter, communicate better, and protect your sanity.
Renovation timelines are not just about counting days on a calendar. They are about coordinating materials, labor, permits, inspections, and your own daily life. A realistic timeline accounts for the unexpected, builds in buffer time, and keeps everyone accountable. This guide will walk you through how to create a timeline that works, what causes delays, and how to keep your project on track without losing your mind.
Why Renovation Timelines Go Wrong
Most homeowners underestimate the time a renovation takes because they focus on the visible work. They see the demo day, the new cabinets going in, and the final walkthrough. What they do not see are the weeks spent waiting for permits, the days lost to weather, or the hours spent coordinating subcontractors. According to industry data, the average kitchen remodel takes 6 to 12 weeks, but many projects stretch to 16 weeks or more. Bathroom remodels typically take 3 to 6 weeks, and a full home addition can take 4 to 6 months. These ranges are broad because every project is unique.
One of the biggest mistakes is relying on a contractor's initial estimate without asking what it includes. Does the estimate cover demolition, disposal, electrical rough-in, plumbing rough-in, inspections, and final cleanup? Or is it just the labor for the visible work? A detailed scope of work is your best defense against timeline creep. When you and your contractor agree on the exact steps, the order of work, and the expected duration for each phase, you can spot problems early.
The Anatomy of a Realistic Renovation Timeline
Before you sign a contract, ask your contractor to break down the project into phases. This breakdown helps you understand what happens when and why. A typical renovation follows a predictable sequence:
- Planning and design: 2 to 6 weeks, depending on the complexity of the project and how quickly you make decisions.
- Permits and approvals: 2 to 8 weeks, depending on your local jurisdiction and the type of work.
- Demolition and prep: 1 to 2 weeks, including removing old fixtures, flooring, and walls.
- Rough-in work: 1 to 3 weeks for electrical, plumbing, and HVAC rough-ins before walls are closed.
- Installation: 2 to 6 weeks for cabinets, countertops, flooring, and fixtures.
- Finishing touches: 1 to 2 weeks for paint, trim, hardware, and final cleanup.
Each phase depends on the previous one, so a delay in one area ripples through the entire schedule. For example, if the electrical rough-in is not ready on time, the drywall crew cannot start, and that pushes back cabinet installation. This is why buffer time is essential. A realistic timeline includes an extra 15 to 20 percent on top of the base estimate to absorb small delays.
Another key factor is the availability of materials. Many homeowners assume that the contractor orders everything right after the contract is signed. In reality, custom cabinets, specialty tile, and windows often have lead times of 4 to 12 weeks. If you have not selected those items before the project starts, you are already behind. Ask your contractor for a detailed material schedule that lists every major item, its lead time, and the order date.
How to Create a Timeline You Can Trust
Start by defining the project scope in writing. The more specific you are, the easier it is to estimate time. For example, a simple bathroom refresh with new fixtures and paint takes less time than a full gut renovation that moves plumbing and electrical. Write down everything you want done, down to the type of faucet and the color of the grout. This document becomes your reference point when the contractor gives you a schedule.
Next, work with your contractor to set milestones. A milestone is a point in the project where you can verify progress. For example, the first milestone might be "demolition complete," the second "rough-in inspection passed," and the third "cabinets delivered." Each milestone should have a target date and a checklist of what needs to happen to meet it. Review these milestones weekly.
Also, consider the season. If you are remodeling a bathroom in a region with harsh winters, the demolition will create a draft that affects your heating bill. If you are adding a deck, rain can delay the concrete pour. A realistic timeline accounts for seasonal weather patterns. Ask your contractor how they handle weather delays and what their contingency plan is.
Finally, build in a communication plan. Decide how often you will receive updates, whether it is a daily text, a weekly email, or an in-person walkthrough. When you know what to expect, you are less likely to panic when a small issue arises. And when a delay does happen, you want to hear about it from your contractor, not from a neighbor who saw the crew packing up early.
The Role of Permits and Inspections
Permits are one of the most common sources of timeline delays, yet they are also one of the most controllable. Before any work begins, find out what permits your project requires. This usually means a building permit, but you may also need electrical, plumbing, or mechanical permits. Your contractor should handle the application, but you should know the timeline. In many cities, the review process takes 2 to 6 weeks, and resubmissions can add more time.
Inspections happen at set points during the project: after rough-ins, after insulation, and after final completion. Each inspection requires a scheduled visit from a city inspector, and if the inspector finds a problem, the crew must fix it before the next inspection. This can add days or weeks, depending on the severity. A realistic timeline includes time for inspections and for potential rework.
If you are working with a contractor who says you do not need permits, be cautious. Unpermitted work can lead to fines, issues when you sell your home, and problems with your insurance. It is rarely worth the risk. Instead, choose a contractor who is transparent about the permitting process and builds it into the schedule.
How to Handle Delays Without Losing Your Cool
Even with the best planning, delays happen. A custom window arrives damaged, a subcontractor gets sick, or a sudden inspection backlog stalls the project. The key is not to avoid all delays, but to manage them well. Here is a simple framework for handling any delay:
- Ask for the reason: Understand why the delay occurred. Is it a material issue, a labor issue, or a decision issue?
- Get a new date: Ask for a specific revised completion date, not just "as soon as possible."
- Request a plan: Ask the contractor what they will do to get back on track, such as adding crew hours or working weekends.
- Document everything: Keep a written record of all changes and delays, including dates and reasons.
This approach keeps the focus on solutions rather than blame. It also protects you if the delay is due to the contractor's negligence, in which case you may have grounds for a revised timeline or compensation.
Another important strategy is to avoid making changes after the work begins. Every change order, whether it is moving a wall or upgrading a tile, adds time and cost. If you must make a change, understand the impact on the timeline before you approve it. A good contractor will give you a change order that includes the new completion date.
What a Realistic Timeline Looks Like in Practice
Let us walk through a typical bathroom remodel to see what a realistic timeline looks like. Day 1 to day 5: the crew protects the floors, sets up a dust barrier, and demolishes the old bathroom. Day 6 to day 10: the electrician and plumber do their rough-in work, running new lines and moving fixtures. Day 11: the city inspector checks the rough-in. Day 12 to day 14: the drywall crew hangs and finishes the new walls. Day 15 to day 18: the tile installer sets the floor and shower tile, and the tile needs time to cure. Day 19 to day 22: the cabinet installer puts in the vanity, the plumber connects the fixtures, and the electrician installs lights and outlets. Day 23 to day 25: the painter touches up the walls, the cleaner does a final pass, and the contractor walks through with you to fix any small issues. Total: about 5 weeks, plus a buffer of 1 to 2 weeks, for a realistic range of 6 to 7 weeks.
This timeline assumes that all materials are on site, the design is finalized, and the permits are already approved. If any of those assumptions are false, the timeline shifts. The point is that a realistic timeline is not a single date but a range with a clear start and end. When your contractor gives you a date, ask: "Is this the date you are confident about, or is this the hopeful date?" You want the confident date.
Using Technology to Stay on Track
Modern tools can help you monitor progress without calling your contractor every day. Many contractors use project management software that sends automatic updates when a task is completed. You can also use simple tools like a shared spreadsheet or a group chat where the contractor posts photos at the end of each day. This creates a transparent record of progress and reduces the number of check-in calls.
If you are managing the renovation yourself, consider a simple Gantt chart or a calendar with milestones. Tools like Trello or Asana are free and easy to use. They help you visualize the sequence of tasks and spot potential conflicts, such as scheduling the countertop installer before the cabinets are set. A simple visual timeline can be your best friend.
Another useful strategy is to set up automatic alerts for material deliveries. Ask your supplier to notify you when your items ship and when they arrive. This way, you know if the tile is on track or if you need to adjust the schedule. The more you know, the less you worry.
When to Push Back on a Timeline
Sometimes a contractor will give you a timeline that is too optimistic. They might say they can finish a full kitchen remodel in three weeks when the reality is six. This is not always dishonest; many contractors are naturally optimistic. But an unrealistic timeline leads to rushed work, skipped steps, and higher stress. You have the right to ask for a more detailed breakdown.
If a contractor says three weeks, ask: "How many days are allocated for demolition, rough-in, and installation?" If the numbers do not add up, say so. A reputable contractor will appreciate your attention to detail and adjust the schedule. If they refuse, that is a red flag. You may want to get another bid.
Also, be wary of contractors who promise to "work around the clock" to finish early. Rushing a renovation often leads to mistakes that cost more time and money in the long run. Quality work takes time. A contractor who gives you a realistic timeline is showing respect for both the project and your budget.
The Financial Side of Timelines
Timelines and budgets are closely linked. The longer a project takes, the more it costs, especially if you are paying for a rental unit or eating out. A realistic timeline helps you budget for these indirect costs. For example, if your kitchen remodel takes 8 weeks instead of 4, you will spend more on takeout and possibly on a temporary kitchen setup. Include these costs in your overall budget.
Also, be aware that some contractors charge a daily or weekly rate for extended timelines, especially if the delay is due to changes you requested. Before you approve any change, ask how it affects the timeline and the cost. This keeps you in control.
If you are financing the renovation, a longer timeline can also affect your interest payments. A realistic timeline helps you plan your cash flow, so you are not caught off guard by a final invoice that arrives later than expected.
Working With a Contractor Network
Many homeowners choose to work with a contractor matching service like USremodel to simplify the process. These platforms connect you with vetted professionals who are used to working within realistic timelines. They handle the legwork of finding contractors, comparing quotes, and verifying credentials. This can save you weeks of research and help you avoid the contractors who overpromise and underdeliver.
When you get quotes through a matching service, ask each contractor about their timeline assumptions. Compare not just the price but also the schedule. The contractor who gives you a realistic timeline is likely the one who will finish on time. Remember that the cheapest bid is not always the best value, especially if it comes with an impossible schedule.
Final Thoughts: The Value of Patience
Managing renovation timelines realistic expectations is not about being pessimistic. It is about being prepared. When you plan for the delays, the weather, and the inevitable surprises, you can enjoy the process more. You will not be shocked when the tile is back-ordered, and you will not be stressed when a small issue comes up during the rough-in inspection.
A realistic timeline also protects your relationship with your contractor. When you know what to expect, you are less likely to micromanage or complain. The contractor can focus on the work, and you can focus on the exciting part: watching your home transform.
Remember that a renovation is a marathon, not a sprint. The goal is not just to finish quickly but to finish well. A timeline that is realistic gives you the time to make thoughtful decisions, to catch problems early, and to ensure the result is something you will love for years. So before you sign that contract, have the conversation about time. Ask the questions, get the breakdown, and build in the buffer. Your future self will thank you.
If you are planning a renovation, take the first step today by getting a detailed quote from multiple contractors. Use our floor installation cost and timeline guide to understand how long one common project takes, then apply the same principles to your own remodel. With the right expectations and the right team, you can turn a stressful process into a rewarding experience.