
Tile Flooring: Pros, Cons, and Smart Installation Tips
Explore tile flooring options, from ceramic to natural stone, and get expert tips on installation, cost, and maintenance.

By Justin Parker
Learn more about Tile Installation and Replacement for guides, costs, and what to expect.
Compare Tile Installation and Replacement Pros Near You

Enter your ZIP code to compare top-rated local professionals and request free quotes.
Tile flooring has long been a favorite among homeowners for its durability, style, and ease of maintenance. Whether you are remodeling a bathroom, updating a kitchen, or finishing a basement, tile offers a versatile surface that can mimic natural stone, wood, or concrete while providing superior resistance to moisture and wear. But choosing the right tile involves more than picking a color or pattern. You need to consider material, size, grout, layout, and installation method to ensure the finished floor looks great and performs well for years.
This guide walks you through the essential decisions, from selecting the right tile type to preparing the subfloor and hiring a professional contractor. You will learn how to avoid common mistakes, what questions to ask before a project starts, and how to maintain your tile once it is installed. By the end, you will have a clear plan for making your tile flooring project a success, whether you tackle it yourself or work with a seasoned installer.
Why Tile Flooring Remains a Top Choice
Tile is one of the most durable flooring options available. It resists scratches, dents, and stains, making it ideal for high-traffic areas like entryways, kitchens, and hallways. Unlike hardwood, tile does not warp or swell when exposed to moisture, so it performs beautifully in bathrooms, laundry rooms, and basements. Additionally, tile does not harbor allergens such as dust mites or pet dander, which is a significant benefit for households with allergy sufferers.
Another advantage is the sheer variety of styles. From glossy porcelain that mimics marble to textured ceramic that looks like reclaimed wood, tile can achieve nearly any aesthetic. You can choose large-format tiles for a modern, seamless look or small mosaic tiles for intricate patterns and accents. With advances in digital printing, even high-end natural stone looks are now affordable for most budgets.
Finally, tile is a sustainable choice. Many manufacturers produce tiles from recycled materials, and the long lifespan of tile reduces the need for frequent replacements. When combined with radiant heating systems, tile floors can even contribute to energy efficiency by retaining heat and distributing it evenly across a room.
Choosing the Right Tile Material
The material you select determines the floor’s durability, appearance, and cost. Here is a breakdown of the most common tile types used in residential settings.
Ceramic and Porcelain
Ceramic and porcelain tiles are made from clay and other natural materials, fired at high temperatures. Porcelain is denser and less porous than ceramic, making it more water-resistant and suitable for outdoor use or areas with high moisture. Both types come in a wide range of colors, sizes, and finishes, including polished, matte, and textured surfaces.
For most interior applications, porcelain is the recommended choice because it offers superior durability and lower water absorption. Large-format porcelain tiles, measuring 12 by 24 inches or larger, are particularly popular for creating a spacious look with fewer grout lines. When selecting porcelain, look for a PEI rating of 3 or higher for residential floors.
Natural Stone
Natural stone tiles, such as marble, granite, travertine, and slate, add a timeless and luxurious feel to any space. Each tile is unique in veining and color, giving your floor a one-of-a-kind character. Stone is highly durable and can last for decades with proper care, but it requires more maintenance than ceramic or porcelain.
Stone is porous, so it must be sealed regularly to prevent staining. Acidic substances like lemon juice or vinegar can etch the surface, so you need to clean stone tiles with pH-neutral products. Despite these extra steps, many homeowners find the beauty of natural stone worth the effort. It works especially well in bathrooms, entryways, and living areas where you want a dramatic focal point.
Glass and Mosaic
Glass tiles are often used as accents or in backsplashes, but they can also create stunning floors in bathrooms or powder rooms. They are non-porous, stain-resistant, and available in vibrant colors and translucent finishes. However, glass can be slippery when wet, so choose a textured or matte finish for floor applications.
Mosaic tiles, which are small pieces mounted on mesh sheets, offer endless pattern possibilities. You can create intricate designs, borders, or feature strips that add visual interest. They are ideal for showers, bathroom floors, and decorative accents. While installing mosaics is more labor-intensive due to the many small pieces, the result is a custom look that elevates the entire room.
Selecting Tile Size and Layout
The size of your tile affects both the visual style and the installation cost. Large-format tiles, such as 12 by 24 inches or 24 by 24 inches, create a clean, modern appearance with fewer grout lines. They also make small rooms feel larger because the eye is not interrupted by frequent seams. However, large tiles require a perfectly flat subfloor, as any unevenness can cause lippage, where one tile sits higher than its neighbor.
Smaller tiles, like 6 by 6 inches or 12 by 12 inches, are easier to install and work well in rooms with curves or unusual shapes. They are also more forgiving on subfloors that are not perfectly level. Subway tiles, typically 3 by 6 inches, remain a classic choice for both floors and walls, offering a timeless look that suits many design styles.
Your layout pattern also influences the final result. A straight grid is the most common and easiest to install. For a more dynamic look, consider a diagonal or herringbone pattern, which adds movement but increases installation time and waste. A running bond, or brick pattern, is another popular option that helps disguise slight imperfections in tile dimensions.
Before committing to a layout, dry-lay a few tiles on the floor to visualize the effect. Use spacers to maintain even gaps, and check that the pattern aligns well with doorways and fixtures. If you are unsure, ask a professional for advice on the best layout for your space.
Grout: Color, Type, and Maintenance
Grout fills the gaps between tiles, preventing moisture from seeping beneath the surface. It comes in two main types: sanded and unsanded. Sanded grout is stronger and recommended for joints wider than 1/8 inch, while unsanded grout works for narrower joints and is easier to work with on vertical surfaces. Epoxy grout is a third option that is highly stain-resistant and does not require sealing, making it ideal for kitchen countertops and bathroom floors.
Choosing the right grout color is as important as the tile itself. Light grout creates a seamless, airy look, while dark grout adds contrast and helps hide dirt. If you want to minimize visible staining, opt for a mid-tone color that blends with the tile. For a bold design statement, choose a contrasting color that highlights the tile pattern.
Grout requires regular maintenance to keep it looking fresh. It is porous, so it can absorb spills and develop mold in damp areas. Sealing the grout after installation and reapplying sealer every one to two years will protect it from moisture and stains. When cleaning, use a pH-neutral cleaner and avoid harsh acids that can degrade the grout over time.
If your grout becomes discolored or starts to crack, you can have it repaired or replaced. In some cases, you can also paint over old grout with a grout colorant, which restores its appearance without a full removal. However, the best approach is to choose high-quality grout and maintain it properly from the start.
Subfloor Preparation and Installation
A successful tile installation begins with a solid, clean, and level subfloor. The ideal base is a concrete slab or a plywood subfloor covered with a cement backer board. The backer board provides a stable surface that resists moisture and ensures the tile adheres properly. If you are installing tile over an existing floor, such as vinyl or hardwood, you must remove it first or cover it with a suitable underlayment.
Before installation, check the subfloor for any high or low spots. Use a self-leveling compound to smooth out low areas and grind down high spots. The floor must be completely free of dust, grease, and debris, as these can compromise the bond between the thin-set mortar and the tile.
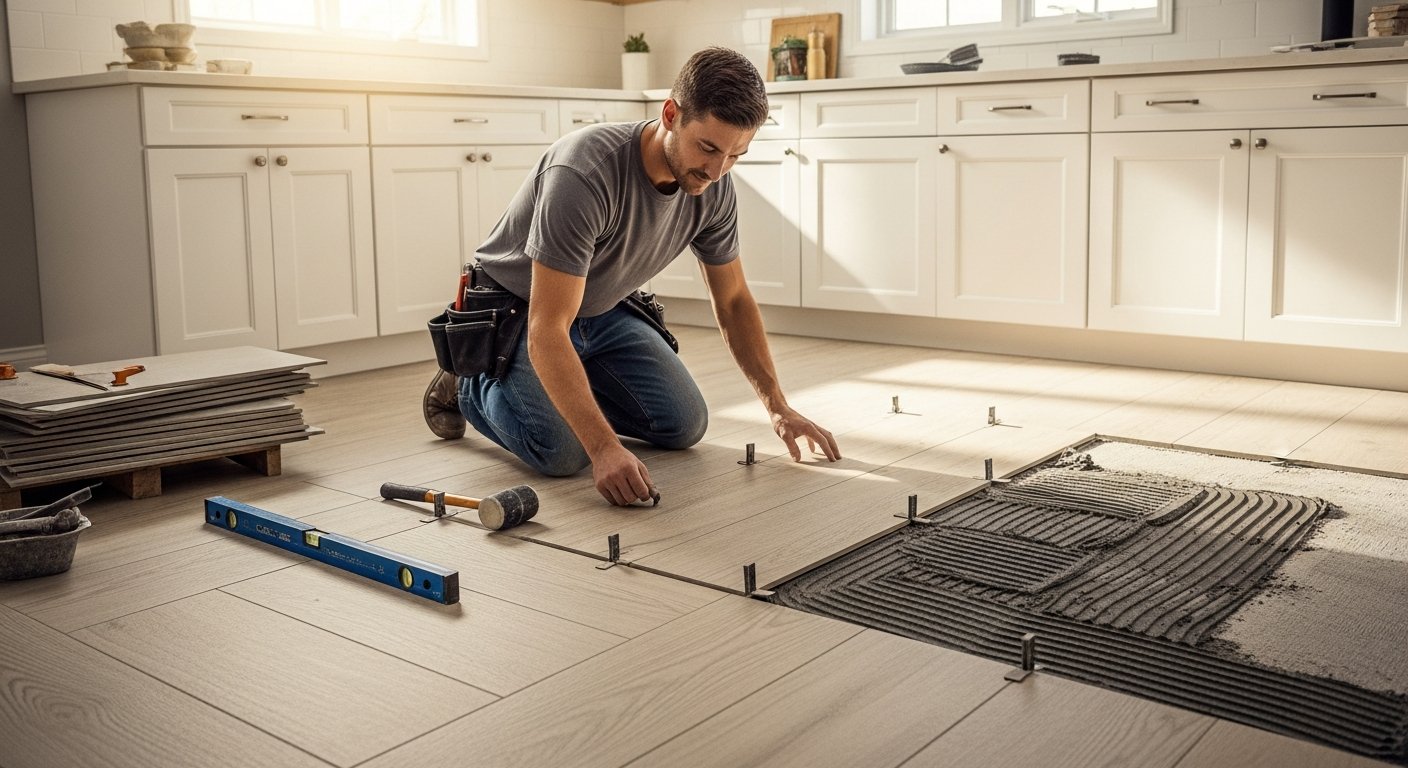
Professional installers follow a systematic process: measure and mark the room’s center, lay out the tile pattern, mix the thin-set mortar, apply it with a trowel, set each tile, and use spacers for even joints. After the mortar sets, they apply grout, wipe off excess, and seal the surface. This process requires precision and experience to avoid crooked lines or uneven surfaces.
While DIY installation is possible for small areas, larger projects or complex patterns are best left to professionals. A skilled installer can handle challenges like cutting tiles around obstacles, ensuring proper expansion gaps, and achieving a level surface across the entire room. If you plan to hire a contractor, request references, check their credentials, and ask about their experience with your specific tile type.
Costs and Budgeting for Tile Flooring
The cost of tile flooring varies widely based on material, size, and labor. Here is a rough breakdown of price ranges per square foot, including materials and installation:
- Ceramic tile: $3 to $10 per square foot
- Porcelain tile: $5 to $15 per square foot
- Natural stone: $10 to $30 per square foot
- Glass or mosaic: $15 to $40 per square foot
Installation labor typically adds $5 to $15 per square foot, depending on the complexity of the layout, the size of the tiles, and your location. Large-format tiles, diagonal patterns, and intricate mosaics will increase labor costs. Additionally, you may need to pay for subfloor preparation, backer board, mortar, grout, and sealing products.
To get an accurate estimate, measure the square footage of your room and add 10 percent for waste. Then, request quotes from multiple contractors. Make sure each quote includes the same scope of work, such as subfloor prep, tile removal, and disposal. Comparing apples to apples will help you avoid surprise charges later.
Remember that tile is a long-term investment. While the upfront cost may be higher than some other flooring options, its durability and timeless appeal often justify the expense. A well-installed tile floor can last 50 years or more, adding value to your home.
Maintaining Your Tile Floor
Once your tile floor is installed, regular maintenance keeps it looking new. Daily care involves sweeping or vacuuming to remove dirt and grit that can scratch the surface. For mopping, use a damp mop with a pH-neutral cleaner designed for tile and grout. Avoid using abrasive pads or harsh chemicals that can dull the finish.
To protect against scratches, place felt pads under furniture legs and avoid dragging heavy objects across the floor. In entryways, use doormats to trap dirt and moisture before it reaches the tile. For stone tiles, reapply sealer every six months to a year, depending on traffic and wear.
Spills should be wiped up immediately, especially if they contain acidic substances like wine, juice, or tomato sauce. For stubborn stains, apply a paste of baking soda and water to the area and let it sit for a few minutes before scrubbing gently. Never use steel wool or sharp tools, as they can scratch the tile or damage the grout.
If you notice cracking or chipping, repair the affected tile as soon as possible. Loose or damaged tiles can allow moisture to seep into the subfloor, causing more extensive damage. Keep a few spare tiles from the original installation so you can match replacements if needed.
When to Call a Professional Installer
While some homeowners enjoy DIY projects, tile installation is a skill that takes time to master. If you have never installed tile before, consider hiring a professional, especially for large areas or complex patterns. An experienced installer will ensure that the floor is level, the grout lines are straight, and the tiles are securely bonded.
Professional installers also have access to specialized tools, such as wet saws, tile cutters, and spacers, which produce cleaner cuts and more precise results. They can handle unexpected challenges, such as uneven subfloors or tricky corners, without compromising the final look. And because they are insured, any accidental damage during installation is covered.
When searching for a contractor, ask for recommendations from friends or family, read online reviews, and verify that they are licensed and insured. Request a written estimate that details the scope of work, timeline, and warranty. A reputable contractor will be happy to answer your questions and provide references from past clients.
Your Next Steps for a Stunning Tile Floor
Tile flooring is a significant investment that rewards you with beauty, durability, and ease of care. By understanding the materials, sizes, layouts, and installation requirements, you can make informed decisions that lead to a floor you will love for decades. Start by defining your budget and style preferences, then explore showrooms or online galleries to gather ideas.
If you are ready to move forward, the next step is to get quotes from qualified tile installers. At 180 Remodel, we connect homeowners with trusted contractors who specialize in flooring installation. Our network includes professionals who can handle everything from simple ceramic tile to complex natural stone patterns. Contact us today for a quick, customized quote, and let us help you transform your space with beautiful tile flooring.
Learn more about Tile Installation and Replacement for guides, costs, and what to expect.
Compare Tile Installation and Replacement Pros Near You
Enter your ZIP code to compare top-rated local professionals and request free quotes.