
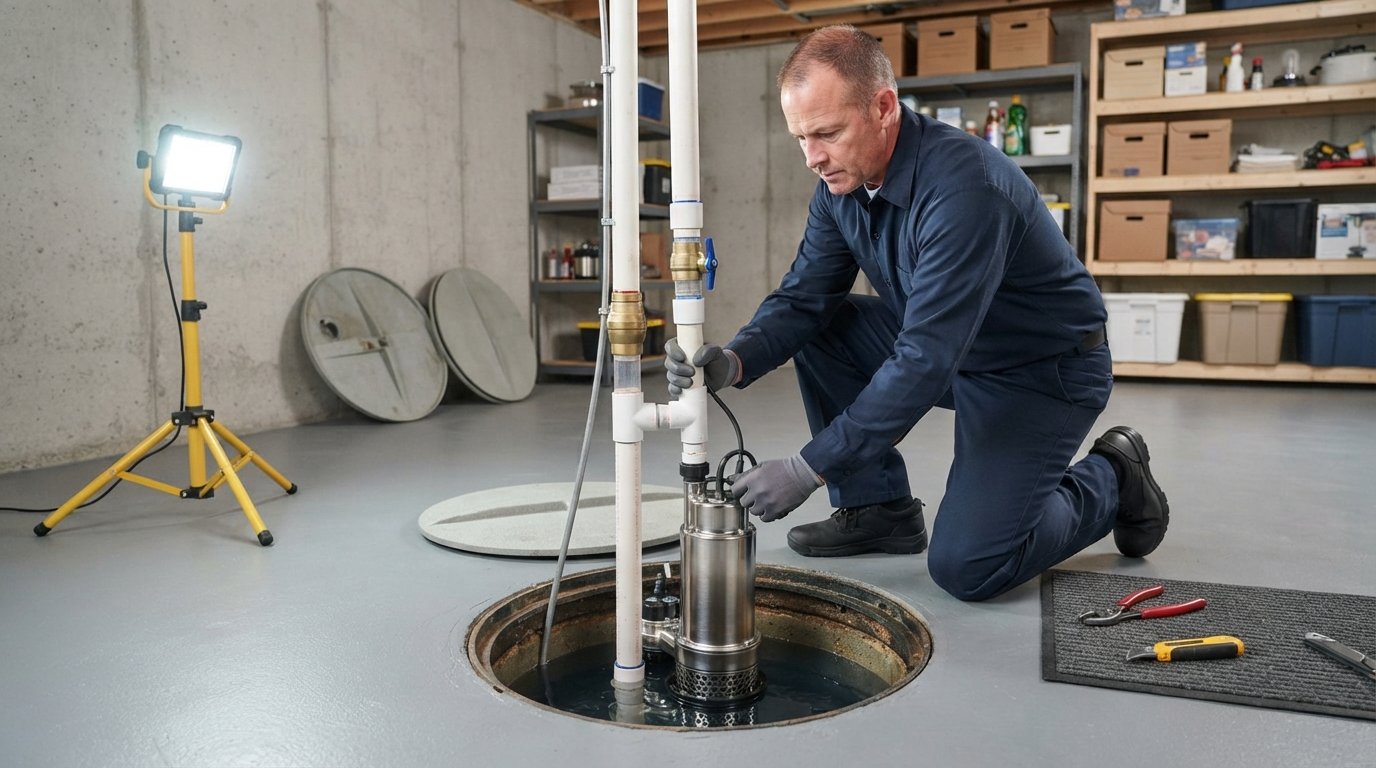
Sump Pump Installation and Maintenance Guide for Dry Basements
Discover a complete sump pump installation and maintenance guide that keeps your basement dry and your foundation safe.

By Margaret Lowe
Learn more about Sump Pump Installation or Replacement for guides, costs, and what to expect.
Compare Sump Pump Installation or Replacement Pros Near You

Enter your ZIP code to compare top-rated local professionals and request free quotes.
Few home emergencies are as disruptive as a flooded basement. Heavy rain, melting snow, or a rising water table can turn a finished rec room into a costly cleanup project in a matter of hours. A sump pump is your primary defense against this scenario, but only if it is installed correctly and maintained consistently. This sump pump installation and maintenance guide walks through every critical step, from choosing the right pump type to performing seasonal checks, so you can protect your foundation and belongings with confidence.
Why Your Home Needs a Sump Pump
Water seeks the lowest point, and for most homes, that point is the basement or crawl space. When soil around your foundation becomes saturated, hydrostatic pressure pushes water through cracks in the walls or floor. A sump pump sits in a specially dug pit, called a basin, and automatically activates when water reaches a certain level, pumping it away from your home to a safe discharge point.
Without this system, even minor groundwater seepage can lead to mold growth, wood rot, rusted appliances, and structural damage. The Federal Emergency Management Agency reports that a single inch of water in a 2,500 square foot home can cause over $25,000 in damage. For homeowners in flood-prone regions or areas with clay soil, a sump pump is not optional; it is an essential component of home maintenance. If you are weighing whether this upgrade fits your needs, our guide on flood-proofing your basement with sump pump installation offers deeper insight into the decision process.
Types of Sump Pumps: Which One Fits Your Home?
Before you start digging, you must choose between two main pump categories: pedestal and submersible. Each has strengths depending on your basement layout, noise tolerance, and budget.
Pedestal pumps have the motor mounted above the basin on a vertical column, with only the intake hose extending into the water. They are easier to service because the motor stays dry, and they typically cost less upfront. However, they are more visible and can be louder than submersible models. Submersible pumps sit entirely inside the basin, sealed against water. They operate more quietly and handle higher volumes of water, making them ideal for larger basements or areas with frequent heavy rain. The tradeoff is a higher price and more complicated access when repairs are needed.
Consider these factors when making your choice:
- Basement size and typical water volume during storms
- Power availability and the need for a backup system
- Noise sensitivity of your living space
- Long-term maintenance costs and ease of service
For most homeowners, a submersible pump with a cast iron or stainless steel housing offers the best balance of durability and performance. If your area experiences frequent power outages, pair your primary pump with a battery backup unit or a water-powered backup to ensure protection during storms when you need it most.
Step-by-Step Sump Pump Installation
Professional installation is recommended for most homes, because improper setup can lead to pump failure, code violations, or even backflow contamination. However, understanding the process helps you ask the right questions and verify that the job is done correctly. The following steps represent a standard installation for a submersible pump.
Step 1: Choose the Location for the Basin
The sump basin should be placed at the lowest point of the basement floor, which is often near a wall where groundwater first enters. The pit must be deep enough to accommodate the pump and allow proper float switch movement, typically 18 to 24 inches deep. Check local building codes, as some municipalities require a specific distance from the foundation wall.
Step 2: Excavate the Pit and Install the Basin
Using a jackhammer or concrete saw, cut a circular opening in the floor, then dig out soil to the required depth. Place the basin in the hole and ensure it is level. Fill the bottom with gravel to create a stable base and allow water to flow freely. The top of the basin should be flush with the floor so it does not create a tripping hazard.
Step 3: Connect the Discharge Pipe
Attach a check valve to the pump's discharge port to prevent water from flowing back into the basin after each cycle. Then run a PVC pipe from the pump up and out through the wall to an exterior discharge point. The pipe must slope away from the house and terminate at least 10 feet from the foundation to avoid re-soaking the soil. Many codes require a gravity drain or a pop-up emitter at the end.
Step 4: Wire the Pump to Power
Sump pumps require a dedicated, grounded 120-volt outlet. The outlet should be installed by a licensed electrician and protected by a ground fault circuit interrupter (GFCI). Never use an extension cord, as it can overheat and cause a fire. If you are adding a battery backup, that unit also needs proper wiring and ventilation.
Step 5: Test the System
Fill the basin with water from a bucket or hose. The float switch should activate the pump when water reaches the preset level, and the pump should run until the basin is nearly empty. Watch for leaks at the joints and confirm that water flows out of the discharge pipe with strong pressure. Repeat the test a few times to ensure consistent operation.
After installation, record the pump model, installation date, and any warranty information. Keep this documentation in your home maintenance file for future reference.
Essential Sump Pump Maintenance Tasks
An installed pump is not a set-and-forget device. Sediment, debris, and mechanical wear can reduce efficiency or cause failure. Regular maintenance extends the life of your pump and ensures it operates when you need it most. Schedule these tasks at least twice a year, ideally in early spring and late fall.
- Inspect the power cord and plug for damage or fraying.
- Clean the inlet screen on the pump to remove debris.
- Test the float switch by pouring water into the basin.
- Check the discharge pipe for clogs or ice blockages.
- Listen for unusual vibrations or grinding noises during operation.
Once a year, unplug the pump and lift it out of the basin to clean the pit itself. Remove any gravel, mud, or small objects that may have accumulated. Also, verify that the check valve operates freely by pushing on the flap. If the valve sticks, replace it immediately, as a faulty check valve can cause the pump to short-cycle and wear out quickly.
For homes with a battery backup system, test the battery every three months. Replace the battery every 3 to 5 years according to the manufacturer's guidelines, since a dead backup provides no protection during a power outage.
Common Sump Pump Problems and How to Solve Them
Even with diligent maintenance, issues can arise. Knowing how to diagnose common problems saves you time and money, and can prevent a minor issue from becoming a flooded basement.
If your pump runs constantly, the problem may be a stuck float switch, an undersized pump, or a high groundwater table. First, check if the float is obstructed by debris. If not, measure the rate of water inflow; if it exceeds your pump's capacity, you may need a larger model. A pump that never runs despite water in the basin often points to a tripped GFCI, a blown fuse, or a faulty float switch. Reset the breaker or replace the float as needed.
Odd noises, such as grinding or rattling, usually indicate worn bearings or debris caught in the impeller. Unplug the pump, clean the impeller area, and inspect for damage. If the noise persists, the pump may need professional servicing or replacement. Most sump pumps have a lifespan of 7 to 10 years, and replacing an aging unit proactively is cheaper than dealing with a flood.
When to Call a Professional for Sump Pump Service
While basic cleaning and testing are DIY-friendly, some tasks require a licensed contractor. If you notice frequent circuit breaker trips, visible rust on electrical components, or water leaking from the pump housing, do not attempt repairs yourself. Electrical issues pose a serious shock risk, and improper plumbing can violate local codes.
Professional technicians can also perform a load test on your pump, verify the discharge line is properly sloped, and check that your sump pit meets code requirements. Many homeowners schedule an annual inspection with a plumber or a basement waterproofing specialist to catch minor issues early. This is especially important if your home is in a low-lying area or has a history of basement moisture.
When searching for a qualified contractor, look for licensed, insured professionals who specialize in sump pump systems. Platforms like USremodel connect you with vetted home improvement experts in your area, allowing you to compare quotes and read reviews before making a decision. This approach takes the guesswork out of hiring and ensures the job is done right the first time.
Extending the Life of Your Sump Pump
A well-maintained sump pump can last 10 years or more, but harsh conditions can shorten that lifespan. High humidity, frequent cycling, and poor power quality all contribute to wear. Here are a few advanced tips to maximize your investment:
- Install a surge protector on the pump's power line to guard against voltage spikes.
- Ensure the basin cover is sealed to reduce evaporation and prevent debris from falling in.
- Consider a high-water alarm that alerts you when the water level rises above normal.
- If your pump runs frequently during dry weather, investigate for a plumbing leak or a high water table.
For homes in areas with frequent storms, a secondary pump with its own float switch can provide redundancy. This system, called a duplex setup, alternates between pumps to balance wear and ensures backup if one unit fails. While more expensive upfront, it offers peace of mind for homeowners who have experienced flooding before.
Sump pump installation and maintenance guide details, such as these, are meant to empower you with knowledge. However, do not underestimate the value of a professional eye. An expert can spot subtle signs of wear, such as a corroded impeller or a hairline crack in the basin, that you might miss during a routine check.
The Role of Sump Pumps in Overall Home Protection
A sump pump works in tandem with other waterproofing measures, including gutter maintenance, downspout extensions, and proper grading around your foundation. Even the best pump cannot compensate for water that is directed straight against your basement walls. Ensure your gutters are clean and that downspouts discharge water at least 5 feet away from the foundation. Also, verify that the soil slopes away from your house so surface water does not pool near the walls.
In addition to protecting your basement, a functional sump pump can increase your home's resale value. Buyers view a dry, well-maintained basement as a major asset, especially in regions prone to heavy rain. A recent survey by the National Association of Realtors found that waterproofing projects, including sump pump installation, recoup over 70% of their cost in added home value. This makes the investment not just protective but financially sound.
If you are planning a basement remodel or finishing project, installing a sump pump before the work begins is far more cost-effective than retrofitting later. It also allows you to incorporate the pump into your design, hiding the basin cover or integrating it into a utility room.
Final Checklist for Year-Round Readiness
To keep your sump pump in peak condition, create a seasonal checklist and stick to it. In the spring, after the snow melts and rains arrive, test your pump weekly for the first month. In the summer, inspect the discharge pipe for insect nests or blockages. In the fall, before heavy rains return, clean the basin and replace the battery backup if needed. In the winter, check that the discharge line is not frozen, as ice can cause water to back up into the basement.
Keep a log of your maintenance activities, noting the date, what you checked, and any parts replaced. This record helps you spot patterns and provides valuable information for a technician if you ever need to call one.
Your sump pump is a silent guardian, working behind the scenes to protect your largest investment. By following the steps outlined in this sump pump installation and maintenance guide, you can ensure that it is always ready to respond when the next storm hits. Whether you are installing a new system or servicing an existing one, take the time to do the job thoroughly. A few hours of preventive care today can save you thousands of dollars and endless headaches tomorrow.