
Solar Plus Battery Backup System Design for Homes
Solar plus battery backup system design for homes explained: sizing, batteries, and costs. Call 8333658755 for a free contractor quote today.

By Elena Shaw
Learn more about Solar Panel Installation and Repair for guides, costs, and what to expect.
Compare Solar Panel Installation and Repair Pros Near You

Enter your ZIP code to compare top-rated local professionals and request free quotes.
A home that keeps the lights on when the grid goes down is no longer a luxury. It is a practical upgrade that more homeowners are planning for in 2026. A solar plus battery backup system design for homes combines solar panels, an inverter, a battery bank, and smart controls so your house can run on stored sunshine at night or during an outage. The design choices you make early (sizing, panel placement, backup circuits, and battery chemistry) determine whether the system saves you money for decades or leaves you frustrated.
This guide walks through the design process step by step. You will see how to size a system for your real usage, how to choose between AC and DC coupling, which loads to back up first, and how to avoid the most common installation mistakes. You will also learn where to find vetted solar and electrical contractors who can turn a plan into a permitted, working system. For homeowners who want a single point of contact for solar, electrical, and remodeling work, USremodel connects you with independent local professionals who handle quotes, permits, and installation.
How a Solar Plus Battery Backup System Works
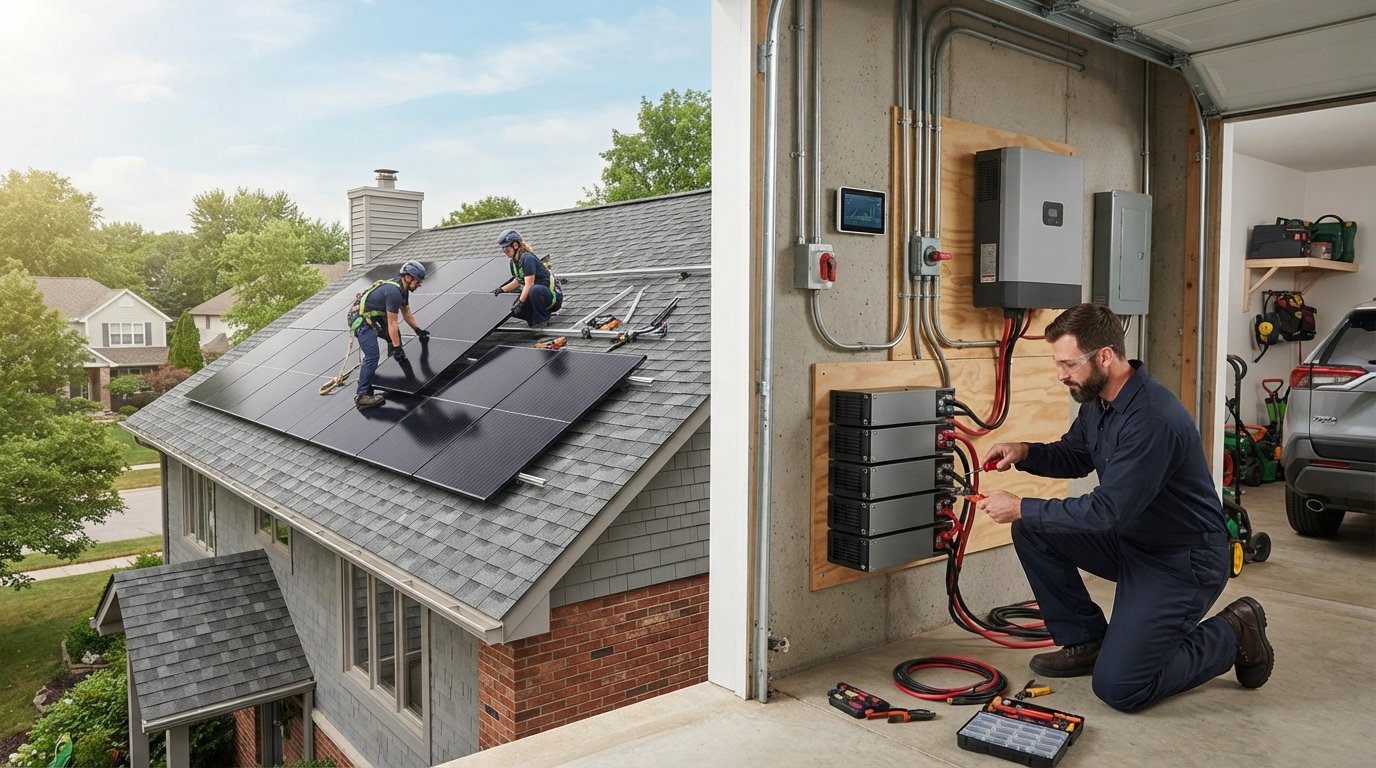
At its core, the system has four jobs: collect energy, convert it, store it, and deliver it to the right circuits at the right time. Solar panels produce direct current (DC) electricity. An inverter converts that DC into alternating current (AC) that your home appliances use. A battery stores excess energy for nighttime or outages. A transfer switch or gateway isolates your home from the utility grid when the grid fails, so your system can keep running safely.
There are two main architectures. In a DC-coupled system, solar panels and batteries share the same inverter and DC bus. This setup is efficient for off-grid or storage-heavy homes because it avoids double conversion losses. In an AC-coupled system, solar has its own inverter, and the battery has a separate inverter or hybrid inverter. AC coupling is often simpler to retrofit onto an existing solar array.
Understanding your daily energy profile matters more than picking a brand. A typical American home uses between 25 and 40 kWh per day, but that average hides huge peaks. An electric oven, heat pump, and EV charger can pull 10 kW or more at once. A well-designed system accounts for both total energy (kWh) and peak power (kW). If you only size for total energy, your battery may trip offline when the well pump or air conditioner starts.
Sizing Your Solar Array and Battery Bank
Sizing starts with a simple energy audit. Pull twelve months of utility bills and note the total kWh used. Then identify which appliances you want to run during an outage. Most homeowners choose a critical loads panel that covers refrigeration, lights, internet, medical equipment, and a few outlets. Whole-home backup costs significantly more because it requires a larger battery and a service upgrade.
Here is a practical framework for sizing:
- Calculate daily critical load: Add the wattage of each backed-up appliance, multiply by hours used, then divide by 1,000 to get kWh.
- Add days of autonomy: Most designs target one to two days of backup. Three days is common in hurricane or wildfire regions.
- Match solar production: A 6 kW to 10 kW array can recharge a 10 to 20 kWh battery in a sunny day, depending on location and shading.
- Check peak output: Confirm the battery inverter can handle your largest motor startup, which can be three times its running wattage.
For example, a homeowner in Texas with a 30 kWh daily use might install a 10 kW solar array and a 20 kWh battery. That combination covers evening loads, recharges by mid-afternoon, and keeps critical circuits running for about 24 hours without sun. A smaller home in Chicago with a 20 kWh daily use might choose a 7 kW array and a 13.5 kWh battery, which is a common residential size.
Do not forget temperature. Lithium iron phosphate (LFP) batteries handle heat better than older nickel manganese cobalt (NMC) chemistries, but all batteries lose capacity in extreme cold. If you live in a northern climate, plan for an insulated garage or conditioned space for the battery. This single detail protects both performance and warranty coverage.
Choosing the Right Battery Technology for Home Backup
Battery chemistry drives cost, safety, lifespan, and where you can install the unit. LFP batteries are now the default for most residential projects because they are thermally stable, last 4,000 to 6,000 cycles, and do not contain cobalt. NMC batteries store more energy per pound, which matters for tight spaces, but they cost more and have a shorter cycle life.
Lead-acid batteries still appear in budget off-grid builds. They are cheap upfront but require ventilation, watering, and frequent replacement. For a grid-tied home that wants outage protection, LFP is almost always the better long-term value.
Beyond chemistry, compare these features:
- Usable capacity: Many batteries advertise 13.5 kWh but only allow 90 to 100 percent depth of discharge. Read the spec sheet, not the marketing page.
- Continuous and peak power: A battery with high capacity but low output cannot start an air conditioner.
- Inverter compatibility: Some batteries only work with specific hybrid inverters. Confirm compatibility before you buy.
- Warranty terms: Look for a ten-year warranty with a specified throughput (MWh) limit, not just a year count.
- Monitoring and control: App-based monitoring and time-of-use scheduling let you shift energy to avoid peak utility rates.
Stackable batteries make expansion easier. If you start with one 10 kWh unit and add a second later, you avoid a full system redesign. Just confirm the inverter and wiring can handle the extra capacity from day one.
Designing Backup Circuits and Load Management
The difference between a frustrating backup system and a seamless one is load management. You do not need to power everything at once. You need to power the right things at the right time. A critical loads panel, sometimes called a subpanel, separates backed-up circuits from the rest of the house. During an outage, only those circuits receive battery power.
Typical critical loads include the refrigerator, freezer, furnace blower, sump pump, internet router, security system, and a few lighting circuits. Add a dedicated circuit for medical devices if anyone in the home depends on them. High-draw appliances like electric ranges, central air conditioners, and EV chargers usually stay off the backup panel unless you invest in a much larger battery.
Smart load management takes this further. Some inverters and gateways can automatically shed loads or cycle large appliances to stretch battery runtime. For example, the system might pause the EV charger while the well pump runs, then resume charging when demand drops. This software layer often costs less than adding another battery and delivers similar real-world results.
If you are also upgrading lighting as part of your renovation, efficient LED fixtures reduce the load your battery must carry. In our guide on modern lighting design, we explain how to cut lighting wattage without sacrificing comfort, which directly extends backup runtime.
Wiring, Inverters, and Electrical Upgrades
Most homes need at least one electrical upgrade before a battery system goes in. A 200-amp service panel is the practical minimum for a whole-home design. Older homes with 100-amp panels may need a service upgrade, a line-side tap, or a critical loads subpanel to avoid overloading the main breaker.
Hybrid inverters simplify the design because they manage solar, battery, and grid power in one unit. They also support generator input, which gives you a third layer of resilience. String inverters with separate battery inverters cost less in some configurations but add wiring complexity and more points of failure.
Disconnects, rapid shutdown devices, and arc-fault protection are code requirements, not optional extras. The National Electrical Code (NEC) has specific rules for rapid shutdown of solar arrays on rooftops, and utilities often require a visible AC disconnect near the meter. Your installer should handle these details, but you should understand them so you can review the permit drawings.
Permitting timelines vary widely. In many jurisdictions, solar plus storage permits take two to six weeks, and utility interconnection approval can add another two to eight weeks. Starting the paperwork early keeps the project on schedule, especially if you are coordinating a roof replacement or panel upgrade at the same time.
Cost, Incentives, and Payback for Solar Plus Storage
A typical residential solar plus battery system costs between $25,000 and $50,000 before incentives, depending on array size, battery capacity, and local labor rates. The federal investment tax credit (ITC) covers a percentage of the total cost when you install solar and storage together, and many states and utilities add rebates or performance payments on top.
Payback depends on three variables:
- Your electric rate and how fast it rises. Higher rates shorten payback.
- Time-of-use rates. Shifting battery discharge to expensive evening hours increases savings.
- Incentives and net metering rules. Some utilities pay less for exported solar than they charge for imported power, which makes storage more valuable.
Most homeowners see a payback period between seven and twelve years when they include incentives and time-of-use arbitrage. Backup power itself has value that does not show up in a simple payback calculation. After a multi-day outage, few homeowners regret the investment.
Financing options include solar loans, home equity lines of credit, and property assessed clean energy (PACE) programs. Compare total cost of ownership, not just monthly payment. A low monthly payment on a twenty-year loan can cost far more than a shorter loan with a slightly higher rate.
Common Design Mistakes to Avoid
The most expensive mistakes happen before installation. Undersizing the battery is the classic error. Homeowners buy a single 10 kWh unit, then discover it cannot run the air conditioner through a hot night. Oversizing solar without matching storage is another. Extra panels send power to the grid at low export rates while the battery sits empty by midnight.
Other frequent problems include:
- Ignoring shade: One shaded panel can drag down a whole string. Microinverters or power optimizers solve this but must be planned early.
- Skipping the critical loads panel: Without it, you either back up everything (expensive) or nothing (useless).
- Poor battery placement: Heat, cold, and flooding risk shorten battery life and can void warranties.
- No monitoring plan: You cannot manage what you cannot see. Set up alerts for battery state of charge and system faults.
Finally, do not treat solar and battery design as separate projects. The inverter, battery, and solar array must be engineered as one system. A mismatch between components leads to reduced output, voided warranties, and frustrating service calls.
Finding Qualified Solar and Battery Installers
Design is only half the project. Installation quality determines whether the system performs as modeled. Look for installers who hold North American Board of Certified Energy Practitioners (NABCEP) certification, carry proper licensing and insurance, and provide a detailed commissioning report at the end of the job.
Get at least three quotes and compare more than price. Ask for the expected production estimate, the battery runtime under specific loads, and the warranty terms for labor as well as equipment. A quote that promises unrealistic savings is a red flag. A good installer will explain trade-offs honestly and show you the assumptions behind the numbers.
If you are planning solar alongside a roof replacement, bathroom remodel, or panel upgrade, coordinating contractors saves time and money. A single point of contact reduces scheduling conflicts and ensures the electrical work meets code before the solar crew arrives.
Solar plus battery backup design rewards careful planning. Start with an honest energy audit, size the battery for real loads, choose LFP chemistry for longevity, and design the backup panel around the circuits that matter most. Add a qualified installer and a clear monitoring plan, and your home will stay powered through the next outage while trimming your utility bills every sunny day.