
Retaining Wall Installation Cost and Drainage Requirements
Plan your project with confidence. Get retaining wall installation cost and drainage requirements clear, then call (833)-365-8755 for expert help.

By Rachel Green
Learn more about Masonry Construction Services for guides, costs, and what to expect.
Compare Masonry Construction Services Pros Near You

Enter your ZIP code to compare top-rated local professionals and request free quotes.
A sloped yard can be a landscape asset or a slow-motion disaster. When soil creeps downhill with every rainstorm, a retaining wall becomes the structural answer that protects your foundation, your driveway, and your patience. But two questions dominate every homeowner's research: what will it cost, and how do you handle water? The retaining wall installation cost and drainage requirements are inseparable, because a wall that sheds water poorly will crack, lean, and fail long before its time. This guide walks through material options, permit triggers, drainage essentials, and real-world cost ranges so you can plan with confidence and avoid surprise bills down the road.
Wall Types Compared: Timber, Segmental Block, Poured Concrete, and Boulder
Not every retaining wall is built the same way, and the material you choose drives both the budget and the drainage strategy. Timber walls use pressure-treated lumber or railroad ties stacked in a crib or cantilever pattern. They are the least expensive option per linear foot and are friendly to do-it-yourselfers, but they have the shortest lifespan (roughly 15 to 25 years in most climates) and are vulnerable to rot and insect damage when drainage is poor. Segmental block walls, often called retaining wall blocks or modular blocks, interlock without mortar and come in dozens of colors and textures. They offer a strong balance of cost, durability, and curb appeal, and most systems are engineered with built-in drainage channels. Poured concrete walls are the most robust option for tall or load-bearing situations, often requiring rebar and professional forming, and they can be faced with stone or brick for aesthetics. Boulder walls use natural stone set into the slope, delivering a rustic look and excellent longevity, but they demand skilled equipment operators and careful placement to remain stable.
Each material carries different implications for permits and engineering. Timber walls under about three feet tall in many jurisdictions can be permitted with a simple application or may not require a permit at all, while segmental block and poured concrete walls often trigger engineering review once they exceed three or four feet. Boulder walls are heavy and require a solid base, so even modest heights may need a geotechnical assessment. The key takeaway is that material choice is not just about looks; it determines how much oversight, excavation, and drainage work the project requires.
Height Thresholds That Trigger Engineering and Permits
Height is the single biggest factor in whether your retaining wall project stays simple or becomes a regulated construction event. Most building departments use four feet as a common threshold: walls up to four feet from the bottom of the footing to the top of the wall often qualify for a simplified permit or no permit, while anything taller usually requires stamped engineering drawings, a soil report, and inspections. Some jurisdictions set the trigger at three feet, especially when the wall supports a driveway, a pool, or a structure. Others measure differently, counting the retained soil height rather than the exposed face, so a wall that looks three feet tall from the lawn might be five feet of retained earth on the uphill side.
Engineering matters because soil is heavy. A cubic foot of saturated soil can weigh well over 100 pounds, and a tall wall must resist that lateral pressure plus surcharge loads from anything above it, such as a patio, a parked car, or a neighboring structure. An engineer will specify footing size, block type, reinforcement (such as geogrid layers), and drainage details. Skipping this step on a tall wall is one of the most common and expensive mistakes homeowners make, because a failed wall can damage property and create liability. Before you buy materials, call your local building department with the proposed height and location, and ask specifically what triggers a permit and whether engineering is required. That five-minute call can save thousands later.
Drainage Essentials: Backfill, Weep Holes, and Footing Depth
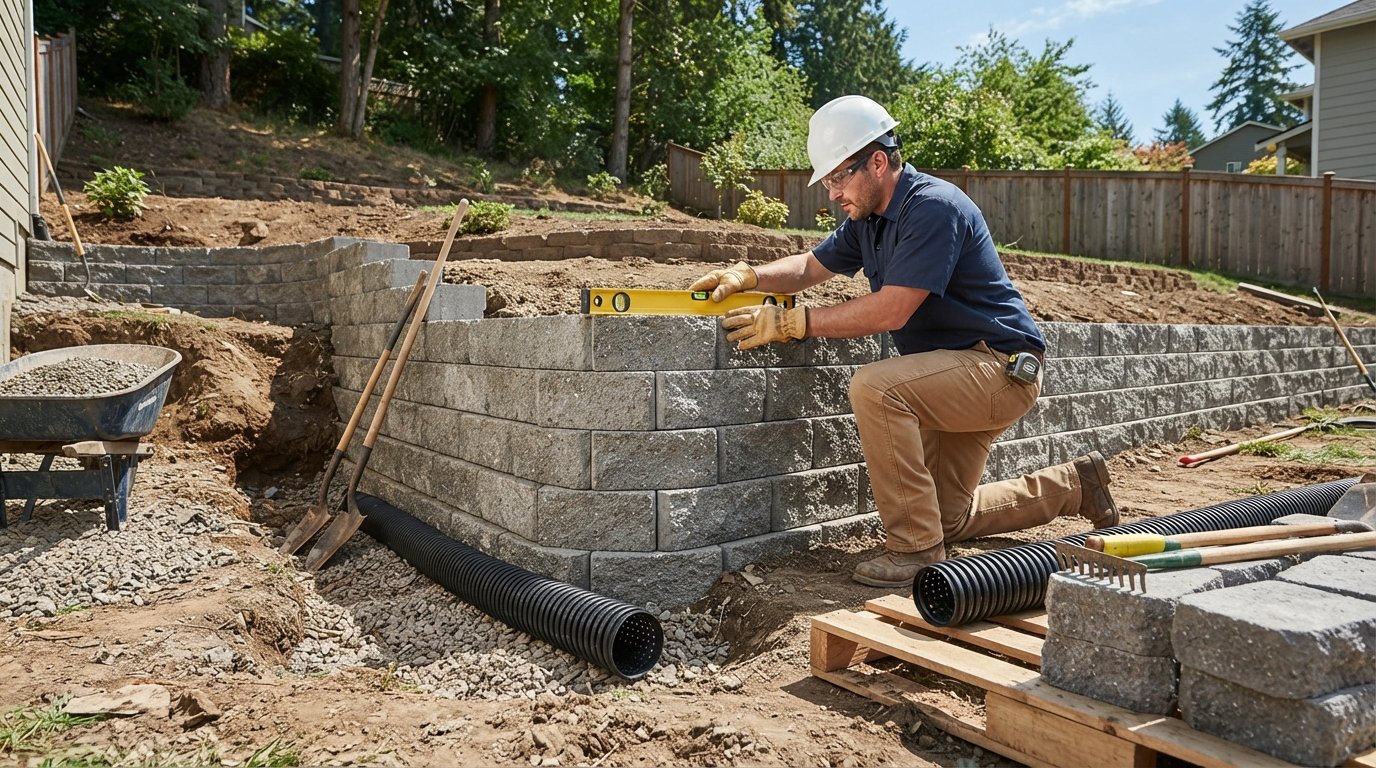
Water is the enemy of every retaining wall. When rain saturates the soil behind a wall, it adds weight and hydrostatic pressure that pushes the wall outward. Proper drainage relieves that pressure and directs water away from the structure. The core components are a free-draining backfill, a perforated drain pipe, and weep holes. Behind the wall, a layer of gravel or crushed stone (often wrapped in filter fabric) allows water to move freely down to the drain pipe rather than pooling against the blocks. The perforated pipe, sometimes called a French drain or footing drain, collects that water and carries it to a daylight outlet or a dry well. Weep holes are small openings in the wall face that let any remaining water escape, preventing pressure from building up.
Footing depth is equally critical. The footing must extend below the frost line in cold climates to prevent heaving, and it must be wide enough to distribute the wall's weight. A common rule of thumb is that the footing should be at least six inches thick and twice the width of the wall base, but local codes and engineer specifications always take precedence. Backfill material should be granular and compacted in lifts, never clay-heavy soil that holds water. If your yard slopes toward the wall, consider a swale or surface drain uphill to divert runoff before it ever reaches the wall zone.
Here is a simple checklist for drainage planning before construction begins:
- Confirm the frost line depth and footing requirements with your local building department.
- Plan a gravel backfill zone at least 12 inches wide behind the wall, wrapped in filter fabric.
- Install a perforated drain pipe at the base, sloping to a daylight outlet.
- Include weep holes every 4 to 6 feet along the wall face, kept clear of debris.
- Add surface grading or a swale uphill to redirect runoff away from the wall.
These details add modest cost upfront but dramatically extend the wall's life. A wall built without them may look fine for a season or two, then begin to lean or crack after the first heavy spring.
Cost Ranges by Material and Linear Foot
Retaining wall installation cost varies widely by material, height, access, and region, but national averages give a useful starting point. For a wall in the three-to-four-foot range, homeowners typically see the following per-linear-foot ranges, including materials, excavation, drainage, and labor:
- Timber: $20 to $40 per linear foot. Best for low walls, garden beds, and budget-conscious projects.
- Segmental block: $30 to $60 per linear foot. The most popular choice for curb appeal and durability.
- Poured concrete: $50 to $90 per linear foot. Higher cost reflects forming, rebar, and engineering.
- Boulder or natural stone: $40 to $80 per linear foot. Equipment and skilled labor drive the price.
These figures assume reasonable access for equipment and a straightforward soil profile. Add 20 to 50 percent for steep slopes, tight access (such as a narrow side yard), or walls that require engineering and permits. A 50-foot segmental block wall at $45 per foot lands around $2,250, while the same length in poured concrete could run $3,500 to $4,500. Taller walls cost more per foot because they require larger footings, geogrid reinforcement, and more block courses. Drainage work is usually bundled into these ranges, but if your site needs extensive regrading or a new dry well, budget an extra $500 to $2,000.
When comparing quotes, insist on line-item breakdowns that separate excavation, base material, block, drainage, and labor. A suspiciously low bid often omits drainage or skimps on footing depth, which is exactly where failures begin. If you are also planning interior updates, our guide on bathtub installation cost shows how the same line-item approach keeps renovation budgets honest.
Warning Signs a Failing Wall Needs Professional Evaluation
Retaining walls rarely fail without warning. Small symptoms appear first, and catching them early can mean the difference between a repair and a full rebuild. Watch for these red flags:
- Visible leaning or bulging, especially near the middle of the wall.
- Cracks that widen over time, or stair-step cracks in block walls.
- Soil or water seeping through the wall face, or muddy weep holes.
- Settling at the base, with gaps under the bottom course.
- Tree roots or heavy vegetation pushing against the wall.
Any of these signs warrants a professional inspection, particularly if the wall is taller than three feet or supports a driveway or structure. A failing wall can release tons of soil and debris suddenly, so do not delay. A qualified contractor can assess whether drainage improvements, reinforcement, or partial reconstruction will solve the problem.
Finding a reliable contractor is its own challenge. A directory like Homes.Contractors can connect you with pre-vetted professionals who understand local codes and drainage best practices, which is especially helpful if you are new to the area. Whether you choose a specialized wall builder or a general landscape contractor, ask for references on similar projects and confirm they pull the required permits.
Retaining wall installation cost and drainage requirements come down to planning: choose a material suited to your height and soil, respect permit triggers, and invest in drainage from day one. A well-built wall with proper backfill, weep holes, and footing depth will hold its ground for decades, protect your landscape, and spare you the emergency repair bills that come with water pressure left unchecked. Start with a local permit call, get two or three detailed quotes, and build the wall once, the right way.