
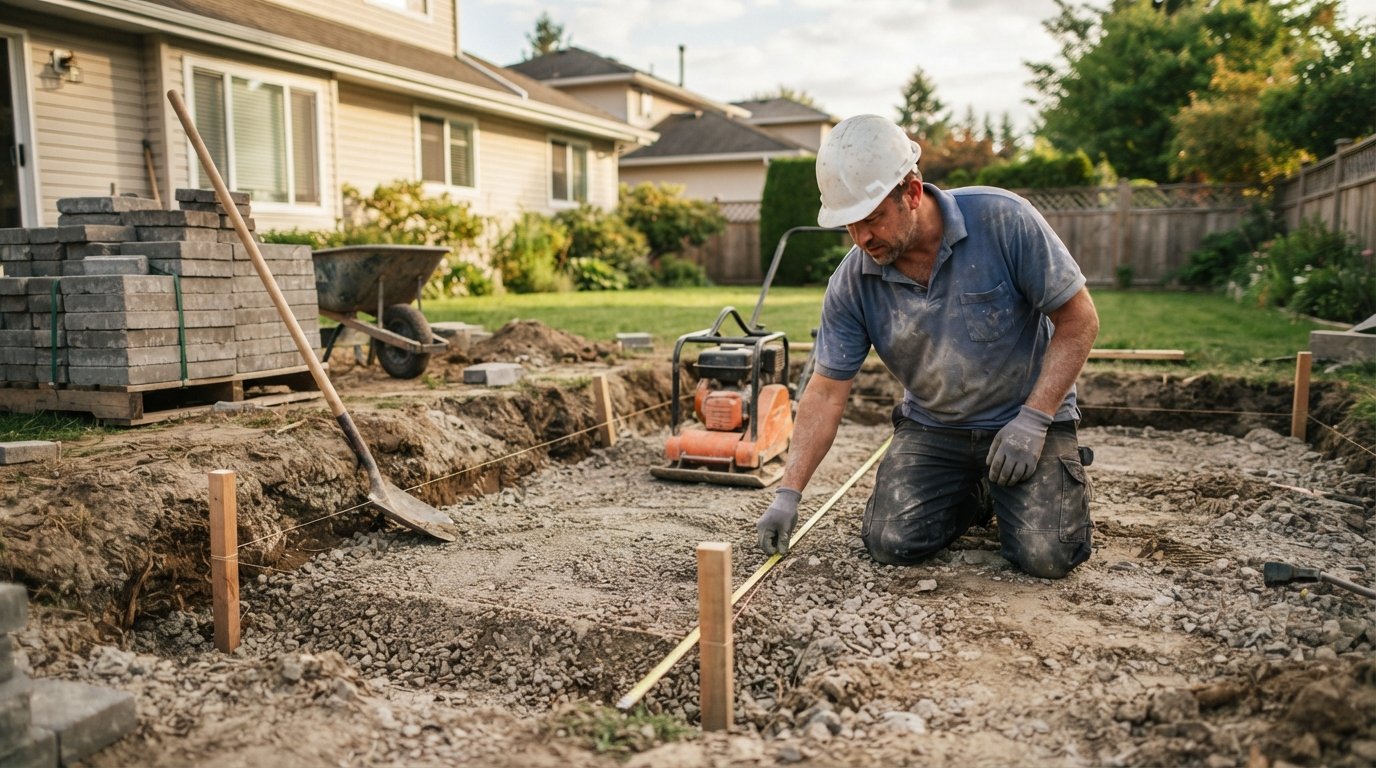
Paver Patio Base Preparation Mistakes to Avoid
Avoid costly patio failures by steering clear of these base preparation mistakes. Call (833)-365-8755 for expert guidance.

By Justin Parker
Learn more about Patio Remodel or Addition for guides, costs, and what to expect.
Compare Patio Remodel or Addition Pros Near You

Enter your ZIP code to compare top-rated local professionals and request free quotes.
A paver patio can transform a backyard into an outdoor living room, but its longevity hinges on what happens before the first paver is laid. Homeowners often focus on the finish, the color of the stone, the pattern, the fire pit, while the base, the invisible foundation, receives little attention. That oversight is costly. According to industry data, improper base preparation is the leading cause of paver patio failure, resulting in settlement, heaving, and uneven surfaces within just a few seasons. The good news is that most of these failures are entirely preventable. By understanding the paver patio base preparation mistakes to avoid, you can ensure your investment stands up to traffic, weather, and time.
Mistake 1: Skimping on Excavation Depth
One of the most common and damaging errors is digging too shallow. The base of a paver patio is not just a thin layer of sand; it is a carefully engineered system of compacted aggregate that distributes weight and promotes drainage. The required excavation depth depends on the intended use and the local climate. For a pedestrian patio, you typically need a base of 4 to 6 inches of compacted gravel. For driveways or areas with heavy loads, that depth increases to 8 to 12 inches. In cold climates where frost heave is a concern, the base must extend below the frost line, which can mean 12 inches or more.
Unfortunately, many DIYers and even some inexperienced contractors cut corners by excavating only enough for the pavers and a thin sand bed. The result is a patio that shifts, cracks, and sinks. The excavation must account for the thickness of the pavers, the sand setting bed (about 1 inch), and the full compacted base. As a rule of thumb, excavate 7 to 9 inches below the final patio grade for a standard walkway or patio, and more for vehicular use. Always check local building codes for frost depth requirements.
Proper excavation also involves removing all organic material, such as grass, roots, and topsoil. These materials decompose over time, creating voids that lead to settlement. If you leave them in place, you are essentially building on a sponge that will collapse under the first heavy rain.
Mistake 2: Using the Wrong Base Material
Not all gravel is created equal. The base material must be a well-graded aggregate, typically crushed stone with a mix of particle sizes from fines to 3/4 inch. This composition allows for tight interlock and excellent compaction. Common choices include crushed stone base (often called item #4 or 3/4 inch minus), which contains stone dust and smaller particles that fill voids. Avoid using pea gravel or rounded river rock; these materials do not compact well because the rounded stones slide past each other, leading to a loose, unstable base.
Another mistake is using sand as the primary base. Sand is only for the setting bed, a 1-inch layer that helps level the pavers. A thick sand base will shift and retain water, causing the patio to become uneven and promoting weed growth. In some regions, especially where freeze-thaw cycles are common, a geotextile fabric should be laid between the subsoil and the base material to prevent fine soil particles from migrating up into the gravel, which can compromise drainage and stability.
Climate and soil conditions also dictate base material selection. In areas with expansive clay soils, a thicker base and possibly a geogrid reinforcement may be necessary to prevent movement. In sandy soils, drainage is less of a concern, but the base still needs proper compaction. For homeowners in Chicago or Texas, where soil conditions vary widely, consulting a local hardscaping professional is wise. If you are planning a larger remodel, you might also consider how other projects, like basement finishing contractors, manage moisture and structural support, as the principles of proper base preparation often apply across home improvement projects.
Mistake 3: Failing to Compact in Layers
Compaction is the single most critical step in base preparation, yet it is frequently done incorrectly. You cannot simply dump 6 inches of gravel and run a plate compactor over it once. The base must be compacted in lifts, typically 2 to 4 inches at a time. Each layer should be thoroughly compacted with a mechanical plate compactor or vibratory roller before adding the next. This process ensures that the entire depth of the base achieves maximum density and load-bearing capacity.
Skipping layers or under-compacting leaves voids and loose spots that will settle unevenly under foot traffic or the weight of furniture. A properly compacted base should be so hard that you cannot leave a footprint when walking on it. For larger patios, a vibratory plate compactor is essential; hand tamping is insufficient for anything beyond a small walkway. Also, ensure the base is slightly moist when compacting, as a little moisture helps particles lock together, but avoid over-wetting, which can cause the base to become muddy and unstable.
After compaction, check the surface for any low or high spots. Use a straightedge or a long level to identify irregularities and fill or scrape as needed. This step is your last chance to correct grading before the sand and pavers go down.
Mistake 4: Neglecting Slope and Drainage
Water is the enemy of any patio. Without proper slope, water will pool on the surface, seep into the joints, and undermine the base. A common mistake is to make the patio perfectly flat or to slope it toward the house. The patio should slope away from the house at a minimum of 1 to 2 percent (1/8 to 1/4 inch per foot) to direct water away from the foundation. This slope should be established during excavation and maintained through the base and sand layers.
In addition to surface slope, consider subsurface drainage. If your patio is in a low spot or surrounded by landscaping that traps water, installing a French drain or a perforated pipe in the base can help. The base itself should be free-draining; using a well-graded aggregate ensures that water percolates through rather than sitting. However, if the subsoil is clay or otherwise impermeable, you may need to direct water to a dry well or storm drain. Ignoring drainage can lead to heaving in winter, mosquito breeding in summer, and a host of other problems.
Another drainage-related mistake is failing to compact the subgrade (the soil beneath the base) and shape it to the same slope. If the subgrade is uneven or slopes incorrectly, the base will follow suit. Take the time to grade the subsoil properly before bringing in any aggregate.
Mistake 5: Overlooking Edge Restraint
Edge restraint is the unsung hero of a paver patio. Without it, the pavers at the perimeter will gradually spread outward, especially under the pressure of foot traffic and freeze-thaw cycles. This migration creates gaps, loosens the interlock, and eventually leads to a failing patio. Many homeowners and inexperienced installers skip edge restraint to save time or money, only to regret it later.
There are several types of edge restraint, including plastic, aluminum, and concrete. Plastic edge restraints are affordable and easy to install, but they may not be suitable for heavy loads or extreme temperatures. Aluminum is more durable and provides a cleaner look. Concrete curb is the most permanent option and is often used for driveways. Regardless of the material, the edge restraint must be anchored into the base, not just the sand, and secured with spikes long enough to penetrate the compacted gravel. The restraint should be set so its top is flush with the paver surface, allowing for a neat, finished edge.
Proper installation of edge restraint also involves creating a small trench along the perimeter, setting the restraint, and backfilling with soil or gravel to lock it in place. This step ensures that the entire patio acts as a unified system, resisting movement from all directions.
Mistake 6: Improper Joint Sand and Compaction
After the pavers are laid, joint sand is swept into the gaps to lock them together. But the type of sand and the method of application matter. Using regular play sand or masonry sand is a mistake because it washes out easily and does not provide stable interlock. Instead, use polymeric sand or a specially graded joint sand that hardens when wet. Polymeric sand is particularly effective because it binds the pavers together and resists erosion, weeds, and insects.
Another common error is failing to compact the pavers after laying and before applying joint sand. A plate compactor with a rubber pad should be run over the pavers to seat them into the sand bed and ensure uniform height. Then, apply the joint sand, sweep it into the joints, and compact again. Finally, mist the patio lightly to activate the polymeric sand (if using) and allow it to cure. Skipping these steps leaves the pavers loose and the joints vulnerable.
It is also important to fill the joints completely. If the sand is not compacted into the joints, the pavers can shift, and the sand will wash out. A second application of sand after initial compaction is often necessary to top off the joints.
What to Inspect Before the Pavers Are Laid
Before you give the go-ahead to lay pavers, do a thorough inspection of the prepared base. This quality control step can save you from costly repairs down the road. Start by checking the depth and material of the base. Dig a small test hole to verify that the base is the correct thickness and that it is made of proper aggregate. Ensure that it is compacted to the point of being hard and unyielding. Check the slope with a level or straightedge; it should consistently fall away from the house. Look for any soft spots or areas where the base feels spongy, which indicate inadequate compaction.
Also inspect the edge restraint. It should be securely anchored and aligned with the planned patio perimeter. If a geotextile fabric was used, make sure it is not torn or bunched. Finally, confirm that the sand setting bed is uniform and no more than 1 inch thick. If any of these elements are off, address them before the pavers go down. It is far easier to fix a base than to redo a finished patio.
Questions to Ask a Hardscaping Contractor Before Signing
Hiring a professional is often the best way to ensure a proper base, but not all contractors are created equal. Ask potential contractors about their base preparation process. Specifically, inquire about excavation depth, base material, and compaction methods. A reputable contractor will be able to explain the why behind each step and provide references from previous patio installations. Ask how they handle drainage and whether they use edge restraint. Also, ask about their warranty and what it covers; a solid warranty that includes base failure is a sign of confidence in their work.
It is also wise to check licenses and insurance. In many states, hardscaping contractors must be licensed and carry liability insurance and workers compensation. Do not hesitate to ask for proof. Finally, get everything in writing, including the scope of work, materials, timeline, and payment schedule. A detailed contract protects both parties. If you are unsure where to find qualified professionals, resources like Homes.Contractors offer directories of pre-vetted contractors for various home improvement projects, including hardscaping and patio installation.
Remember that the lowest bid is not always the best value. A contractor who cuts corners on the base may save you money upfront but cost you far more in repairs. Invest in quality workmanship and materials, and your paver patio will reward you with decades of beauty and function.
Final Thoughts on Building It Right
A paver patio is a significant investment, and the base is the foundation of that investment. By avoiding these common mistakes, you can ensure that your patio remains level, stable, and beautiful for years to come. Whether you do it yourself or hire a pro, pay attention to excavation depth, base material, compaction, slope, edge restraint, and joint sand. Inspect the base before pavers are laid, and ask the right questions before signing a contract. Your diligence will pay off every time you step onto a perfectly prepared patio.