
Garage Workshop Conversion Planning and Cost Guide
Plan your garage workshop conversion with confidence. Call (833)-365-8755 for expert contractor matching and cost guidance.

By Justin Parker
Learn more about Garage Addition or Remodel for guides, costs, and what to expect.
Compare Garage Addition or Remodel Pros Near You

Enter your ZIP code to compare top-rated local professionals and request free quotes.
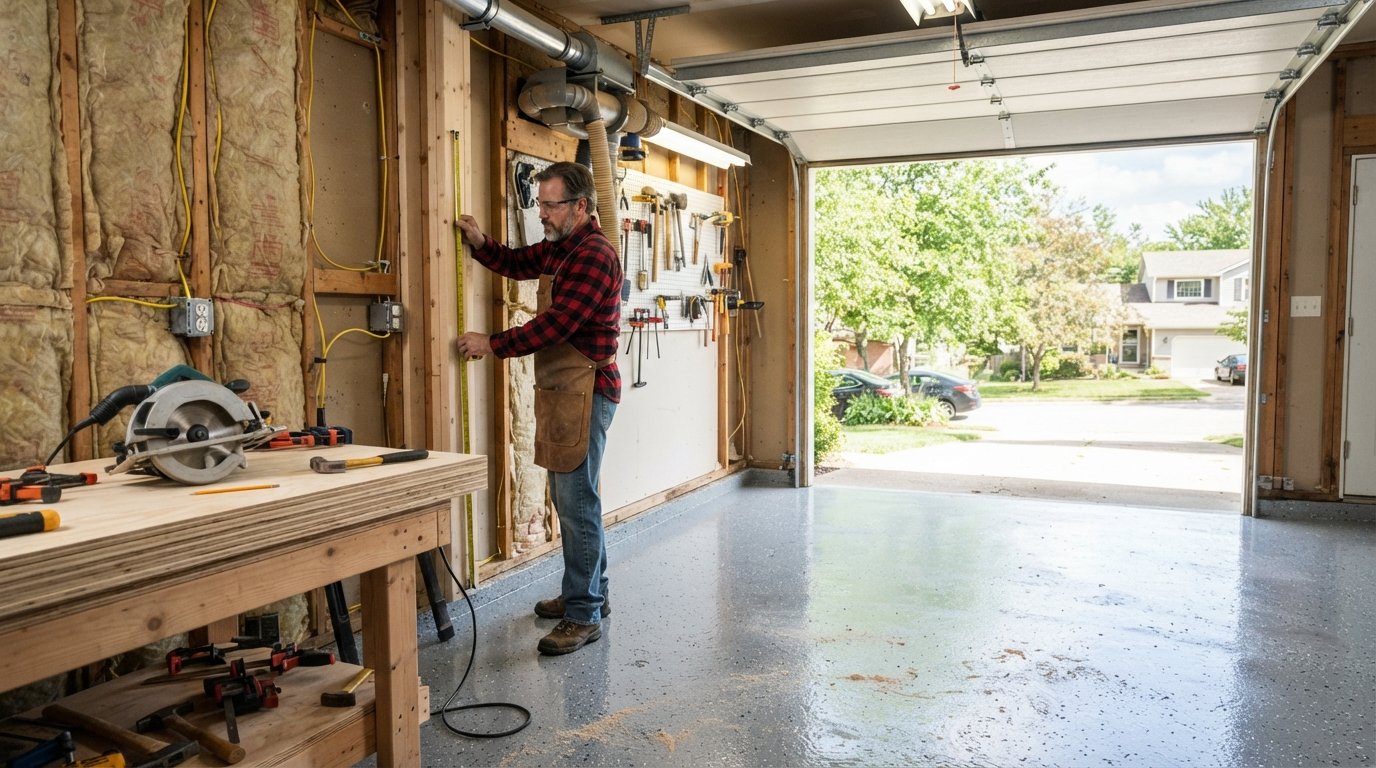
Your garage is the largest unfinished room in your house, and it is sitting there wasting potential. Converting it into a dedicated workshop transforms dead storage space into a productive, organized area for woodworking, auto repair, metal fabrication, or any hobby that needs room to breathe. The garage workshop conversion planning and cost process involves more than sweeping the floor and hanging a few lights. You need to think about insulation, electrical capacity, flooring, ventilation, and permits before you ever pick up a hammer. Get those details right, and you create a space that works year round. Get them wrong, and you end up with a dusty, freezing, underpowered room you avoid using. This guide walks you through every major decision, with real cost ranges and practical advice for planning a conversion that fits your budget and your workflow.
Start with a Clear Plan and Honest Budget
Before you buy a single sheet of plywood, define what the workshop is actually for. A woodworking shop has different needs than an auto repair bay or an electronics bench. Woodworkers need dust collection, ample outlets, and floor space for large tools. Auto enthusiasts need a lift or heavy-duty jack points, chemical-resistant flooring, and strong ventilation for fumes. Electronics hobbyists need clean benches, anti-static surfaces, and stable power. Write down the specific tools and activities you plan to support, then measure your garage dimensions and note the ceiling height, door widths, and existing utility locations.
Your budget should cover three categories: materials, labor, and contingency. For a garage workshop conversion, typical total costs range from $8,000 for a basic DIY upgrade to $40,000 or more for a fully finished, heated, and wired professional space. Most homeowners land in the $15,000 to $25,000 range when hiring contractors for major systems work. Set aside 15 to 20 percent of your total budget for surprises, because garages often hide problems like cracked slabs, inadequate wiring, or water intrusion that only become visible once you start work.
A realistic budget breakdown for a mid-range conversion looks like this:
- Insulation and drywall: $2,000 to $6,000
- Electrical upgrade and wiring: $2,500 to $8,000
- Heating and ventilation: $1,500 to $5,000
- Flooring: $1,500 to $6,000
- Permits and inspections: $300 to $1,500
- Tools, benches, and storage: $1,000 to $5,000
These numbers shift based on your region, garage size, and how much work you do yourself. A 400-square-foot detached garage in a mild climate costs far less to convert than a 600-square-foot attached garage in a cold climate where you need serious heating and insulation. If you are also planning larger home improvements alongside this project, our guide on kitchen remodel costs and planning can help you sequence projects and avoid budget overlap.
Insulation, Ventilation, and Heating for Year-Round Comfort
An uninsulated garage is miserable in winter and unbearable in summer. Insulation is the single most impactful upgrade for making your workshop usable year round. Start with the walls and ceiling, then address the garage door. Fiberglass batts are the most budget-friendly option, but rigid foam boards and spray foam deliver better performance and air sealing. For a garage in a cold climate, aim for R-13 to R-15 in the walls and R-30 to R-38 in the ceiling. In milder climates, R-11 walls and R-19 ceiling are often sufficient. Do not forget the garage door: an insulated door or a DIY insulation kit can cut heat loss dramatically.
Ventilation matters just as much as insulation, especially if you work with solvents, paints, or fine dust. A simple exhaust fan mounted in a wall or ceiling can pull fumes and airborne particles out of the space. For woodworking, a dedicated dust collection system connected to your major tools is essential, not optional. It protects your lungs and keeps the shop clean. If you plan to spray finishes or weld, you need a more robust ventilation strategy, possibly including a make-up air system to replace the air being exhausted.
Heating options range from simple to sophisticated. A small electric space heater works for occasional use in a well-insulated garage, but it will struggle in extreme cold. A mini-split heat pump provides both heating and cooling, runs efficiently, and requires no ductwork. It is the gold standard for garage workshops, though it costs $2,000 to $5,000 installed. Propane or natural gas heaters deliver powerful heat but require venting and a fuel source. Radiant floor heating is luxurious but expensive to install, typically $6 to $12 per square foot. Whichever system you choose, size it based on your garage's square footage, insulation level, and climate zone.
Electrical Capacity for Tools, Lighting, and Dust Collection
Most garages come with a single 15-amp circuit and maybe two outlets. That is nowhere near enough for a workshop. You need to plan your electrical system around the tools you will actually run. A table saw draws 15 amps on its own. Add a dust collector, shop vac, air compressor, and lighting, and you can easily exceed 50 amps. The solution is a subpanel fed from your main electrical panel, with dedicated circuits for high-draw tools.
Here is a practical electrical plan for a typical workshop:
- Install a 60-amp or 100-amp subpanel in the garage.
- Run at least four to six 20-amp circuits for general outlets.
- Add one or two 240-volt circuits for large tools like table saws, welders, or compressors.
- Install separate circuits for lighting and dust collection so a tripped breaker does not plunge you into darkness.
- Place outlets every 6 feet along walls and add ceiling outlets for retractable cord reels.
Lighting deserves its own attention. Fluorescent shop lights are cheap but flicker in cold temperatures. LED shop lights are brighter, more efficient, and instant-on. Aim for 50 to 75 lumens per square foot for general work, and add task lighting at benches and machines. If you do detailed work, consider a mix of overhead and adjustable task lights to eliminate shadows.
Hiring a licensed electrician for the subpanel and major circuits is money well spent. DIY electrical work is risky and often voids insurance coverage if something goes wrong. A licensed electrician will also pull the proper permits and ensure your work passes inspection. For more guidance on selecting qualified tradespeople, resources like ContractorHomeQuotes offer cost data and contractor selection advice that can help you compare bids and avoid overpaying.
Flooring That Handles Weight, Chemicals, and Moisture
Concrete is the default garage floor, and it is a solid base for a workshop. But bare concrete is cold, dusty, and unforgiving on your feet and knees. It also absorbs oil, chemicals, and moisture. You have several flooring options, each with trade-offs in cost, durability, and comfort.
Epoxy coatings are popular because they seal the concrete, resist chemicals, and clean up easily. A professional epoxy job costs $3 to $7 per square foot, while DIY kits run $1 to $3 per square foot. The catch is surface preparation: epoxy will peel if the concrete is not properly etched and cleaned. Polyaspartic coatings are a newer alternative that cure faster and resist UV damage, but they cost more.
Interlocking rubber or PVC tiles are a favorite for workshops because they are comfortable, easy to install, and replaceable if damaged. They cost $2 to $5 per square foot and provide cushioning that reduces fatigue during long sessions. However, they can trap fine dust and are not ideal for welding or heavy chemical spills. Roll-out vinyl mats are cheaper but less durable. For a serious woodworking shop, a plywood subfloor over sleepers with a hardwood or engineered surface offers the best combination of comfort and durability, but it is the most expensive option at $6 to $12 per square foot.
Whichever floor you choose, address moisture first. If your garage slab wicks moisture, no coating or tile will stay put for long. A simple plastic sheet test can tell you whether you need a vapor barrier or drainage solution before you install any finished floor.
Permits, Inspections, and Code Considerations
Converting a garage into a workshop can trigger building code requirements, especially if you are adding electrical circuits, heating systems, or structural changes. Most jurisdictions require permits for electrical work, gas or propane heater installation, and any structural modifications. Some areas also require a change of use permit if the space is no longer used for vehicle storage, though a workshop is often still classified as an accessory space rather than habitable living area.
Fire safety is a major concern. Garages often house flammable materials, and workshops add sawdust, solvents, and sparks. You may need fire-rated drywall on walls shared with the house, a fire door between the garage and living space, and a smoke or heat detector in the workshop. If you install a gas heater or welding equipment, check local rules about ventilation, clearances, and fuel storage. Electrical inspections verify that your wiring meets code, which protects you and your home insurance coverage.
Before you start, call your local building department and describe your plans. Ask specifically about permits for electrical, heating, and any structural work. A 30-minute phone call can save you thousands in fines or forced rework. If you hire contractors, confirm they will pull the necessary permits and schedule inspections. Reputable contractors expect this and build it into their bids. If a contractor suggests skipping permits to save money, walk away.
Contractor Types and How to Budget for Labor
You may not need a general contractor for the entire project, but you will likely need several specialists. An electrician handles the subpanel, circuits, and lighting. An HVAC technician installs and services heating and cooling systems. An insulation contractor can handle spray foam or blown-in insulation. A flooring specialist installs epoxy, tile, or subfloors. For structural work or major changes, a general contractor coordinates trades and ensures code compliance.
Labor costs vary widely by region and scope. Here are typical ranges for a mid-size garage workshop conversion:
- Electrician: $2,500 to $8,000
- HVAC (mini-split or heater): $2,000 to $5,000
- Insulation: $1,500 to $4,000
- Flooring: $1,500 to $6,000
- General contractor coordination (if used): 10 to 20 percent of project cost
To get accurate bids, prepare a written scope of work that lists every task, material preference, and deadline. Get at least three quotes and compare not just price but also what is included. A low bid that excludes permits, cleanup, or warranty coverage is not a bargain. Ask for references and photos of similar projects. A contractor who has converted garages before will understand the unique challenges of moisture, insulation, and electrical load.
If you are handy and want to reduce costs, you can handle demolition, painting, and some insulation work yourself while hiring licensed pros for electrical and HVAC. This hybrid approach often saves 20 to 30 percent compared to a full turnkey contract. Just be honest about your skills and timeline. A half-finished garage workshop is worse than no workshop at all.
Sequencing the Project for Smooth Execution
A successful conversion follows a logical order. Start by decluttering and assessing the existing structure. Repair any roof leaks, foundation cracks, or pest damage before you insulate or finish walls. Next, rough in electrical and any plumbing or gas lines. Then install insulation and drywall. After that, complete flooring, heating and cooling, and lighting. Finally, build benches, storage, and dust collection, and organize your tools.
If you are hiring contractors, schedule them in the right sequence to avoid delays. The electrician needs open walls, so rough electrical comes before drywall. The flooring installer needs a clean, dry slab, so moisture remediation comes first. The HVAC technician needs to run lines before insulation if you are using a mini-split. A general contractor can manage this sequencing, but if you are acting as your own project manager, create a calendar and confirm each trade's start date a week in advance.
Expect the project to take four to eight weeks for a typical conversion, depending on permit timelines and contractor availability. Simple DIY upgrades can happen in a weekend, but anything involving permits and multiple trades will take longer. Plan for disruptions and keep a contingency fund for unexpected delays or material shortages.
When the dust settles, your garage workshop will be one of the most valuable rooms in your home. It adds functional square footage, supports your hobbies and side work, and can even increase resale appeal for buyers who want a dedicated workspace. The key is to plan carefully, budget realistically, and hire qualified professionals for the work that matters most. Whether you are welding, woodworking, or rebuilding engines, a well-designed workshop makes every project safer and more enjoyable.