
Foundation Waterproofing Methods and Materials for Homeowners
Foundation waterproofing methods and materials for homeowners, explained. Call (833)-365-8755 to compare local contractor quotes and protect your basement.

By Rachel Green
Learn more about Home Waterproofing for guides, costs, and what to expect.
Compare Home Waterproofing Pros Near You

Enter your ZIP code to compare top-rated local professionals and request free quotes.
Water staining on a basement wall or a musty smell after heavy rain is more than a nuisance. It is an early warning that water is finding a path into your foundation, and the damage compounds quickly once it starts. Foundation waterproofing methods and materials for homeowners range from simple grading fixes to full exterior membrane systems, and choosing the right one depends on where the water is coming from, how your home was built, and what you plan to do with the space. This guide walks through the real options, the materials behind them, and the cost and contractor questions that separate a lasting fix from a temporary patch.
Why Foundation Waterproofing Deserves Attention Before Damage Spreads
Concrete is porous. Even a foundation that looks solid can wick moisture from saturated soil, and that moisture carries dissolved salts and minerals that slowly break down the concrete and anything stored against it. In cold climates, water in cracks freezes and expands, widening the very gaps it entered through. In warm, humid regions, constant dampness feeds mold and wood rot inside finished basements and crawl spaces. The common thread is that water damage rarely stays contained; it moves into framing, insulation, flooring, and indoor air quality.
Homeowners often notice the problem first as a white powdery deposit (efflorescence), dark staining at the base of walls, or a musty odor that never quite goes away. These are signs that hydrostatic pressure or capillary action is already at work. Addressing them early is almost always cheaper than waiting, because the cost of waterproofing is modest compared to structural repair, mold remediation, or replacing a finished basement. A damp basement also undermines any plan to finish the space, so waterproofing should come first if you intend to convert it into living area.
One more reason to act: disclosure. When you sell a home, known water intrusion must be disclosed in most states, and buyers and inspectors will look for it. A documented, professionally installed waterproofing system can turn a red flag into a selling point. If you are planning broader exterior work at the same time, it helps to think about how roofing and drainage interact with foundation moisture; our guide on comparing roofing materials for your home explains how roof runoff and gutter performance affect the water load around your foundation.
Interior vs. Exterior Waterproofing: How to Know Which Applies
The single biggest decision in any waterproofing project is whether to work from the inside or the outside. Each approach has a clear set of conditions where it makes sense, and a contractor who recommends one without explaining why is worth questioning.
Exterior waterproofing involves excavating down to the footing, repairing and coating the foundation wall, installing drainage board and a footing drain, and backfilling with proper grading. It is the most thorough solution because it stops water before it reaches the wall and relieves hydrostatic pressure at the source. It is also the most invasive and expensive, since it means digging around the perimeter, moving landscaping, and sometimes disrupting decks, patios, or driveways. Exterior work is typically the right call for new construction, for homes with severe or recurring leakage, and for situations where the foundation wall itself needs repair.
Interior waterproofing manages water after it enters. The standard approach is to cut a channel along the interior perimeter of the footing, install a drainage system that leads to a sump pump, and seal the wall surface with a waterproof coating or panels. Interior systems are less disruptive, work in all weather, and are often the practical choice for finished or partially finished basements where exterior excavation would destroy interior improvements. They do not, however, reduce the pressure on the wall from outside.
Here is a quick comparison of when each approach tends to be recommended:
- Exterior waterproofing: active leaks during rain, visible wall damage or bowing, new construction, or a full exterior renovation already underway.
- Interior waterproofing: minor seepage, high water table, finished basement protection, budget constraints, or inaccessible exterior walls.
- Combination approach: severe chronic moisture where interior drainage is paired with exterior grading and downspout corrections.
In practice, many successful projects blend the two. A homeowner might correct grading and extend downspouts (exterior, low cost), install an interior perimeter drain and sump (interior, moderate cost), and seal cracks with a hydraulic cement or polyurethane injection. The key is matching the intervention to the water source rather than defaulting to whichever method a contractor prefers to sell.
Drainage Corrections: The Cheapest Waterproofing You Can Do
Before anyone digs or cuts concrete, the water that pools around your foundation needs somewhere else to go. Poor drainage is the root cause behind a large share of basement leaks, and correcting it is far less expensive than structural waterproofing. The goal is simple: move roof runoff and surface water away from the foundation and keep the soil around the house sloping downward.
Start with grading. The ground should slope away from the foundation at roughly a 6-inch drop over the first 10 feet. Settled backfill, mulch beds, and new patios often reverse that slope over time, funneling water toward the wall. Regrading is a landscaping task most homeowners can tackle or hire out cheaply, and it often resolves minor dampness on its own.
Next, look at downspouts and gutters. A roof can shed hundreds of gallons of water in a single storm, and short downspouts dump it right at the foundation. Extending downspouts 6 to 10 feet away, keeping gutters clear, and adding splash blocks or underground discharge lines makes a measurable difference. In areas with poor surface drainage, a French drain, a gravel-filled trench with a perforated pipe that collects and redirects subsurface water, can intercept water before it reaches the wall. Where the water table is high or the site is flat, a sump pump integrated with the drainage system becomes the exit point.
These corrections are the first line of defense and are frequently required before more expensive waterproofing will perform as intended. A contractor who skips straight to a membrane or interior system without addressing grading and downspouts is leaving an obvious gap. For a broader look at how exterior components work together, think of drainage as part of the same envelope that roofing, siding, and windows protect.
Waterproofing Materials Explained: Membranes, Sealants, and Crystalline Products
Once drainage is under control, the material choice determines how long the protection lasts. Foundation waterproofing materials fall into a few broad families, each suited to different applications and budgets.
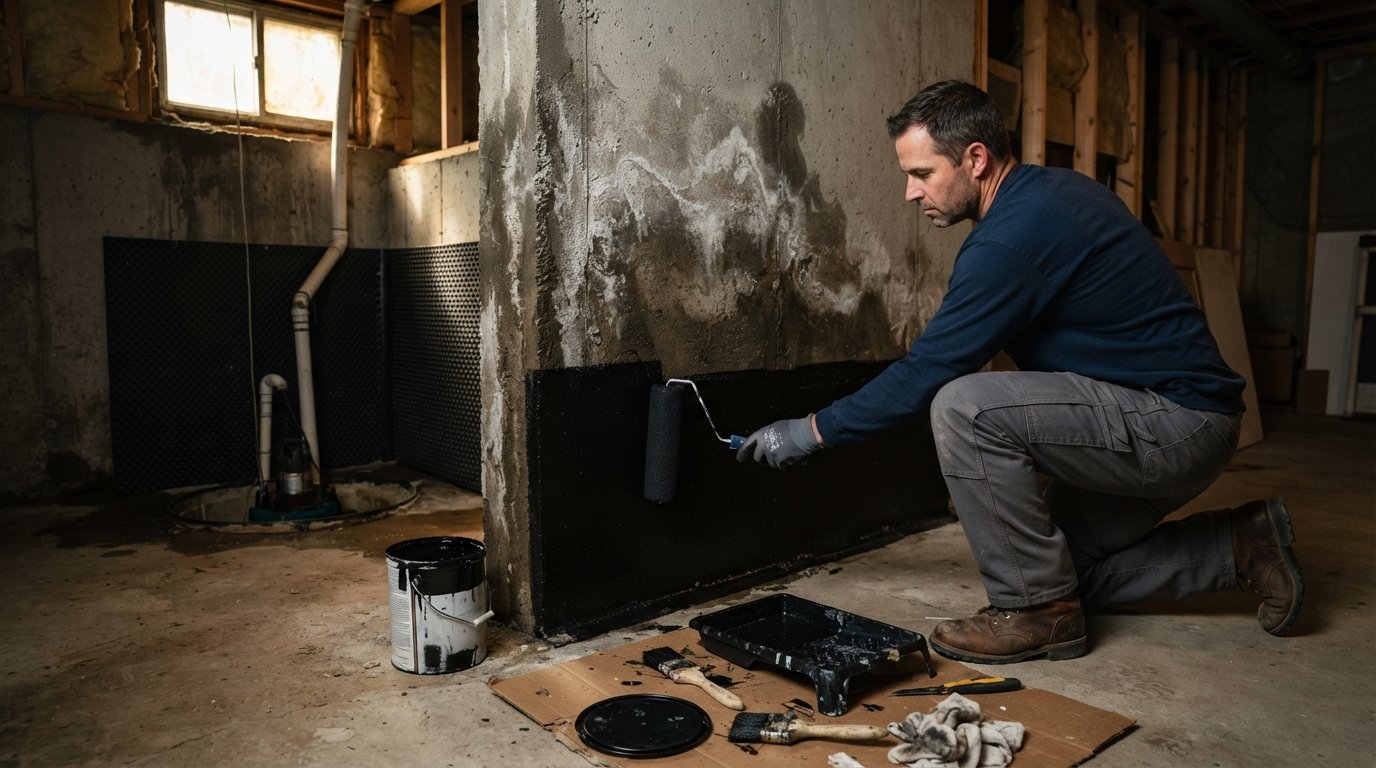
Sheet and fluid-applied membranes. These are the heavy-duty exterior barriers. Sheet membranes are rolls of rubberized asphalt or synthetic polymer (such as HDPE or butyl) adhered to the wall, while fluid-applied membranes are sprayed or rolled on as a thick, seamless coating that cures into a rubbery layer. Both are installed on the exterior of the foundation and are the gold standard for keeping water out. They are typically paired with drainage board and a footing drain.
Cementitious and crystalline coatings. These are applied to the interior or exterior of concrete and masonry walls. Crystalline products react with moisture and free lime in the concrete to grow crystals inside the pores, effectively sealing the material from within. They are excellent for damp-proofing basements and for walls that see intermittent moisture, and they can be applied to the inside face of a wall without excavation. Cementitious coatings are a surface barrier and work best on sound walls with minor seepage.
Sealants and crack injections. Polyurethane and epoxy injections fill and seal cracks from the inside, and hydraulic cement stops active leaks quickly. These are targeted repairs rather than whole-wall solutions, but they are invaluable for spot treatment and for stabilizing a wall before a larger system is installed. Sodium bentonite clay is another material, often used in panel form behind exterior walls or as a granular backfill that swells when wet to form a self-sealing barrier.
Material selection should follow a simple logic: exterior membranes for new construction and severe exterior leakage, crystalline and cementitious coatings for interior damp-proofing, and sealants for localized cracks. A reputable contractor will explain the trade-offs in lifespan, cost, and installation conditions rather than pushing a single product.
Cost Drivers and How to Evaluate Contractor Recommendations
Waterproofing costs vary widely because the scope ranges from a few hundred dollars of grading and sealant to tens of thousands for full exterior excavation. The main cost drivers are the method chosen, the linear footage of foundation wall, accessibility ( decks, patios, and landscaping add labor), the condition of the foundation, and whether a sump pump and interior drainage are included. Interior systems are generally the lower-cost option, while exterior membrane systems carry the highest price tag but also the longest service life.
Because the spread is so wide, homeowners should insist on a written scope that specifies exactly what is being done, which materials are used, and what is excluded. A quote for interior waterproofing that does not mention a sump pump, discharge location, or wall sealing is incomplete. An exterior quote should clarify whether the footing drain is replaced, how backfill is compacted, and how the site is restored.
Evaluating a contractor recommendation comes down to a few practical checks:
- Diagnosis first: did the contractor identify the water source (grading, roof runoff, high water table, wall crack) or simply propose a system?
- Drainage addressed: does the plan include grading and downspout corrections, or is it purely a wall treatment?
- Material specifics: are brand names, thicknesses, and warranties stated in writing?
- Permits and inspections: will the work require permits, and who handles them?
- References and warranty: can the contractor show similar completed projects, and what does the warranty actually cover?
Getting multiple quotes is the most reliable way to test whether a recommendation is fair. A platform that connects homeowners with vetted contractors, like ContractorHomeQuotes, can shorten the search by providing comparable bids from local professionals, which makes it easier to spot inflated scopes or missing items. The goal is not the lowest price but the most complete solution for the water problem you actually have.
Signs Waterproofing Should Come Before Finishing a Basement
Finishing a basement is one of the highest-return projects a homeowner can take on, but it is also one of the most vulnerable to moisture. Drywall, insulation, carpet, and wood framing trap dampness and hide the early signs of a leak until mold and rot are advanced. Before any framing goes up, the basement should be dry and the waterproofing strategy settled.
Watch for these signals that waterproofing must precede finishing: visible efflorescence or white powder on the walls, dark staining near the floor line, a musty odor that lingers, condensation on pipes or walls in summer, or any history of water on the floor after heavy rain. Cracks wider than a hairline, bowing walls, or rusted steel columns are more serious and call for an engineer or foundation specialist before cosmetic work begins.
Even a basement that seems dry deserves a moisture test. Tape a square of plastic sheeting to the wall and floor for a few days; condensation or darkening underneath indicates vapor transmission that will find its way into finished materials. If moisture is present, the sequence should be waterproofing first, then a vapor barrier and insulation, then framing and finishes. Doing it in the right order protects the investment and keeps the finished space usable for decades.
Bringing It Together: A Practical Sequence for Homeowners
The most effective approach to foundation waterproofing is sequential. Start with the low-cost, high-impact drainage corrections: regrade the soil, extend downspouts, clear gutters, and add a French drain or sump if surface water has nowhere to go. Then address the wall itself, choosing interior coatings or exterior membranes based on the severity of the problem and whether the exterior is accessible. Finally, plan any basement finishing only after the space has been proven dry through at least one wet season.
Throughout the process, keep documentation: photos of the before condition, the contractor's written scope, material specifications, and warranty terms. This record protects you if a problem recurs and adds credibility when you sell. Waterproofing is not glamorous work, but it is foundational in the literal sense, and getting it right protects everything you build on top of it.