
Exterior Painting Preparation and Weather Timing Guide
Master exterior painting preparation and weather timing with our expert guide. Call (833)-365-8755 for professional contractor matching and free quotes.

By Justin Parker
Learn more about Exterior Painting for guides, costs, and what to expect.
Compare Exterior Painting Pros Near You

Enter your ZIP code to compare top-rated local professionals and request free quotes.
A flawless exterior paint job is never an accident. It is the result of meticulous surface preparation, precise product selection, and, perhaps most critically, impeccable weather timing. Homeowners across the country invest thousands of dollars annually in exterior painting projects, only to watch the finish fail prematurely due to trapped moisture, inadequate surface bonding, or application during unsuitable conditions. Understanding the intricate relationship between exterior painting preparation and weather timing can mean the difference between a finish that lasts a decade and one that peels within a single season.
The stakes are higher than mere aesthetics. A properly painted exterior protects your home's siding, trim, and structural components from moisture infiltration, UV degradation, and pest damage. When paint fails, these protective barriers crumble. Water seeps into wood, causing rot. Sunlight breaks down caulk and sealants. The resulting repairs often cost several times more than the original painting project would have. This guide explores every facet of preparing your home's exterior and timing your project to coincide with optimal weather windows, ensuring your investment delivers maximum durability and visual appeal.
Why Surface Preparation Determines Paint Longevity
Paint manufacturers consistently report that approximately 80 percent of premature paint failures stem from inadequate surface preparation. This statistic underscores a fundamental truth: the best paint in the world cannot compensate for a dirty, damp, or deteriorating substrate. Preparation is not merely a preliminary step; it is the foundation upon which your entire painting project rests.
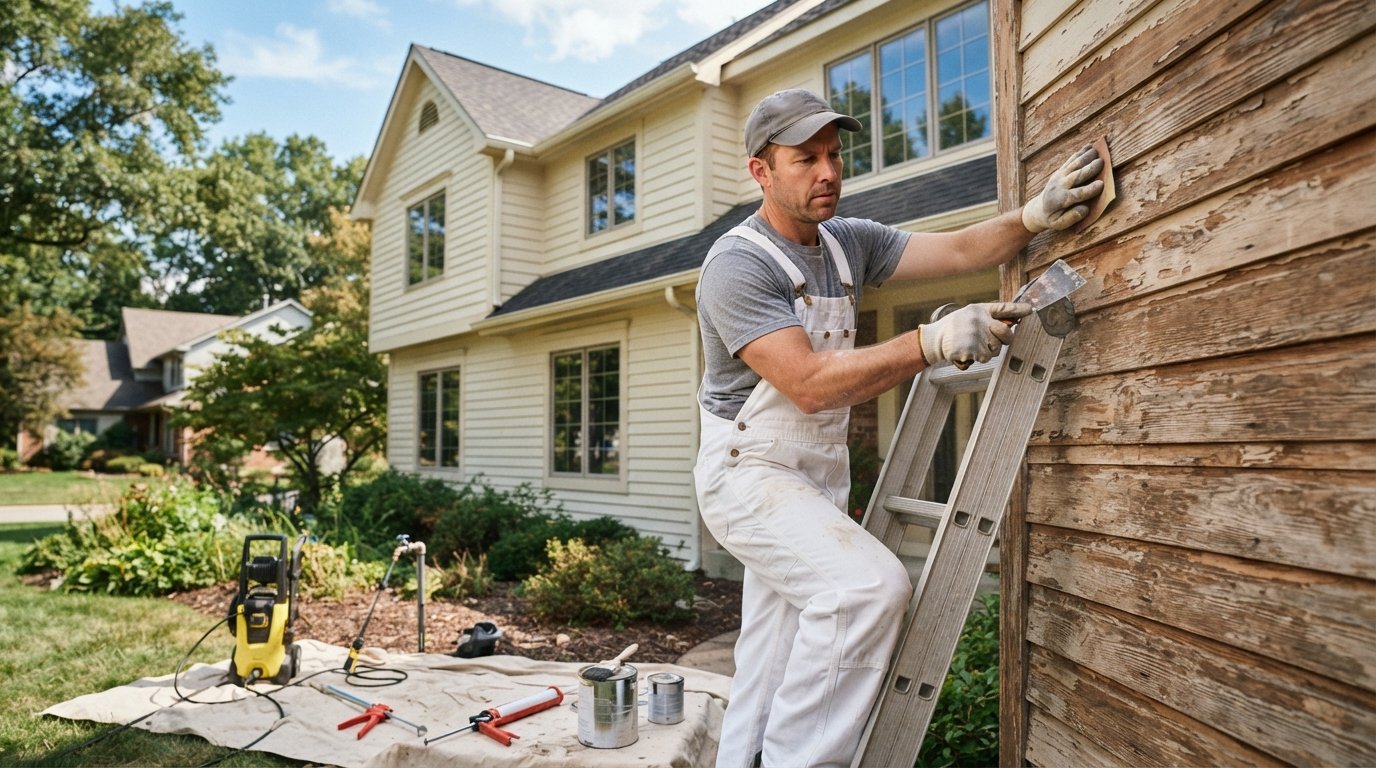
The preparation process involves several distinct phases, each addressing specific vulnerabilities in your home's exterior surfaces. Cleaning removes contaminants that prevent proper adhesion. Scraping eliminates loose paint that would eventually drag fresh coatings down with it. Sanding creates a textured profile that mechanical bonding requires. Priming seals porous surfaces and blocks stains. Caulking fills gaps where water would otherwise penetrate. Skipping any of these steps invites failure.
Consider the specific challenges presented by different siding materials. Wood siding requires careful attention to moisture content and grain direction. Fiber cement demands thorough cleaning to remove chalky residue. Stucco presents a highly porous surface that drinks primer at alarming rates. Metal siding needs rust treatment and bonding primers. Each material dictates its own preparation protocol, and understanding these distinctions is essential for success.
For homeowners seeking professional guidance on comprehensive exterior transformations, exploring resources on transforming your home's exterior with remodeling can provide valuable context for how painting fits into broader improvement strategies. A professional assessment often reveals whether painting alone suffices or whether additional repairs should precede the project.
Essential Preparation Steps Before Any Painting Begins
Every exterior painting project, regardless of size or scope, should follow a systematic preparation sequence. This framework ensures no critical step is overlooked and establishes consistent quality standards across all surfaces.
- Inspect and repair structural issues: Before addressing cosmetic concerns, examine siding, trim, and fascia for rot, pest damage, or structural compromise. Replace damaged wood and address the underlying cause, whether that involves improved drainage, pest treatment, or ventilation improvements.
- Clean all surfaces thoroughly: Power washing removes dirt, mildew, chalky oxidation, and old loose paint. Allow adequate drying time, typically 24 to 48 hours depending on humidity and temperature, before proceeding.
- Scrape and sand loose paint: Remove all peeling, cracking, or flaking paint using scrapers, wire brushes, or sanding equipment. Feather edges smooth to blend transitions between bare and painted areas.
- Prime bare surfaces and problem areas: Apply appropriate primer to bare wood, bare metal, and areas previously affected by stains, knots, or water damage. Primer selection should match your substrate and topcoat product.
- Caulk gaps and joints: Fill cracks, seams, and gaps around windows, doors, and trim with high-quality exterior caulk formulated for paintability and flexibility.
Following this sequence prevents the frustrating scenario of discovering preparation deficiencies after paint application. Each step builds upon the previous one, creating a surface profile optimized for adhesion and longevity. Rushing through preparation to reach the painting stage faster almost always results in compromised outcomes.
Reading Weather Conditions for Successful Paint Application
Weather timing represents the variable most outside homeowner control, yet it profoundly influences project outcomes. Paint products have specific temperature, humidity, and moisture requirements for proper curing. Violating these parameters prevents the chemical reactions that transform liquid paint into a durable protective film.
Temperature affects both application characteristics and curing chemistry. Most exterior paints perform best when surface temperatures range between 50 and 85 degrees Fahrenheit. Below 50 degrees, paint thickens, levels poorly, and may not cure properly. Above 85 degrees, paint dries too quickly, causing brush marks, lap lines, and inadequate bonding. Surface temperature matters more than air temperature, as sun-exposed siding can be 20 to 30 degrees warmer than ambient conditions.
Humidity influences drying time and moisture retention. High humidity slows evaporation of solvents and water, extending recoat times and potentially trapping moisture beneath the paint film. Low humidity accelerates drying, which can cause application difficulties and premature skinning. Ideal relative humidity for exterior painting generally falls between 40 and 70 percent.
Wind presents an often-overlooked factor. While gentle breezes aid drying, strong winds blow debris onto wet surfaces, cause uneven application, and can carry overspray onto neighboring properties. Wind also accelerates drying, potentially creating the same problems associated with high temperatures. Monitoring wind forecasts before beginning work prevents these complications.
Understanding Moisture and Dew Point Considerations
The dew point, the temperature at which air becomes saturated and moisture condenses, deserves special attention. When surface temperatures approach the dew point, condensation forms on siding, even if the sky remains clear. Painting over this invisible moisture layer virtually guarantees adhesion failure.
A practical rule: avoid painting when the dew point is within 5 degrees of the expected overnight low temperature, or when surfaces will reach the dew point within several hours of application. Morning dew typically evaporates by mid-morning on sunny days, making late morning through early afternoon the safest application window. Painting too late in the afternoon risks overnight condensation damaging the uncured film.
Seasonal timing varies significantly by region. In northern climates, the painting window typically spans late spring through early fall. Southern regions offer extended windows but must account for intense summer heat and afternoon thunderstorms. Coastal areas face salt air and fog considerations. Mountain regions contend with rapid temperature swings and intense UV exposure. Understanding your local climate patterns is essential for scheduling success.
Regional Weather Patterns and Timing Strategies
Different geographic regions present unique challenges and opportunities for exterior painting projects. Adapting your approach to local conditions dramatically improves outcomes and reduces the likelihood of weather-related failures.
In the Midwest, including Chicago and surrounding areas, the optimal painting window typically runs from late May through September. Winters bring freezing temperatures and snow, while spring and fall feature unpredictable temperature swings. Summer humidity can slow drying times, requiring patience between coats. Homeowners in these regions should monitor forecasts closely and be prepared to reschedule if conditions deteriorate.
Southern states, including Texas and Florida, present different considerations. Intense summer heat makes mid-day painting impractical, pushing work toward early morning or late evening hours. Afternoon thunderstorms during summer months create unpredictable moisture exposure. Spring and fall often provide the most stable conditions, though hurricane season in coastal areas requires careful monitoring. The extended warm season offers flexibility but demands vigilance regarding heat and humidity.
Regardless of region, the fundamental principle remains consistent: work within the parameters specified by your paint manufacturer, and when conditions fall outside those parameters, wait. The cost of delay pales in comparison to the cost of premature failure. Professional contractors understand this calculus and build weather contingencies into their project schedules.
Choosing the Right Products for Your Climate and Timing
Paint technology has advanced considerably, with formulations designed for specific climate challenges. Selecting products appropriate for your region and anticipated weather conditions enhances durability and appearance retention.
Acrylic latex paints dominate exterior applications due to their flexibility, breathability, and ease of application. They resist fading and chalking better than alkyd products and clean up with water. However, quality varies dramatically. Premium acrylics contain higher solids content, better binders, and more effective mildewcides than economy options. The price difference typically pays dividends in extended service life.
For humid climates, look for paints with enhanced mildew resistance. For intense sun exposure, UV-resistant formulations with colorfast pigments prevent premature fading. For temperature extremes, elastomeric coatings offer superior flexibility and crack-bridging capabilities. For wood siding, breathable formulations allow moisture vapor to escape while blocking liquid water penetration.
Primer selection deserves equal attention. Different substrates require different primers: stain-blocking primers for cedar and redwood, bonding primers for glossy surfaces, masonry primers for stucco and brick, and rust-inhibiting primers for metal. Using the wrong primer undermines even the best topcoat.
For homeowners seeking professional guidance on product selection and application, connecting with experienced contractors through platforms like USremodel provides access to expertise and competitive quotes. These services match homeowners with qualified professionals who understand local climate challenges and appropriate product specifications.
Reading and Interpreting Paint Manufacturer Specifications
Every quality paint product includes technical data sheets specifying application parameters. These documents provide essential information for successful application:
- Temperature range: Minimum and maximum surface and air temperatures for application and curing
- Humidity limits: Acceptable relative humidity ranges and dew point requirements
- Recoat time: Minimum and maximum intervals between coats under specified conditions
- Dry time: Time required for touch-dry and full-cure states
- Coverage rate: Expected square footage per gallon on properly prepared surfaces
These specifications represent tested parameters, not suggestions. Applying paint outside specified conditions voids manufacturer warranties and invites failure. When conditions fall outside acceptable ranges, waiting for improvement is the only responsible choice.
Creating a Weather-Responsive Project Timeline
Successful exterior painting projects incorporate flexibility for weather variations. Rather than scheduling painting for specific dates, build a timeline that accommodates preparation work during marginal conditions and reserves painting for optimal windows.
Preparation tasks including cleaning, scraping, sanding, and repair work tolerate a wider range of conditions than paint application. These activities can proceed during cooler temperatures, higher humidity, and even light precipitation (with appropriate precautions). Completing preparation during these periods positions the project for immediate painting when conditions improve.
Monitor extended forecasts beginning several weeks before your target start date. Identify multi-day windows with favorable temperature, humidity, and precipitation predictions. Plan to complete preparation during the days immediately preceding these windows, then apply primer and topcoats when conditions align.
Build in buffer days for unexpected weather changes. A project scheduled for five days should have seven or eight days available in the calendar. This flexibility prevents the temptation to paint during marginal conditions simply to meet an arbitrary deadline.
Recognizing When to Stop and Wait
Discipline separates successful painting projects from failed ones. When conditions deteriorate, stopping work and waiting for improvement protects your investment and ensures quality outcomes.
Warning signs that demand immediate cessation include: surface temperatures approaching manufacturer minimums, dew forming on surfaces, rain beginning within the expected dry time, wind blowing debris onto wet paint, and humidity rising above specified limits. Continuing under these conditions wastes materials, labor, and the preparation work already completed.
Professional painting contractors build weather delays into their estimates and schedules. They understand that rushing leads to callbacks, warranty claims, and reputation damage. Homeowners should adopt the same patience, recognizing that a delayed project completed properly outperforms a rushed project requiring repairs.
The relationship between exterior painting preparation and weather timing ultimately determines whether your project delivers years of protection and beauty or becomes a cautionary tale. Invest time in thorough preparation. Monitor conditions carefully. Choose quality products appropriate for your climate. When weather cooperates, apply paint according to manufacturer specifications. When it does not, wait. This disciplined approach ensures your exterior painting investment delivers maximum value and lasting results.