
Deck Permit Requirements and Inspection Process: A Homeowner's Guide
Understand deck permit requirements and inspection process steps to avoid costly rework. Call (833)-365-8755 for vetted deck builders.

By Jackson Adams
Learn more about Deck or Porch Remodel or Addition for guides, costs, and what to expect.
Compare Deck or Porch Remodel or Addition Pros Near You

Enter your ZIP code to compare top-rated local professionals and request free quotes.
Building a deck is one of the most satisfying home improvement projects you can take on. It extends your living space, boosts your property value, and gives you a perfect spot for weekend barbecues. But before you start digging footings or framing joists, you need to clear one major hurdle: the deck permit requirements and inspection process. Skipping this step does not just risk fines. It can force you to tear down a completed deck, complicate a future home sale, and leave you legally exposed if someone gets hurt on an unpermitted structure. Understanding what your local building department expects before, during, and after construction saves you time, money, and stress.
When Does a Deck Require a Building Permit?
Not every deck needs a permit, but the exemptions are narrower than most homeowners assume. The general rule across most U.S. jurisdictions is that any deck attached to a house requires a permit, regardless of size or height. That is because an attached deck transfers loads to the home's structure, and the connection point (the ledger board) must be flashed and fastened correctly to prevent water intrusion and structural failure. Detached decks, such as freestanding platforms around a hot tub or a ground-level patio deck, may qualify for an exemption if they meet strict criteria.
The three factors that most often determine whether a permit is required are height, size, and attachment. A deck less than 30 inches above grade, not attached to the home, and under 200 square feet often falls below the permit threshold. However, these numbers vary by state, county, and even city. Some jurisdictions require a permit for any deck over 12 inches high. Others set the square footage limit at 120 square feet. Coastal areas and regions with heavy snow loads tend to have stricter rules because wind uplift and snow accumulation increase the structural demands on the deck.
Here is a quick checklist of the most common permit triggers:
- Attached to the house: Almost always requires a permit.
- Height above grade: Typically 30 inches or more triggers a permit, but some areas use 12 or 24 inches.
- Square footage: Usually 200 square feet, though smaller thresholds exist.
- Location: Decks in flood zones, wetlands, or historic districts face additional review.
- Amenities: Adding stairs, railings, a roof, or a hot tub often increases scrutiny.
Even if your deck technically qualifies for an exemption, getting a permit is still a smart move. It creates a record of the work, which helps during resale and insurance claims. Many contractors will not touch an unpermitted deck because they cannot pull a permit retroactively without exposing defects. If you are unsure, call your local building department. A five-minute phone call can save you thousands in rework.
Code Requirements That Drive the Inspection Process
Building codes exist to ensure decks are safe. The International Residential Code (IRC) serves as the model for most U.S. jurisdictions, though local amendments are common. Inspectors check specific elements during the deck permit requirements and inspection process, and understanding these details helps you prepare. The most common failure points are footings, ledger board attachment, and railing specifications.
Footings and Frost Depth
Footings are the concrete pads or piers that support the deck posts. They must extend below the frost line to prevent heaving during freeze-thaw cycles. Frost depth varies dramatically by region: 12 inches in the deep South, 48 inches or more in northern states. An inspector will check that footing holes are dug to the correct depth and that the concrete is poured to the right diameter. In some cases, they want to see the hole before concrete is poured. That is called a footing inspection, and it is often the first required inspection.
Footing size depends on the load the deck will carry. A deck with a hot tub, for example, needs larger footings than a simple dining deck. The IRC provides tables that correlate footing size with post spacing and soil bearing capacity. Your contractor should know these numbers, but as a homeowner, you should verify that the plans reflect them. If the deck is built on expansive clay soil, which is common in many parts of the country, the footing design may need an engineer's stamp. You can read more about project-specific permit triggers in our guide on home renovation permit requirements by project type.
Ledger Board Attachment
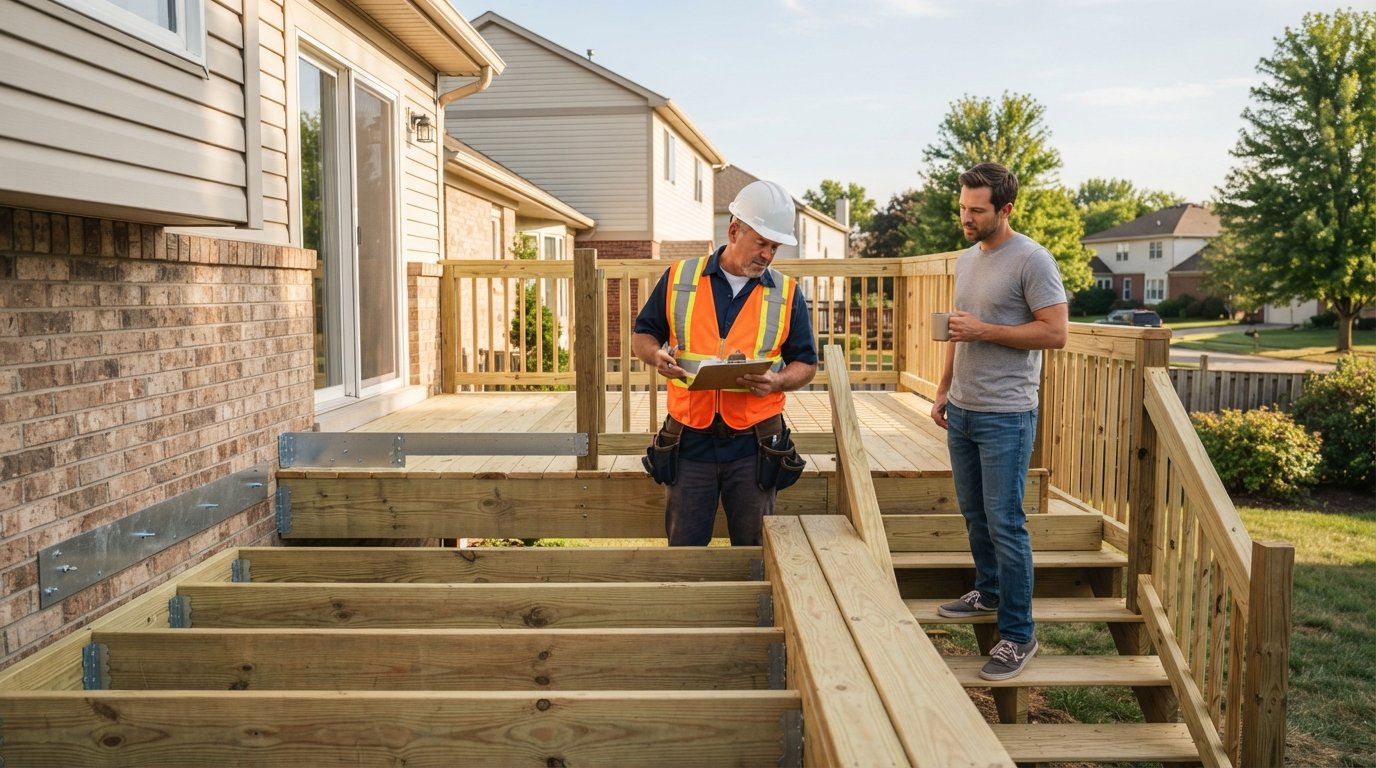
The ledger board is the piece of lumber bolted to the house that supports one side of the deck. It is the most critical connection in the entire structure. Inspectors look for proper flashing, correct bolt size and spacing, and whether the ledger is attached to solid framing or just siding. Attaching a ledger over siding or brick veneer without proper standoffs is a common mistake that fails inspection. The IRC requires specific lag screw or through-bolt patterns, and some jurisdictions require additional hold-down devices to resist lateral loads.
Flashing is equally important. Water that gets behind the ledger can rot the rim joist and cause thousands of dollars in hidden damage. Inspectors want to see metal flashing that integrates with the house's weather-resistive barrier. If the deck is built with a ledger board, the inspector will often check this connection before the decking is installed. That is why the framing inspection happens before the final inspection.
Railing Height and Spacing
Railing rules are straightforward but frequently violated. The IRC requires guardrails on any deck more than 30 inches above grade. The railing must be at least 36 inches high, measured from the deck surface to the top of the rail. Balusters (the vertical pieces) must be spaced so that a 4-inch sphere cannot pass through at any point. This prevents small children from slipping through or getting stuck. The bottom rail also cannot be more than 4 inches above the deck surface.
Handrails on stairs have their own rules: they must be 34 to 38 inches high, graspable, and continuous. Openings between the treads and the bottom rail must also reject a 4-inch sphere. Inspectors carry a 4-inch ball to test these gaps. If your railing fails, you will need to rebuild it before the final inspection. Many deck builders pre-assemble railing panels in the shop to ensure consistent spacing, but field-built railings are more prone to error.
Site Plan and HOA Approval Steps
Before you apply for a building permit, you may need to clear two other approvals: a site plan review and a homeowners association (HOA) approval. A site plan is a scaled drawing that shows the deck's location relative to property lines, easements, and other structures. Most building departments require it with the permit application. The plan helps the reviewer confirm that the deck meets setback requirements, which are minimum distances from property lines. Setbacks typically range from 5 to 15 feet, but they can be larger in front yards or along waterways.
If your deck will encroach on an easement (a right-of-way for utilities, drainage, or access), you may need a variance. Variances require a public hearing and can take months. That is why it is critical to pull your property survey before designing the deck. A survey shows exact property lines and easements. If you do not have one, your local assessor's office may have a copy, or you may need to hire a surveyor.
HOA approval is a separate process. Many HOAs have architectural review committees that must approve deck designs, materials, and colors before construction begins. Even if the city approves your permit, the HOA can still fine you or force you to remove the deck if you skip their process. HOA rules often dictate railing style, decking material (composite vs. wood), and maximum height. Some HOAs require a professional engineer's stamp on the plans. Start this process early, because HOA reviews can take several weeks. Once you have HOA approval and a site plan, you can submit your permit application with confidence.
Hiring Deck Builders Who Manage Permits and Inspections
The easiest way to navigate the deck permit requirements and inspection process is to hire a contractor who handles it for you. A professional deck builder will pull the permit, schedule inspections, and correct any issues that arise. But not all contractors are equally experienced with permits. Some handymen will build a deck without a permit, which puts you at risk. Others may pull the permit but fail inspections repeatedly because they do not understand local code nuances.
When you interview deck builders, ask specific questions. How many decks have you built in this jurisdiction? Who pulls the permit, you or me? What happens if an inspection fails? Do you carry general liability insurance and workers compensation? A reputable builder will answer these questions without hesitation. They will also provide a written contract that specifies who is responsible for permit fees, inspection scheduling, and any re-inspection costs. If a builder suggests skipping the permit to save time, walk away. That is a red flag for other shortcuts.
You can also use a contractor matching service to find pre-vetted professionals in your area. Contractor.Homes connects homeowners with local contractors who specialize in deck construction and permit management. The platform lets you compare quotes and verify credentials before you commit. That said, you should still verify that your chosen builder has experience with your local building department. Permitting is a local process, and a builder who knows the inspectors can often anticipate their concerns and avoid delays.
Here is a simple sequence to follow when hiring:
- Get at least three quotes from licensed deck builders.
- Ask each builder how they handle permits and inspections.
- Check references for decks built in the last two years.
- Verify insurance and confirm the permit will be pulled in your name or the company's name.
- Review the contract for permit fee responsibility and inspection timelines.
Once you hire a builder, stay involved. Ask for copies of the approved plans and inspection reports. Attend the inspections if possible. Understanding what the inspector looks for helps you catch problems early. If the builder fails an inspection, ask what they will change and when the re-inspection is scheduled. Do not pay the final invoice until the deck passes the final inspection and you have a copy of the signed permit card.
What to Expect During the Inspection Process
The inspection process typically involves three stages: footing, framing, and final. Some jurisdictions combine footing and framing into one inspection if the deck is low to the ground. Others require a separate inspection for the ledger board attachment. The footing inspection happens after holes are dug and before concrete is poured. The inspector checks depth, diameter, and soil condition. If the holes are too shallow or the soil is loose, you will need to dig deeper or add gravel.
The framing inspection occurs after the joists, beams, and ledger are installed but before decking is laid. The inspector checks lumber size, spacing, fasteners, and flashing. They also verify that the ledger is properly attached and that the deck is square and level. If the framing passes, you can install decking and railings. The final inspection happens after all work is complete. The inspector checks railing height and spacing, stair dimensions, handrail graspability, and overall workmanship. If everything passes, the inspector signs off on the permit, and you are done.
If an inspection fails, do not panic. The inspector will provide a written list of corrections. Your builder should fix the issues and schedule a re-inspection. Re-inspection fees are common, so it is worth getting it right the first time. The most common failures are missing flashing, improper railing spacing, and footings that are too shallow. A builder who understands the local code will avoid these mistakes.
Remember that the deck permit requirements and inspection process is not just bureaucratic red tape. It is a safety net that protects your family, your investment, and your peace of mind. A permitted deck is a safer deck, and a documented inspection trail makes your home more attractive to buyers. If you are planning a deck this year, start with a call to your local building department. Then find a qualified builder who can handle the paperwork and the construction. With the right preparation, your deck project can go smoothly from first dig to final inspection.