
Basement Finishing: Permits, Planning, and ROI
Basement finishing planning permits and return on investment explained: feasibility, permits, costs, and ROI. Call (833)-365-8755 for expert help.

By Maya Adler
Learn more about Basement Finishing or Remodeling for guides, costs, and what to expect.
Compare Basement Finishing or Remodeling Pros Near You

Enter your ZIP code to compare top-rated local professionals and request free quotes.
Finishing a basement is one of the most cost-effective ways to add living space to your home, but the difference between a smooth project and a financial headache often comes down to two things: planning and permits. Homeowners who understand the permit landscape and the expected return on investment before swinging a hammer consistently make better decisions, avoid costly rework, and end up with a space that appraises well and sells fast. This article walks through the feasibility checks, permit requirements, cost tiers, and resale value of a finished basement so you can move forward with confidence.
Feasibility First: Three Tests That Decide Your Project
Before you sketch a floor plan or call a contractor, you need to know whether your basement can legally and practically become living space. Three tests dominate this early phase: egress, ceiling height, and moisture. Fail any of them and your budget or timeline will shift, sometimes dramatically.
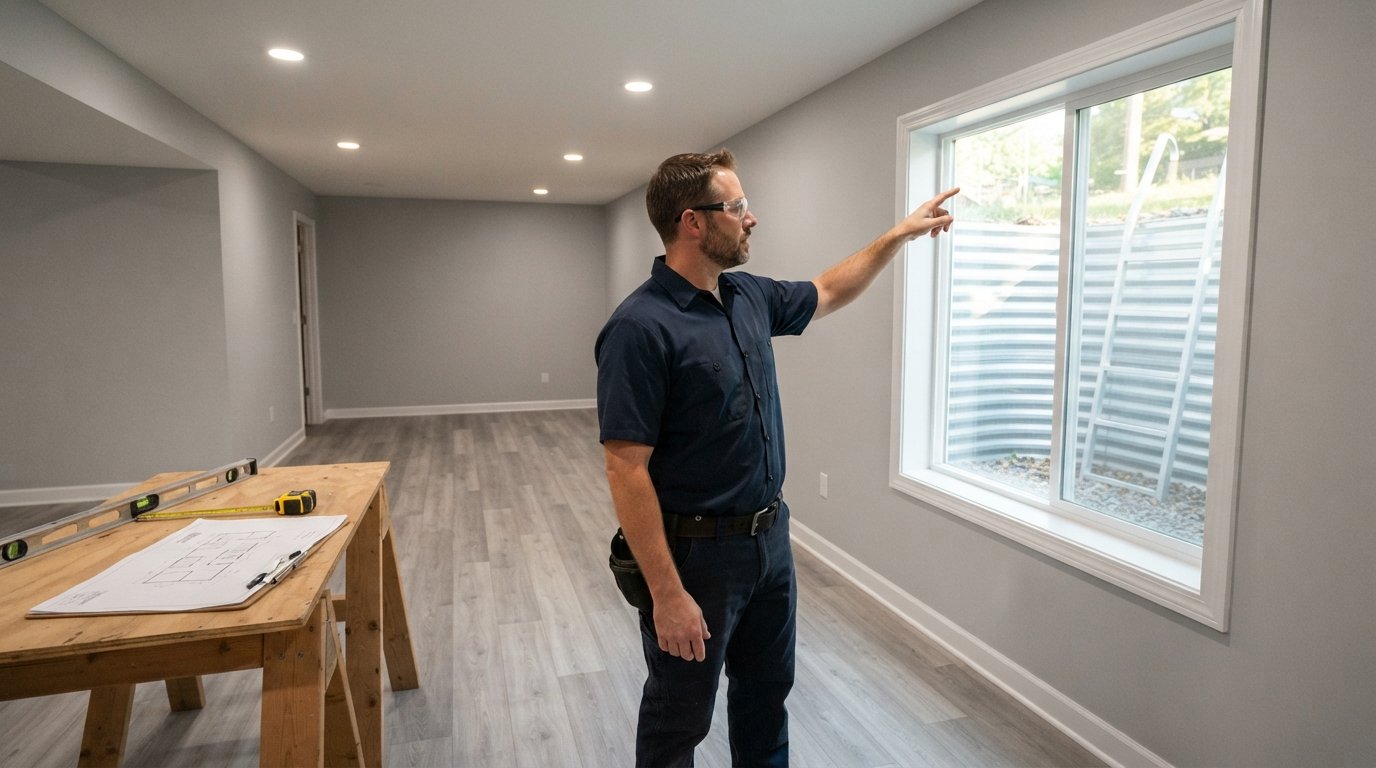
Egress is the most common deal-breaker. Most building codes require at least one operable window or door large enough for a person to escape in an emergency for any sleeping room, and many jurisdictions extend that requirement to any habitable basement room. An egress window typically means cutting the foundation wall, installing a window well, and adding a ladder or steps. That work alone can run $3,000 to $8,000 per opening, but it is non-negotiable if you want a legal bedroom or a safe family room.
Ceiling height matters more than most homeowners realize. Finished ceilings usually need at least 7 feet of clearance, and many codes require 7 feet 6 inches in habitable spaces. If your basement has ductwork, beams, or plumbing running below the joists, you may need to reroute services or use a drop ceiling. Measure from the floor to the lowest obstruction, not to the joists, and do it in several spots. A difference of a few inches can change your entire design approach.
Moisture testing is the quiet killer of basement projects. Tape a square of plastic sheeting to the floor and walls for 24 to 48 hours. If condensation forms underneath, you have a vapor drive problem that must be solved before framing. Look for efflorescence, musty odors, or previous water stains. A simple moisture meter can confirm suspicious areas. Remediation might involve exterior grading, gutter extensions, a sump pump, or interior drainage, and skipping this step can lead to mold behind new drywall within a year.
Permit Scope: What Needs Approval and What Does Not
Permit requirements vary by city and county, but the pattern is consistent: structural, electrical, plumbing, and mechanical work almost always require permits, and finishing a basement touches all four. Framing, insulation, and drywall may be covered under a single basement finishing permit, but you still need separate trade permits for electrical, plumbing, and HVAC in most jurisdictions.
Here is a typical permit breakdown for a basement finish:
- Building permit: Covers framing, insulation, drywall, and the overall layout. Required in nearly every jurisdiction.
- Electrical permit: Required for new outlets, lighting circuits, smoke detectors, and any panel upgrades. Often pulled by the electrician.
- Plumbing permit: Required if you add a bathroom, wet bar, or laundry sink. Includes rough-in and final inspection.
- Mechanical permit: Required for new HVAC ducts, exhaust fans, or a dedicated dehumidifier tied into the system.
- Egress window permit: Sometimes separate from the building permit, especially when cutting a foundation wall.
The order of inspections matters. Most jurisdictions require rough-in inspections for framing, electrical, plumbing, and mechanical before insulation and drywall go up. Then a final inspection covers everything at once. If you sequence trades poorly, you can end up with multiple inspection cycles and weeks of delay. A good general contractor will build an inspection calendar into the schedule from day one.
One more permit consideration: added bathrooms. A basement bathroom often requires a sewage ejector pump or a macerating toilet because the main sewer line sits above the basement floor. That equipment needs electrical and plumbing permits, and some jurisdictions require a separate inspection for the pump installation. Budget $1,500 to $4,000 for the pump and its installation, plus the bathroom finish costs.
Cost Ranges by Finish Level and What Returns at Resale
Basement finishing costs vary widely by region, but national averages give a useful starting point. A basic finish (framing, insulation, drywall, flooring, ceiling, and lighting) typically runs $30 to $50 per square foot. A mid-range finish with a bathroom, wet bar, and built-in storage runs $50 to $75 per square foot. A high-end finish with custom millwork, a home theater, or a guest suite can exceed $90 per square foot.
For a 1,000-square-foot basement, that translates to roughly $35,000 for a basic finish, $60,000 for mid-range, and $90,000 or more for high-end. The return on investment at resale follows a similar curve, but the percentages are more encouraging than most homeowners expect. Remodeling industry data consistently shows basement finishing returning 60 to 75 percent of project cost at resale, with mid-range projects often landing near 70 percent. That is competitive with kitchen and bathroom remodels and usually better than a pool or a luxury addition.
The key to maximizing return is matching the finish to the neighborhood. A $90,000 basement in a $250,000 house will not appraise well, but a $40,000 finish with a legal bedroom and full bath in a family-friendly neighborhood can add $50,000 or more in appraised value. Appraisers look for heated square footage, legal egress, and a full bathroom. Those three features drive the biggest value jumps. Cosmetic upgrades like a wet bar or built-in shelving add enjoyment but rarely move the appraisal needle as much as a conforming bedroom suite.
Below-Grade Building Science: Insulation, Vapor Barriers, and Dehumidification
Basements are different from above-grade rooms, and the building science has to reflect that. Concrete walls wick moisture, and the temperature differential between the soil and the interior air creates a vapor drive that pushes moisture inward. The right assembly, from the wall inward, usually looks like this: a waterproof coating or rigid foam insulation against the concrete, then a sealed vapor barrier, then framed walls with batt insulation, then drywall.
Closed-cell spray foam is popular for basement walls because it acts as both insulation and vapor barrier in one application. It seals the rim joist, fills gaps around pipes, and provides an R-value of roughly 6 to 7 per inch. Rigid foam boards are a budget-friendly alternative, but they must be sealed at the seams and edges. Fiberglass batts alone are a poor choice below grade because they trap moisture against the concrete and lose R-value when damp.
Dehumidification is not optional in most climates. A finished basement with a bathroom, laundry, or even just carpet will benefit from a dedicated dehumidifier sized for the square footage. A standalone unit costs $200 to $500, while a whole-home or ducted dehumidifier runs $1,500 to $3,000 installed. The latter is worth the investment if your basement is part of the conditioned envelope. Set the unit to 50 percent relative humidity and route the drain to a floor drain or sump pit so you never have to empty a bucket.
Vapor barriers deserve special attention. A sealed vapor barrier under the floor (if you are pouring a new slab or installing subfloor panels) and on the walls prevents moisture from migrating into the insulation cavity. Tape all seams and seal penetrations. The cost is minor compared to the risk of mold remediation, which can run $5,000 to $15,000 if a finished basement gets wet.
Sequencing Trades to Stay on One Inspection Calendar
The most common cause of basement project delays is poor trade sequencing. Each trade wants to work in its own window, but the inspection calendar forces a specific order. Here is the sequence that keeps you on track:
- Design and permits: Finalize plans, submit for permits, and get approvals. This phase can take four to eight weeks in busy jurisdictions.
- Demolition and moisture remediation: Remove old finishes, address leaks, and install drainage or sump pumps if needed.
- Framing and rough-ins: Frame walls, run electrical and plumbing rough-ins, and install HVAC ducts. All of this must be inspected before insulation.
- Insulation and drywall: Install insulation, vapor barriers, and drywall. Tape and finish. This is the longest single phase.
- Finishes and final inspection: Install flooring, trim, fixtures, and paint. Then schedule the final inspection and receive your certificate of occupancy.
One practical tip: schedule the rough-in inspection as soon as framing and trade rough-ins are complete, even if you are not ready for drywall. Inspectors are often booked days or weeks out, and a delay at this stage cascades through the entire project. If you are managing the project yourself, keep a shared calendar with your electrician, plumber, and HVAC contractor so everyone knows the inspection date. If you hire a general contractor, ask to see the inspection calendar before signing.
For homeowners who want to simplify the process, working with a platform that connects you to vetted professionals can reduce the coordination burden. Resources like basement finishing contractors can help you compare licensed pros who understand local permit requirements and inspection timelines. And for broader home repair or remodeling needs, a directory such as Repairmen can connect you with vetted local service professionals across categories like plumbing, electrical, and remodeling.
Budgeting for Permits and Contingency
Permit fees vary widely, but a reasonable estimate is 1 to 3 percent of project cost. On a $50,000 basement finish, that is $500 to $1,500. Some jurisdictions charge by square footage, others by fixture count or valuation. Ask your local building department for a fee schedule before you finalize your budget. You should also budget for the inspections themselves, which are sometimes included in the permit fee and sometimes charged separately.
Contingency is the other critical line item. Basement projects uncover surprises: hidden water damage, outdated wiring, or a foundation crack that needs epoxy injection. Set aside 10 to 15 percent of your total budget for contingency. If you do not use it, you have extra cash for upgrades or a faster payoff. If you do use it, you avoid the stress of tapping a credit card mid-project.
Financing options matter too. Home equity loans and HELOCs are common for basement finishes because they use the home's equity and often have lower rates than personal loans. Some contractors offer financing through third-party lenders. Compare the total interest cost against the expected return on investment. If your basement finish returns 70 percent of cost at resale, the remaining 30 percent is the cost of enjoying the space, which is often a better deal than moving to a larger home.
Common Permit Mistakes and How to Avoid Them
The most expensive permit mistake is skipping one entirely. Unpermitted work can complicate a future sale, void insurance claims, and force you to tear out finished walls so an inspector can see the rough-in. If you plan to sell within a few years, unpermitted basement work is a red flag that buyers and their agents will price into the offer.
Other common mistakes include:
- Pulling a building permit but skipping the electrical or plumbing permit. Inspectors check for all required permits at final inspection.
- Framing before the egress window is approved and installed. Some jurisdictions require the egress inspection before framing.
- Insulating before the rough-in inspection. If the inspector cannot see the wiring and plumbing, you may have to remove insulation.
- Assuming a finished basement does not need a certificate of occupancy. Many jurisdictions require one before you can legally use the space as habitable square footage.
Avoid these by having a pre-construction meeting with your contractor and your local building department. Ask specific questions: What inspections are required? In what order? What documentation do you need at each stage? A 30-minute conversation can save weeks of delay.
Maximizing Return on Investment
The highest-return basement finishes share a few traits. They add a legal bedroom with egress, a full bathroom, and a flexible living area. They use durable, moisture-resistant materials. They keep the ceiling height as high as possible. And they prioritize energy efficiency with proper insulation and a dedicated dehumidifier.
Cosmetic features like a wet bar, built-in entertainment center, or home gym add enjoyment and can help the space sell faster, but they rarely return their full cost. Focus your budget on the features that appraisers and buyers value: square footage, bedroom count, bathroom count, and storage. A simple, well-lit, dry basement with a bedroom and bath will outperform a fancy theater room without either.
Finally, document everything. Keep copies of permits, inspection reports, warranties, and before-and-after photos. When you sell, that documentation proves the work was done legally and to code, which protects your resale value and speeds up the buyer's due diligence.
Finishing a basement is a major project, but the planning and permit work upfront pays for itself many times over. By understanding feasibility tests, permit scope, cost tiers, and resale value, you can move forward with realistic expectations and a budget that holds. Whether you hire a general contractor or manage trades yourself, treat the permit calendar as the backbone of your schedule, and you will end up with a safe, legal, and valuable space that your family can enjoy for years.